Introduction
As web programmers, we need to show tooltips often in our pages, but not in an old fashioned way. Tooltips should be appealing and subtle to the page layout and design.
Most of the time, we go for available open source scripts which are free. I was also doing the same until I decided to write a simple one when I realized that customizing a free snippet took more time.
Background
A little bit of JavaScript, HTML and CSS experience will help you in modifying the script to suit your needs.
Using the code
Writing a tooltip is quite simple. This is a simple tooltip for our web pages with minimal code. Images, text and HTML code can be shown inside the tooltip.
First, we have to define a div which is our tooltip that we are going to use for our tooltip. Using a div will help us to show images, HTML code etc. inside a tooltip.
We can define the styles of the tooltip like transparency, font etc.
Once the tooltip div is OK, we have to add some attributes/events to the elements for which we are going to use this tooltip.
For example, I want to show a tooltip with text only for a span. Then I've to add the following to the span.
onmouseover onmouseout
These two events are used to show the tooltips while the mouse is over the span and hide the tooltip when the mouse is out of the span.
<span onMouseOver="toolTip('simple Tooltip Text here')" onMouseOut="toolTip()"
    class="Text">Simple Tooltip</span>
For tooltip function, there are three parameters to be passed. The first parameter is mandatory, in which we are going to pass the text to be shown for the tooltip.
The second and third parameters are optional. They are the foreground color and background color respectively. If these two parameters are omitted, then the default colors will be used.
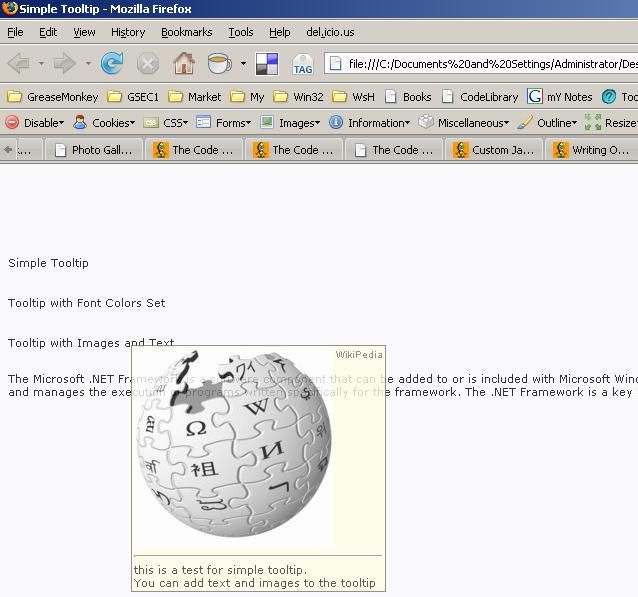
To show an image inside or show some formatted message with HTML markup, we can first form an HTML string and then pass it to the tooltip function. That's all.
The tooltip will have the formatted text and image. There is nothing special to code for this. The div tag does everything that we need to show (images, HTML string etc).
<span
    onMouseOver="show()" onMouseOut="toolTip()"
    class="Text">Tooltip with Images and Text</span>
For formatting, I'm using a separate function show() to avoid confusion while using an HTML string and maintain readability. Inside show(), we can format the string, add text, image etc. needed for the tooltip. You can use your own function or use inline code in the onmouseover = "".
function show()
{
    s = '<table width="100%" cellspacing="2" cellpadding="0" border="0">';
    s += '<tr><td><img src="http://upload.wikimedia.org/wikipedia/meta/2/2a/
        Nohat-logo-nowords-bgwhite-200px.jpg" border="0"/> </td>
        <td valign="top">WikiPedia</td></tr>';
    s += '<tr><td colspan="2" class="Text">
    <hr/>this is a test for simple tooltip.
    <br/>You can add text and images to the tooltip</td></tr>';
    s += '</table>'
    toolTip(s)
}
Now everything is ready. We are going to look into how the tooltip is being shown in the mouse position.
Whenever the mouse is moved inside the document, we are detecting the event using document.onmousemove = moveToMousePos;
This will place the tooltip in the mouse's current position. The moveToMousePos function will detect the mouse coordinates and set the tooltip div's left and top positions. So when the mouse is over the span, we want to show the tooltip, then the tooltip's display property will be set to block and when out, display property is set to none.

Screenshot With Colors Set

Screenshot Text only
Note
- We can set the font styles and opacity of the tooltip using the
CSS class
.toolTip
{
font-family<span class="code-none">: Verdana, Arial, Sans-serif, 'Times New Roman'<span class="code-none">;
font-size<span class="code-none">: 8pt<span class="code-none">;
filter<span class="code-none">:alpha(opacity=80)<span class="code-none">;
-moz-opacity<span class="code-none">: 0.8<span class="code-none">;
opacity<span class="code-none">: 0.8<span class="code-none">;
<span class="code-none">} </span></span></span></span></span></span></span></span></span></span></span>
- We can insert HTML with tables for better formatted output/look for the tooltip. But don't include HTML, body tags.
- We can add this tooltip for any HTML element. In this example I've used the
span tag.
