This blog post details a simple metro-in-motion behaviour which reduces the Panorama control’s contents while the user slides from item-to-item so that they can really appreciate your fancy background graphic!
For those of you who have not been following my Metro-In-Motion series, I’ll briefly recap. My aim is to provide an implementation of the ‘fluid’ UI transitions and effects seen in native Windows Phone 7 applications but absent from the Silverlight APIs. So far, I have covered fluid list animations, ‘peel’ animations, flying titles, a ’tilt’ effect and a rolling list location indicator. In this post, I look at a very simple and subtle effect, reducing the opacity of your Panorama contents when the user slides from item-to-item.
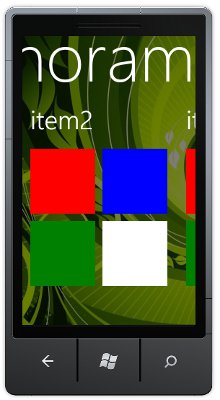
The Panorama is probably the prettiest of all the Windows Phone 7 controls, it really embodies what the Metro Design Language is all about. Typically, a pretty graphic is used as a background for the Panorama as follows:
<controls:Panorama Title="Panorama">
<controls:Panorama.Background>
<ImageBrush "PanoramaBackground.jpg" Opacity="0.5"/>
</controls:Panorama.Background>
</controls:Panorama>

Note, in the example above, the opacity of the image is reduced to 0.5 in order that it is not too bold and overpowering.
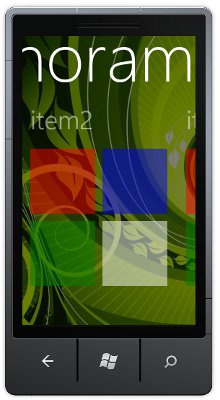
Unfortunately, our beautiful background graphic is almost entirely obscured by the panorama contents. The native applications, such as the pictures and games hubs, use a cunning little trick to allow the user to enjoy the background, whilst the user is sliding the Panorama, the contents become opaque, making the background visible behind the various tiles. That is the effect I will re-create in this blog post.
The code to achieve this effect is very simple. It is a basic Blend Behaviour, which handles the Panorama ManipulationDelta event in order to set the item’s Opacity, with the ManipulationCompleted event handler resetting the Opacity to 1.0.
The behaviour is shown in its entirety below:
public class PanoramaOpacityBehaviour : Behavior<Panorama>
{
#region DPs
[Description("Indicates the opacity used for the
panorama items whilst the user is 'sliding'")]
[Category("Appearance")]
public double Opacity
{
get { return (double)GetValue(OpacityProperty); }
set { SetValue(OpacityProperty, value); }
}
public static readonly DependencyProperty OpacityProperty =
DependencyProperty.Register("Opacity", typeof(double),
typeof(PanoramaOpacityBehaviour), new PropertyMetadata(0.7));
#endregion
#region overrides
protected override void OnAttached()
{
base.OnAttached();
AssociatedObject.ManipulationDelta += Panorama_ManipulationDelta;
AssociatedObject.ManipulationCompleted += Panorama_ManipulationCompleted;
}
protected override void OnDetaching()
{
base.OnDetaching();
AssociatedObject.ManipulationDelta -= Panorama_ManipulationDelta;
AssociatedObject.ManipulationCompleted -= Panorama_ManipulationCompleted;
}
#endregion
#region private
private void Panorama_ManipulationCompleted(object sender, ManipulationCompletedEventArgs e)
{
foreach (FrameworkElement fe in AssociatedObject.Items)
{
fe.Opacity = 1.0;
}
}
private void Panorama_ManipulationDelta(object sender, ManipulationDeltaEventArgs e)
{
foreach (FrameworkElement fe in AssociatedObject.Items)
{
fe.Opacity = Opacity;
}
}
#endregion
}
This behaviour can be applied programmatically as follows:
<controls:Panorama Title="Panorama">
<i:Interaction.Behaviors>
<WP7Contrib_View_Controls_Behaviors:PanoramaOpacityBehaviour/>
</i:Interaction.Behaviors>
<controls:Panorama.Background>
<ImageBrush "PanoramaBackground.jpg" Opacity="0.5"/>
</controls:Panorama.Background>
</controls:Panorama>
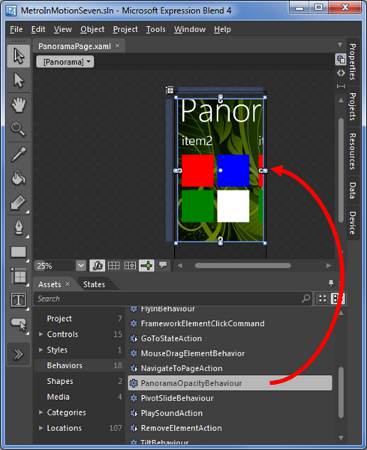
Or applied by drag and drop within Expression Blend:

With this behaviour applied, the user can now fully appreciate your Panorama control’s beautiful background graphic:

You can download the source code for this behaviour and an example project here.
I have also added this behaviour to the WP7Contrib project on codeplex. I would recommend that anyone doing WP7 development should download the WP7Contrib code, it is packed full of useful utilities.
Regards,
Colin E.
