This is with reference to my previous post where I showed how to deploy ASP.NET Windows Azure application manually on the Windows Azure Server.
In this post I am going to show you how to deploy Windows Azure application using Visual Studio 2010 IDE, this I guess is quite simpler as compared to the previous approach i.e. doing it manually.
Once you ready with your Windows Azure Application, Select Deploy option from the Windows Azure Application. To see how to create a basic application you can refer to my previous post.

Now from the Deploy Select
- Create your Windows Azure project to Windows Azure Option

- From the Credential Select Add option if you don’t have Server certificate already present. This will open a Popup for you to enter the details of the Certificate.
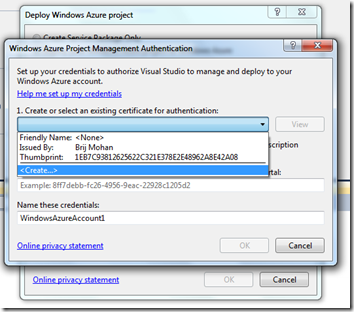
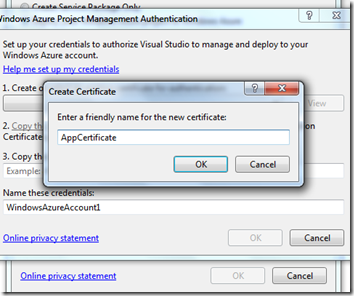
- Here again I am selecting Create Option from the Dropdown. This will open another popup for entering the name of your certificate. Once you done Click Ok.
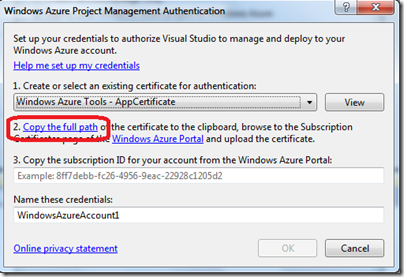
- From the Second option Select the Copy full path and now its time for you to open you Windows Azure Site to upload your Certificate. By Selecting the Copy Full Path option basically this is copying the certificate path for you to clipboard, which you can paste later in Windows Azure Site.
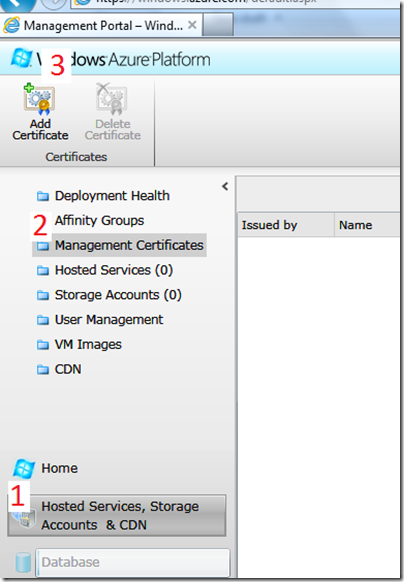
- Once you logged into your Windows Azure Website (https://windows.azure.com), Select ‘Hosted Service, Storage Accounts & CDN then Management Certificates and at the End Select Add Certificated as given in the Screen shot below as 1,2,3.
- This will open a Popup screen for you to upload your certificate, I hope during these time you have not copied anything else in your Clipboard and you still have the path copied which I have mentioned in Step 4.
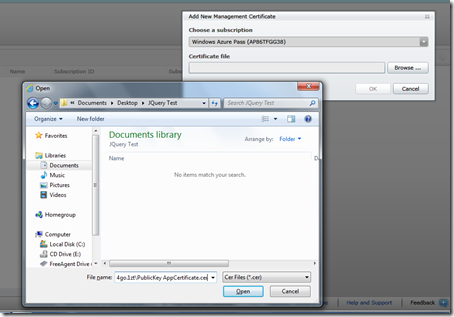
- Select your Subscription and then Select Browse and paste the Path which you have copied earlier in the File Name of Select file dialogue. Select Open. And then Select Ok from the Popup menu given below.
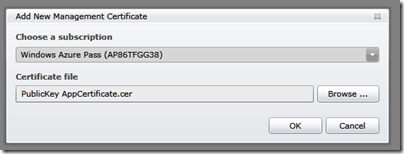
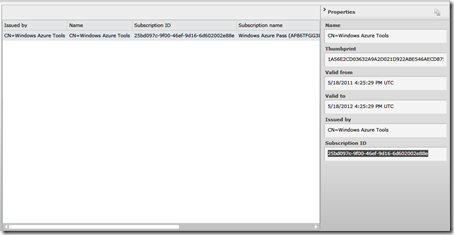
- So this will create a certificate on Windows Azure Server, and Create a Subscription Id for you Copy the Subscription Id using Ctrl+C, remember right click will not work since this is Silverlight Interface.
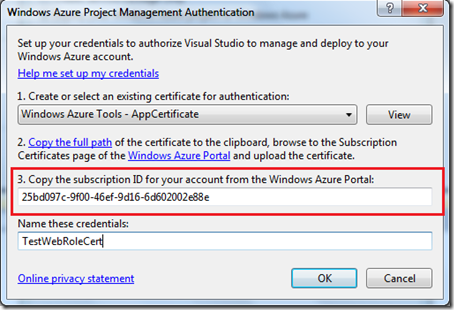
- Now come back to your Visual Studio IDE with once you copied the Subscription Id from Windows Azure Site. and paste in the Step 3 of the popup screen as given below. Enter any desired name for your credentials and Click on Ok button.
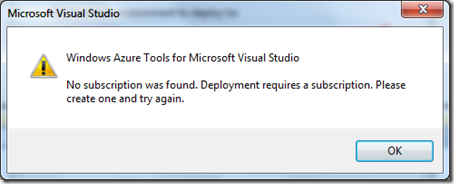
If you get the Error: No Subscription found. As given in the screen below, this means either you have not created the Storage Account or Hosted Service or may be both.
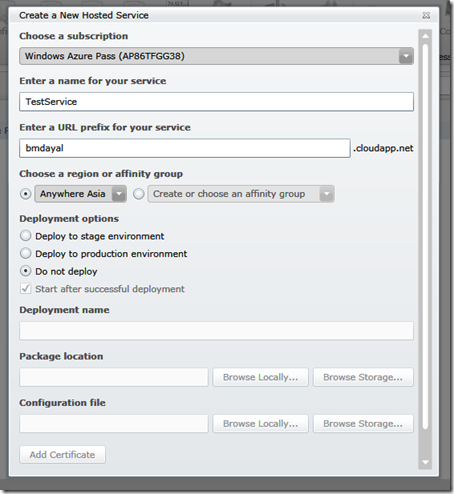
To get this things working you have to go to Windows Azure Site and Create a Hosted Service with Do not deploy option selected, as we want to deploy using our Visual Studio IDE.
Similarly you have to create a Storage Account too. Hope after doing this you may not face any other issues. So once you have done with these things then
Again you have to Start from Step 1 above, but instead of Adding a new Certificate you can select the one which you have already created. Skip the Steps for uploading the certificate on Windows Azure Server and try again Deploying your application.
- Now you are almost done, this will take you back to the screen which you got in Step 1, now click on Ok button.
If you get a prompt like the one below, there is nothing to worry, this simply tells you that your Hosted Service is already occupied with another deployment which you may have already done before, this this wizard will just replace you existing application with this one. You have to select Delete and Continue.

- Once you select delete and continue your deployment process starts here, and you can see the progress in Windows Azure activity log.

You can also see the progress of your deployment using your Server Explorer or Directly in your Windows Azure Site.


Once finished your application is ready to browse from Windows Azure Staging Environment. The deployment wizard will provide you with a URL which you can use to browse you latest deployed application. Your URL may look like something like this http://f0f8a62a71fe43158bf43af14b11f5b5.cloudapp.net/, you can find in the Windows Azure Activity Log or you can also find this information in the Windows Azure Site.

Hope this helps.
