
Introduction
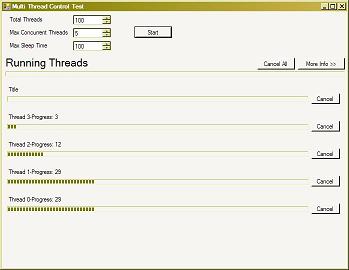
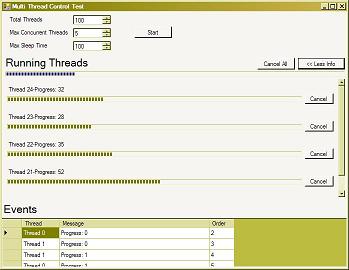
This article presents a control that creates threads and displays the progress and any messages sent from the thread.
Background
Running multiple threads and seeing the status of where they are has been a tricky subject for quite a while. The main thing being that you could not access anything that is being controlled by the main (UI) thread. This includes all parts of the form you are displaying and the properties and variables on it.
The .NET Framework 2.0 has helped clear up some of that with the introduction of the BackgroundWorker class. This class allows you to run some code on its own thread. This allows your UI to remain responsive while the code runs.
What It Does
This control can be easily modified to be used to monitor/control batch operations that can be done simultaneously. Some examples:
- File Transfers
- Image Processing
- Directory Processing
- Screen scraping
Each thread can send its own messages back to the container. The container shows those messages in a grid as the threads are running.
The thread container actually does throttling as well. Before you start the threads, you can set the number of threads you want to run concurrently. I hope to eventually make this property dynamic so that it can be changed on the fly.
What It Does Not Do
This control is designed for items that do not update the UI other than what is already displayed. If you need to render objects and update the screen, you will need to modify the way this works. That may be another article.
How It Works
Each thread is represented in a ThreadView which inherits from UserControl. This ThreadView contains a BackgroundWorker. When the ThreadContainer.Start method is called, it creates as many threads as it can (either Concurrent or TotalThreads if it is less than Concurrent). The ThreadViews are docked to the top so that they are all displayed nicely and expand to the width of the ThreadContainer. After creating the new ThreadView and display it and start it. As it works, it raises its JobEvent event. This passes the message to the container and the ThreadContainer stores it in its DataTable.
Each ThreadView contains a JobCompleted event that notifies the ThreadContainer that it is done.
How to Use the Code
I have divided up the code for the control and the test app into two projects. So, if you usually like to look at the code and the forms before running it, then THE FIRST THING YOU DO AFTER OPENING THE PROJECT IS BUILD IT OR YOU WILL GET ERRORS because I have stripped out the information to make the download smaller.
The ThreadView Class
Currently the code sleeps for a random number of milliseconds 100 times. Not terribly useful. Go to the ThreadView class and the worker_DoWork method. You can change this code to do whatever you would like it to do.
Here is the code. I have omitted some of the comments for brevity.
private void worker_DoWork(object sender, DoWorkEventArgs e)
{
for (int i= 0; i < 100; i++)
{
if(worker.CancellationPending)
break;
worker.ReportProgress(i, "Progress:" + i.ToString());
try
{
Thread.Sleep(r.Next(0, _maxSleep));
}
catch
{
}
OnJobEvent(new JobEventEventArgs(ThreadName, "Progress: " + i.ToString()));
}
}
There are two function calls that you need to worry about:
-
worker.ReportProgress(i, "Progress: " + i.ToString());
This line sets the progress bars position as well as the text above the progress bar.
-
OnJobEvent(new JobEventEventArgs(ThreadName, "Progress: " + i.ToString()));
This sends any messages you want to post back to the ThreadContainer.
That’s it! Change the code to do what you want it to do and add the progress bars and the messages to your messages and you are done!
Properties and Constructors
Currently I pass the maximum time I would like to the thread to sleep in via a property, but you can define whatever properties you would like, or change the constructor and pass them in as parameters. What you have to do is make sure you pass it into the ThreadContainer as well as the ThreadView classes. Or you can pass a value to the ThreadView (i.e. a DirectoryInfo) and it calculates the values for you (DirectoryInfo.GetFiles().GetUpperBound(0)).
Controlling the ThreadView Progress Bar Maximum
Currently I have set the bar maximum at 100, but if the number of objects you are working with is not 100, you have 3 options:
- Take the number of iterations you are doing and do an integer divide on the current index.
- Pass the object you are going to work with (i.e.
DirectoryInfo) into the ThreadView constructor and calculate the maximum. (DirectoryInfo.GetFiles().GetUpperBound(0)). - Pass the maximum into the thread as a property or a constructor parameter.
History
- 14th March, 2008: Initial post
