Introduction
Drupal is an open source content management platform powering millions of websites and applications. In this article, I will show you how to install Drupal 7.8 on Windows 7 with Apache HTTP Server 2.2.21, PHP 5.3.8 and MySQL 5.5.1.
Before Installation
Before you start the installation process, you must have the following installer or package downloaded:
- Drupal 7.8 (http://www.drupal.org)
- Apache HTTP Server 2.2.21 (http://httpd.apache.org/)
- PHP 5.3.8 (http://windows.php.net)
- MySQL 5.5.1 (http://www.mysql.com/)
Install Apache HTTP Server
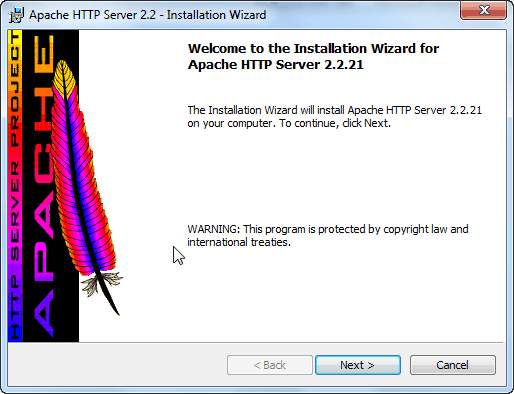
- Run httpd-2.2.21-win32-x86-no_ssl.msi to start the Apache HTTP Server installation.

- Enter Network Domain, Server Name, and Adminstrator's Email Address:

Because Apache is used in my laptop as development environment, I put my laptop name “laptop” in both Network Domain and Server Name textbox and entered a fictional email “webmaster@laptop” in Administrator’s Email Address textbox.
- Follow the wizard to complete the configuration steps and clicked Install button to start the installation, you will probably see the following error messages in command windows.

http:exe: Could not reliably determine the server’s fully qualified domain name, using 192.168.1.105 for ServerName
(OS 10013) An attempt was made to access a socket in a way forbidden by its access permissions. : make_sock: could not bind to address 0.0.0.0:80
no listening sockets available, shutting down
The ServerName “laptop” can’t be recognized error is because I haven’t mapped “laptop” to my laptop IP yet. The port 80 is forbidden error is because access permission reason. I will use a different port 8888 instead of 80 later.
- Follow the rest of the installation wizard steps to complete the installation.
- Use Windows “Search programs and files” box to find the Notepad.

Right click on Notepad and select “Run as administrator” to open the Notepad.

The reason to do this is because Windows 7 has a more restricted security feature - UAC, in order to change a system file, we need administrator rights. Another way to allow changing a system file is turning off UAC.
- Open httpd.conf file in C:\Program Files\Apache Software Foundation\Apache2.2\conf.
- Find the line...
Listen 80
...and change it to:
Listen 8888
- Save and close httpd.conf file.
- Open hosts file in C:\Windows\System32\drivers\etc.
- Add a line in it:
127.0.0.1 laptop
- Open a browser and enter http://laptop:8888. You are supposed to see this:

Install PHP
- Run php-5.3.8-Win32-VC9-x86.msi to start the installation.

- Select Apache 2.2.x Module.

- Follow the rest of the installation wizard steps to complete installation.
Install MySQL
- Run mysql-installer-5.5.15.0.msi to start the MySQL installation.

- Follow the wizard to complete MySQL installation.
Install Drupal
- Create a server folder: C:\server.
- Create a www folder in C:\server.
- Create a demo folder in C:\server\www.
- Extract drupal-7.8.zip into the demo folder.
- Open httpd.conf in C:\Program Files\Apache Software Foundation\Apache2.2\conf
- Find the line:
#LoadModule rewrite_module modules/mod_rewrite.so
Change it to:
LoadModule rewrite_module modules/mod_rewrite.so
- Add the following if not in httpd.conf (PHP windows installer will add PHP5 section, but I found it’s not always a success):
#PHP5
LoadModule php5_module "C:\Program Files\PHP\php5apache2_2.dll"
PHPIniDir "C:\Program Files\PHP"
- Find the line:
AddType application/x-gzip .gz .tgz
Add the following:
AddType application/x-httpd-php .php
AddType application/x-httpd-php-source .phps
- Find the line:
DirectoryIndex index.html
Change it to:
DirectoryIndex index.html index.php
- Find the line:
#Include conf/extra/httpd-vhosts.conf
Change it to:
Include conf/extra/httpd-vhosts.conf
- Save and close httpd.conf.
- Open http-vhosts.conf in C:\Program Files\Apache Software Foundation\Apache2.2\conf\extra
- Find the line:
NameVirtualHost *:80
Change it to:
NameVirtualHost *:8888
- Find the section:
<VirtualHost *:80>
…
</VirtualHost>
There are two matched sections.
Change the first section to:
<VirtualHost *:8888>
    ServerAdmin webmaster@laptop
    DocumentRoot "C:\Program Files\Apache Software Foundation\Apache2.2\htdocs"
    ServerName laptop
    ServerAlias laptop
    ErrorLog "logs/laptop-error.log"
    CustomLog "logs/laptop-access.log" common
</VirtualHost>
Change the second section to:
<VirtualHost *:8888>
    ServerAdmin webmaster@demo.com
    DocumentRoot "C:/Server/www/Demo "
    ServerName demo.com
    ServerAlias www.demo.com
    ErrorLog "logs/demo-error.log"
CustomLog "logs/demo-access.log" common
<directory "C:/Server/www/Demo">
AllowOverride All
Options Indexes FollowSymLinks
Order allow,deny
Allow from all
</directory>
</VirtualHost>
- Save and close httpd-vhosts.conf.
- Restart Apache HTTP Server.
- Open hosts in C:\Windows\System32\drivers\etc.
- Add line:
127.0.0.1 www.demo.com
- Save and close hosts file.
- Open MySQL Workbench 5.2 CE from Program menu MySQL group.

- Click Local instance MySQL55 to open the database.

- Click Add schema to add a new schema demo
- Run script in Query window to create demoadmin account:
CREATE USER 'demoadmin'@'localhost' IDENTIFIED BY 'demoadmin123';
- Run script in Query window to grant permission to
demoadmin account:
GRANT ALL ON demo.* TO 'demoadmin'@'localhost';
- Open http://www.demo.com:8888 in browser. You should see Drupal installation page.

- Follow the wizard to complete installation. Your Drupal site is ready.

Summary
Installing Drupal on Windows 7 is not a simple work for a beginner. You need to use trial and error to figure out how to install and configure each component. I was stuck on PHP configuration for one week. Hope this article could save a little bit of your time.
History
- 2nd October, 2011: Initial post
