Introduction
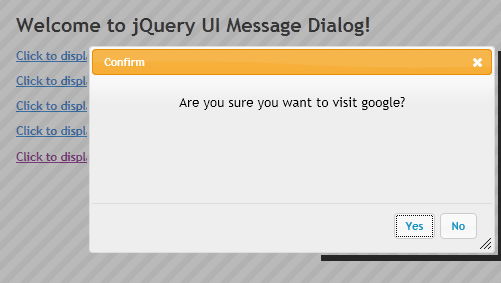
Sometimes, when working with JavaScript, we need to write a confirm dialog or message box to display some informative data. We can either use JavaScript alert function or confirm function for such operations. But in order to make a nice UI, we can resort to JQuery UI dialog, which gives a nice chrome window. But settings that up is not a one liner task. In this article, I will present a small plugin which will help us display some basic dialog just to get the job done without too much code.
Background
JQuery UI library is getting more and more popular for doing web 2.0 style user interface. The library provides a rich set of widgets and the Dialog component is one of them. But to display a dialog, one would need to setup some div and the content of the dialog. You can then call the dialog function display with a lot of optional options for customization.
Using the Code
The plugin is very simple and small, download the code block and make a reference to the scripts right after you have referenced the jquery lib and UI lib. Caution, without the UI lib, the plugin won't work.
(function($)
{
$.msgBox = $.fn.msgBox = function(msg, onDialogClosed, customOpt, buttons)
{
.....
};
$.fn.msgBox.defaults =
{
height: 200,
width: 400,
title: "Message",
modal: true,
resizable: true,
closeOnEscape: true
};
$.fn.msgBox.confirm = function(msg, onConfirm, yesNo)
{
.....
}
$.fn.extend({
confirmLink: function(options) {
.....
}
});
})(jQuery);
To use the plugin, first make a reference in the head section:
<link type="text/css" href="css/ui-lightness/jquery-ui-1.8.16.custom.css"
rel="stylesheet" />
<script type="text/javascript" src="js/jquery-1.6.2.min.js"></script>
<script type="text/javascript" src="js/jquery-ui-1.8.16.custom.min.js"></script>
<script type="text/javascript" src="js/jquery.msgBox.v1.js"></script>
To display a message box, simply call as follows:
$.msgBox("Hello World");
You can optionally specify the callback handler when the dialog is closed or custom title, etc.
$.msgBox("Hello World Demo with Custom Title", null, { title: "My Title" });
To display a confirmation dialog, use the following:
$.msgBox.confirm("Are you sure?",function(){
		alert("OK Clicked");
});
Now to something more useful, you use the confirmLink method to hook up any links to auto display a confirm dialog. The anchor rel attribute will be used by default to display the dialog text.
$("#confirmDemo2").confirmLink();
....
<a href="http://www.google.com" id="confirmDemo2"
rel="Are you sure you want to visit google?">
	Click to display a confirm dialog (inline)</a>
For submit buttons, you could use the following:
$(".confirmButton").confirmLink();
....
<input type="submit" value="Submit" class="confirmButton"
	rel="Are you sure you want to visit google?" />
Behind the Scenes
For those of you who want to understand how the plugin works, here is a little detail. To display the jquery UI dialog, you need a div section to be declared in your page along with the dialog contents. Now every time on every page if we need to do that, it becomes tedious. So what the plugin does is to inject a hidden div at the end of BODY to be used with the dialog. It creates the div the first time the function is called. Next time, it will reuse the div.
if (div.length == 0) {
    div = jQuery("<div id=\"msgBoxHiddenDiv\" title=\"Message\"
	style=\"font-size: 10pt;display:none\"><p id=\"msgBoxHiddenDivMsg\"
	style=\"font-size: 10pt; color: black; text-align: center\"></p></div>");
    div.appendTo(document.body);
    var dialogOpt = {
        bgiframe: true,
        autoOpen: false,
        height: opts.height,
        width: opts.width,
        modal: opts.modal,
        resizable: opts.resizable,
        closeOnEscape: opts.closeOnEscape,
        draggable: opts.draggable,
        buttons: $.fn.msgBox.defaultButtons
    };
    div.dialog(dialogOpt);
}
Points of Interest
Make sure you have referenced JQuery UI library. Most of the msgBox functions take optional parameters if you need to customize.
You can probably extend the plugin in many ways, like UI lib detection, etc., and also there are a lot of alternatives out there. I just tried to keep it simple to be handy and useful.
History
- V1 - Basic Message Box and Confirm Dialog functionality
- V1.1 - Include support to handle INPUT nodes, and bug fix for Firefox. Included an ASP.NET web app demo in download
