Introduction
If you have ever felt bored of wasting time opening Debug -> Attach of Visual Studio to attach to NUnit GUI application for debugging, then this macro is for you.
Background
No background is required.
Using the Code
First, download MsacroAttachNUnit.zip and extract the file Debug.vb inside this zip to your local drive.
Next, open Macros IDE by either going to menu Tools -> Macros -> Macros IDE or pressing Alt + F11.
After the IDE is open, in its Project Explorer Windows, right click on MyMacros and choose Add -> Add Existing Item. Then point the file browser to file Debug.vb.
Now, close the Macros IDE and open the Macros Explorer by either going to menu Tools -> Macros -> Macro Explorer or pressing Alt + F8. There is a macro named DebugNunit under MyMacros.Debug.
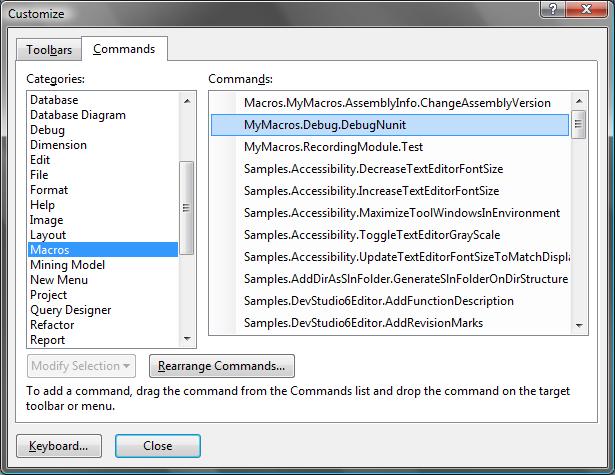
From now on, you can run the macro by double clicking on it in Macro Explorer to attach to NUnit GUI application. In order to make life a little bit easier, we can create a toolbar button for this macro. All the things you need to do is right click on your toolbar and choose Customize, then browse to command MyMacros.Debug.DebugNunit as in the figure shown below:

Drag the command to anywhere most suitable for you and forget about all macro things. Just click the button whenever you want to attach to NUnit GUI for debugging.
Points of Interest
There are no points of interest except trying to find some "solution" for your laziness:-).
History
- 5th July, 2008: Initial post
