Introduction
This is an article which gives you general hints for displaying a dialog box in an application based on SCSF.
Background
We use dialog boxes frequently in desktop applications, and it is very easy to use, but in the case of SCSF, working with a dialog box is a little bit tricky. I'll try to explain about displaying a dialog box in an application that uses SCSF in a simple way.
Using the code
In this article, I'm going to display a view in a dialog box. For this, I have created a user control in the UI section of Infrastructure.Library. Two properties are used in this user control:
private DialogResult _dialogResult;
private string _title;

public virtual DialogResult DialogResult
{
    get { return _dialogResult; }
    set { _dialogResult = value; }
}

public string Title
{
    get { return _title; }
    set { _title = value; }
}
The DialogResult property is used to hold the dialog result returned by the dialog box, and Title is used for displaying the dialog title. It also consists of a method which will return the SmartPartInfo properties:
public ISmartPartInfo GetSmartPartInfo(Type smartPartInfoType)
{
    DialogSmartPartInfo info = new DialogSmartPartInfo();
    info.Title = _title;
    info.Modal = true;
    info.Keys[WindowWorkspaceSetting.StartPosition] =
                      FormStartPosition.CenterScreen;
    return info;
}
We set all the properties related to the dialog in this method. Generally, a dialog box will be displayed in the modal, so I have set the Modal property of the DialogSmartPartInfo to true.
And also, I have displayed the dialog at the center of the screen. You can also add your own properties related to the form such as for not displaying the dialog in the taskbar. For this, you have to add a property in WindowWorkspaceSetting.cs. For instance, the attached sample project currently consists of the following properties:
public class WindowWorkspaceSetting
{
    public const string AcceptButton = "AcceptButton";
    public const string CancelButton = "CancelButton";
    public const string FormBorderStyle = "FormBorderStyle";
    public const string StartPosition = "StartPosition";
}
Actually, the properties will be assigned in WindowWorkspace.cs. In the OnApplySmartPartInfo event, all the properties will be set.
protected override void OnApplySmartPartInfo(Control smartPart,
    Microsoft.Practices.CompositeUI.WinForms.WindowSmartPartInfo smartPartInfo)
{
    base.OnApplySmartPartInfo(smartPart, smartPartInfo);
    if (smartPartInfo is WindowSmartPartInfo)
    {
        WindowSmartPartInfo spi = (WindowSmartPartInfo)smartPartInfo;
        if (spi.Keys.ContainsKey(WindowWorkspaceSetting.AcceptButton))
            Windows[smartPart].AcceptButton =

            (IButtonControl)spi.Keys[WindowWorkspaceSetting.AcceptButton];
        if (spi.Keys.ContainsKey(WindowWorkspaceSetting.CancelButton))
            Windows[smartPart].CancelButton =

            (IButtonControl)spi.Keys[WindowWorkspaceSetting.CancelButton];
        if (spi.Keys.ContainsKey(WindowWorkspaceSetting.FormBorderStyle))
            Windows[smartPart].FormBorderStyle =

            (FormBorderStyle)spi.Keys[WindowWorkspaceSetting.FormBorderStyle];
    }
}
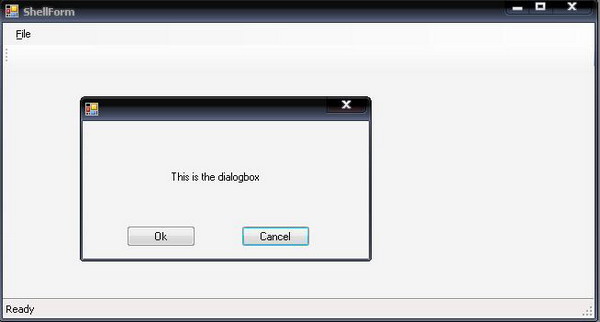
After the implementation of Dialog.cs, a view has to be created which will actually be displayed as a dialog box. So, this view should consist of the controls and the logics that you want to implement in the dialog. I have simple OK and Cancel buttons in this view. For these buttons, I have just assigned the dialog result.
private void butOk_Click(object sender, EventArgs e)
{
    DialogResult = DialogResult.OK;
    _presenter.OnCloseView();
}

private void butCancel_Click(object sender, EventArgs e)
{
    DialogResult = DialogResult.Cancel;
    _presenter.OnCloseView();
}
_presenter.OnCloseView() is used to close the dialog after the user clicks the button. I also have another view which consists of only one button. This button is used to display the dialog box.
