This is a very simple step by step guide to install OSQA on Windows server in production. This guide is applicable to IIS 7+ based servers, which include Windows Server 2008, 2008 R2, Windows Vista and Windows 7. Latter two should not be used for production solutions though. Please follow these steps:
- Download Microsoft Web Platform Installer, and install it.
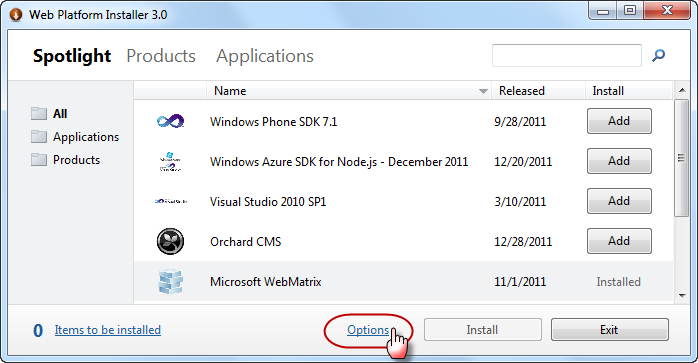
- Run Web Platform Installer and click “Options”.

- Add Helicon Zoo feed into “Display additional scenarios” field: http://www.helicontech.com/zoo/feed Select “IIS” as a target web server.

A new tab named “Zoo” should appear on the main page of Platform Installer.
- Go to Zoo → Applications and add OSQA, then click install.

- Accept license agreements:

Web Paltfrom Installer will start downloading and installing required components, which include Python 2.7.2, Django 1.3, Helicon Zoo Module, MySQL and OSQA itself.

- Setup new web-site dialog will appear. Fill it with your site specific values.

- Database dialog will open. Fill it to create new or use existing MySQL database.

Default administrator user name for MySQL is ‘root’ and default password is empty.
Installation will configure database and run migration scripts, you can now launch web site by clicking on a link:

Congratulations! You have finished installation and may start using OSQA on your Windows server with Microsoft IIS in production:

