In the
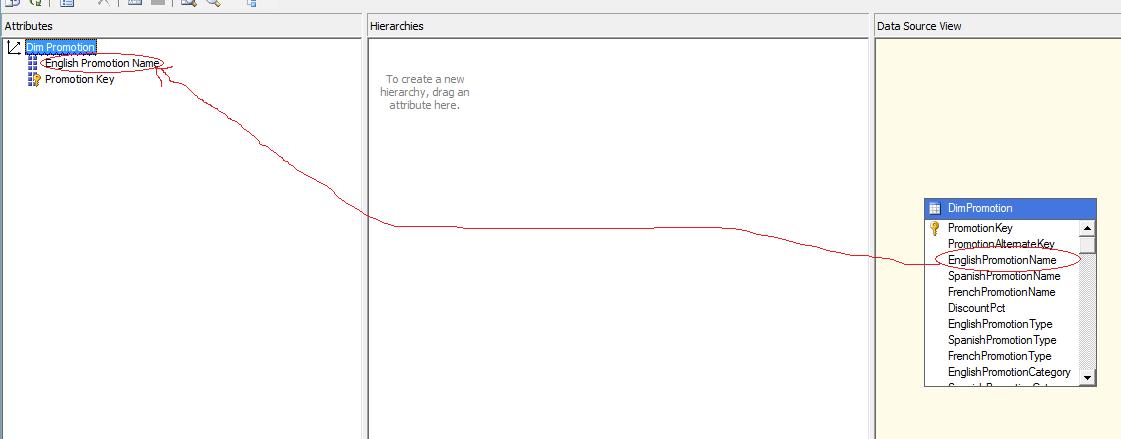
previous post we learned how to build simple cube using BIDS, and if you’re follower I’ve forgot something important is deployment the cube on the Analysis Services. 1- We just need to add some attributes to the dimensions(DimPromotion, DimProduct) as each of which pure (contains just the key) for some reasons we need to show the user the name of product, or the promotion because it very hard to make human treat with numbers contrary to machines which prefer them. We shall add some attributes to the dimensions to make it meaningful. 2- Double click on DimPromotion; the dimension design window opened you find Data Source View, Hierarchies and Attributes; simply drag EnglishPromotionName from the Data Source View table to Attributes. 3- Repeat the previous step with the DimProduct to add EnglishProductName
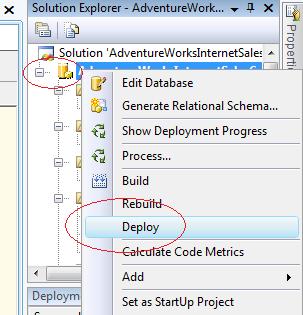
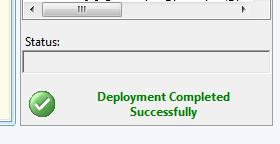
4- Right click on AdventureWorksInternetSalesCube project then deploy (to move your cube to the Analysis Services). If deployment succeeded it shows you message Deployment Completed Successfully
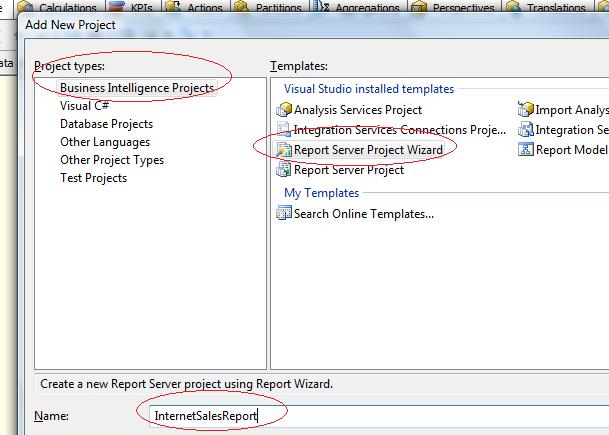
Now it’s the time to build our Report. 1- Right click on the solution, then Add->New Project-> Select Business Intelligence Projects from Project types then create Report Server Project Wizard, with name “InternetSalesReport” 2- OK
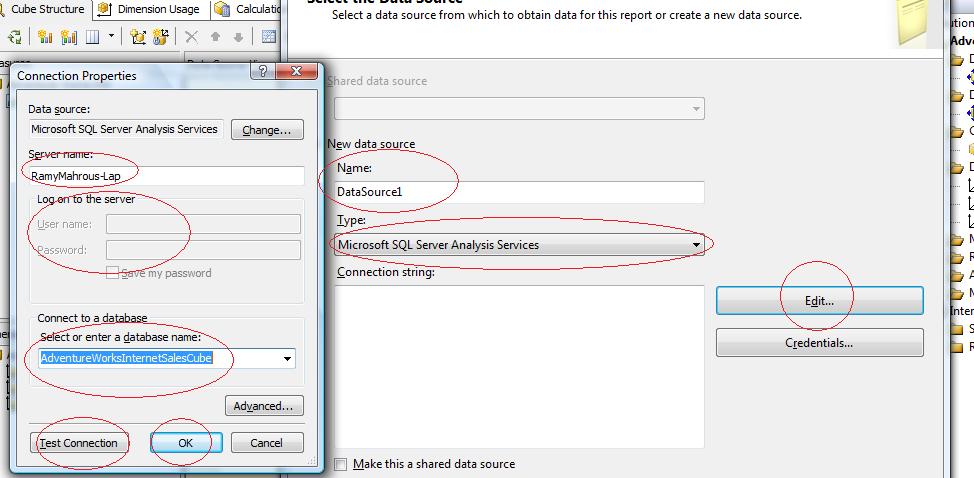
3- Report Wizard dialog open, Next; Select New data Source; Type: Microsoft SQL Server Analysis Services then Edit; Server Name: your server name in my case I’ll type “RamyMahrous-Lap” you will notice that when selecting the Data Source as Microsoft SQL Server Analysis Services there is no any chance to login using Username or password as we illustrated in
the previous part Analysis Services permits just Windows Authentication. Select or enter database name: “AdventureWorksInternetSalesCube”; Test Connection and then OK if succeeded.
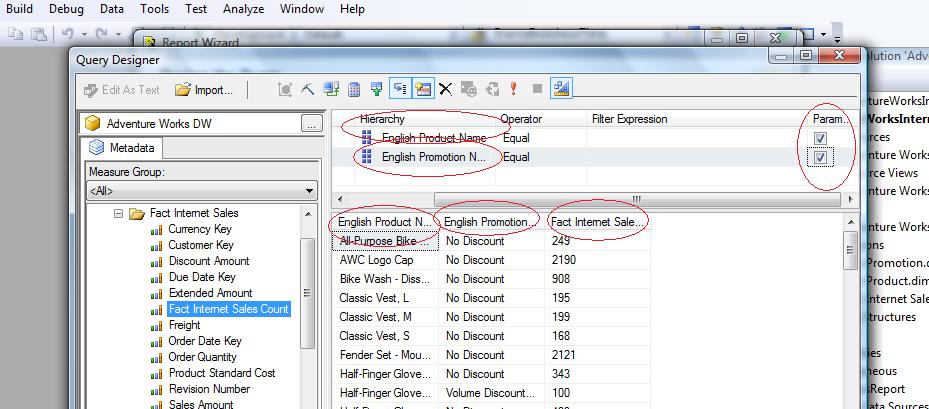
4- Next; we come to the dialog to build the query; press on the Query Builder to open a Query Designer form to help us building the Report Dataset. We need to show ProductEnglishName, PromotionEnglishName, and FactInternetSaleCount and the parameters are ProductEnglishName, and PromotionEnglishName so we’ll drag the ProductEnglishName, PromotionEnglishName, and FactInternetSaleCount on the space which shows “Drag levels or measures here to add to the query”. And ProductEnglishName, and PromotionEnglishName on dimension area and check parameter checkbox. OK


5- Next; select report type as Tabular; next; add available fields to details; next;next; rename it to InternetSaleCount_ByProduct_ByPromotion; finish. 6- You can preview it and select some criteria to test the report. 7- Right click on InternetSalesReport and Deploy to deploy it on the Reporting Service Server to enable users to access it over http. If you got message The specified TargetServerURL is not valid. Specify a valid URL for a report server in the deployment settings. Right click on InternetSalesReport project then properties set the TargetServerURL to http://localhost/ReportServer or your ReportServer URL, check it from IIS. Conclusion: We’ve showed building Report using BIDS and deploying it on ReportServer. Stay tuned
the last part building the ASP.NET application.
