When ever we need to create a grid in MVC 3, we often end up with Telerik grids, due to awesome features and support. But you need to have a licensed version of controls.
What if you don't have license for it and you have to create a Gridview of your own, like below.
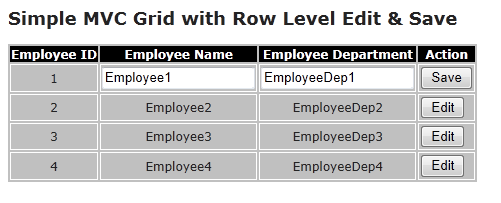
Its very simple, and all you need to create is a little Html, JQuery and supporting Action Methods.
Let's see how . . .
Step 1: Create a MVC 3 Project. Create a Model class for above data.
namespace MVC3SimpleGrid.Models
{
    public class EmployeeModel
    {
        public int EmpId { get; set; }
        public string EmployeeName { get; set; }
        public string EmployeeDep { get; set; }
    }
}
Step 2: Create the Action method and the supporting functionality.
HomeController.cs
namespace MVC3SimpleGrid.Controllers
{
    public class HomeController : Controller
    {
        static List<EmployeeModel> _lstEmployee = new List<EmployeeModel>();
        public ActionResult Index()
        {
            _lstEmployee=GetEmployees();

            return View(_lstEmployee);
        }

        private List<EmployeeModel> GetEmployees()
        {
            List<EmployeeModel> _pvtList=new List<EmployeeModel>();
            EmployeeModel mod1 = new EmployeeModel { EmpId = 1, EmployeeName = "Employee1", EmployeeDep = "EmployeeDep1" };
            EmployeeModel mod2 = new EmployeeModel { EmpId = 2, EmployeeName = "Employee2", EmployeeDep = "EmployeeDep2" };
            EmployeeModel mod3 = new EmployeeModel { EmpId = 3, EmployeeName = "Employee3", EmployeeDep = "EmployeeDep3" };
            EmployeeModel mod4 = new EmployeeModel { EmpId = 4, EmployeeName = "Employee4", EmployeeDep = "EmployeeDep4" };
            _pvtList.Add(mod1);
            _pvtList.Add(mod2);
            _pvtList.Add(mod3);
            _pvtList.Add(mod4);

            return _pvtList;
        }

    }
}
You can observe that Default Action method is creating a list of employees and send it back to view.
Step 3: Create the View representing the Grid in a very creative manner. While creating the different fields of the grid, ensure the Ids are unique and relative to one component of model.
Here i consider EmpId to be the Key Fields of reference for all the rows.
See how i created the grid taking care of above functionality.
@model IEnumerable<MVC3SimpleGrid.Models.EmployeeModel>
@{
    ViewBag.Title = "Index";
}
<div id="divResult">
<h2>Simple MVC Grid with Row Level Edit & Save</h2>
<table>
<tr>
<th>Employee ID</th>
<th>Employee Name</th>
<th>Employee Department</th>
<th>Action</th>
</tr>
@foreach (var m in Model)
{
    <tr>
        <td>
            @m.EmpId
        </td>
        <td>
            <div id="divEmpName-@m.EmpId.ToString()" class="visible">@m.EmployeeName</div>
            <input id="txtEmpName-@m.EmpId.ToString()" type="text" class="hide" value=@m.EmployeeName.ToString() />
        </td>
        <td>
            <div id="divEmpDep-@m.EmpId.ToString()"  class="visible">@m.EmployeeDep</div>
            <input id="txtEmpDep-@m.EmpId.ToString()" type="text"  class="hide" value=@m.EmployeeDep.ToString() />
        </td>
        <td>
            <button id="btnEdit-@m.EmpId.ToString()"  class="visible" onclick="ShowEdit(@m.EmpId); return false;">Edit</button>
            <button id="btnSave-@m.EmpId.ToString()"  class="hide" onclick="SaveEdit(@m.EmpId); return false;">Save</button>
        </td>
    </tr>
}
</table>
</div>
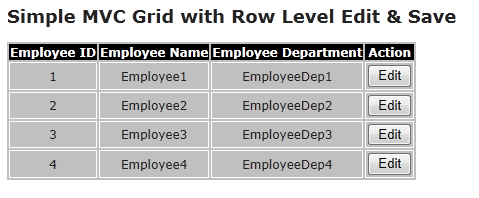
Immediately run the view in browser and see how the Ids are generated.
<div id="divResult">
<h2>Simple MVC Grid with Row Level Edit & Save</h2>
<table>
<tr>
<th>Employee ID</th>
<th>Employee Name</th>
<th>Employee Department</th>
<th>Action</th>
</tr>
    <tr>
        <td>
            1
        </td>
        <td>
            <div id="divEmpName-1" class="visible">Employee1</div>
            <input id="txtEmpName-1" type="text" class="hide" value=Employee1 />
        </td>
        <td>
            <div id="divEmpDep-1"  class="visible">EmployeeDep1</div>
            <input id="txtEmpDep-1" type="text"  class="hide" value=EmployeeDep1 />
        </td>
        <td>
            <button id="btnEdit-1"  class="visible" onclick="ShowEdit(1); return false;">Edit</button>
            <button id="btnSave-1"  class="hide" onclick="SaveEdit(1); return false;">Save</button>
        </td>
    </tr>
 . . . AND SO ON . . .
Step 4: Here comes the JQuery part. We need to create the script to address the functions attached to both the buttons to do their respective tasks.
<script type="text/javascript">
    function ShowEdit(par) {
        $("#divEmpName-" + par).attr("class", "hide");
        $("#txtEmpName-" + par).attr("class", "visible");
        $("#divEmpDep-" + par).attr("class", "hide");
        $("#txtEmpDep-" + par).attr("class", "visible");
        $("#btnEdit-" + par).attr("class", "hide");
        $("#btnSave-" + par).attr("class", "visible");
    }

    function SaveEdit(par) {
        $("#divEmpName-" + par).attr("class", "visible");
        $("#txtEmpName-" + par).attr("class", "hide");
        $("#divEmpDep-" + par).attr("class", "visible");
        $("#txtEmpDep-" + par).attr("class", "hide");
        $("#btnEdit-" + par).attr("class", "visible");
        $("#btnSave-" + par).attr("class", "hide");

        var _empName = $("#txtEmpName-" + par).val();
        var _empDep = $("#txtEmpDep-" + par).val();
        var url = '@Url.Action("Index","Home")';
        $.post(url, { Id: par, empName: _empName, empDep: _empDep },
            function (data) {

                $("#divResult").html(data);
            });
    }
</script>
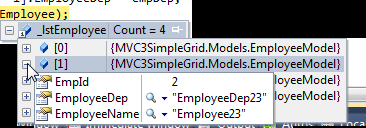
Step 5: Everything is there except the Ajax version of Index Action method for supporting the SaveEdit(). Below is the implementation of it.
[HttpPost]
        public ActionResult Index(int Id,string empName,string empDep)
        {
            _lstEmployee[Id - 1].EmployeeName = empName;
            _lstEmployee[Id - 1].EmployeeDep = empDep;
            return View(_lstEmployee);
        }
We are all set with coding part. Now execute and see the results.
Results
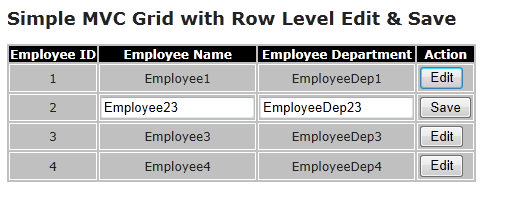
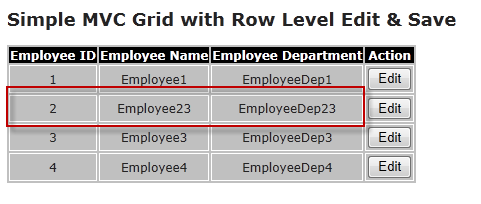
Please note that this application is purely to demonstrate how simple it is to create the GridView in MVC 3.
Code:
Html GridView in MVC3
Is it helpful for you? Kindly let me know your comments / Questions.

