Introduction
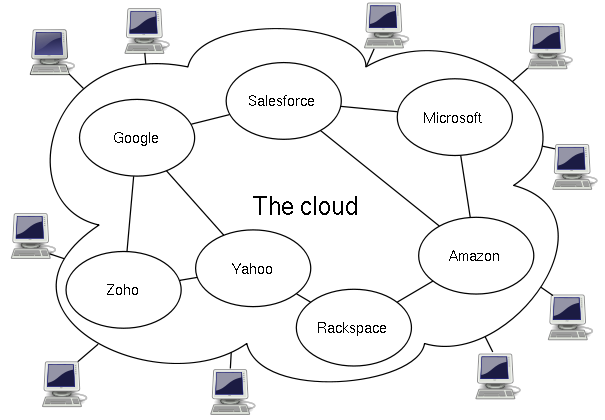
Cloud computing is steadily emerging as the next big thing in enterprise software arena. Many companies have already launched their own versions providing a wide variety of features.

*Image courtesy - Wikipedia
Microsoft has launched a CTP (Community Technology Preview) that is available for signup at www.azure.com. The biggest advantage presented by Azure is a very quick developer ramp up, as .NET developers can very easily learn new cloud based computing features. Also huge existing code base of customers can be reused and quickly scaled up to the cloud platform using Azure.
The intension here is to demonstrate my understanding of Azure in a series of small tutorials moving from simple to complex topics. In this first article, I shall demonstrate how any individual knowing .NET can create a simple "Hello World!" on Azure Platform.
Step 1 - Signup and Get Started!
Azure is based primarily on 3 kinds of services:
- Windows Azure: Provides compute and storage platform
- SQL Services: Provides SQL and data storage related services
- .NET Services: Provides service bus and access control features
Many other services and SDKs may be available in future on Azure like SharePoint, etc.
To get the invitation code, one needs to register at www.azure.com and subsequently follow the instructions given on the site to receive invite code.

Step 2 - Installing Pre-requisites
Links for Azure Development tools and SDK are available on www.azure.com. Also you can download tools from here. To install these tools, you need at least Visual Studio 2008 on Windows Vista SP1 or Windows Server 2008 or Windows 7.
Step 3 - Creating Project
Once pre-requisites (tools & SDKs) are installed, the Cloud related projects become available in Visual Studio. Start Visual Studio and create a C# "Cloud Service" project with a suitable name.

You shall be asked to select a role. Azure provides mainly 2 types of roles:
- Web Role: It is more like a Web Application where you get Web Pages, code behind and other web related services.
- Worker Role : It is more like a Windows service which once started will keep running and perform the tasks you wish.
Your application may contain either one of these or both, depending on functionality you wish to create. Currently in the CTP, the maximum roles your project can have is limited to 2.
In our case, as we are creating a Web App, we select "Web Role" and continue to complete project creation.

Step 4 - Implementation
Your project created contains many files including "ServiceDefinition.csdef" which is very interesting. We keep it unchanged and continue to web page 'Default.aspx'. Drop a label from toolbox to the page.

Double click the page and within Page_load(..) function, add this line:
this.Label1.Text = "Hello World! Welcome to Azure!";
Step 5 - Debug and Test
Debugging this code is similar to regular ASP.NET Web Application, just press F5. It will launch the 'Execution Fabric' simulated cloud environment of Microsoft.

Step 6 - Deploy
Right click the project and in Visual Studio, select 'publish' from the pop-up menu. Once 'Published', Visual Studio shall create HelloAzureService.cspkg and ServiceConfiguration.cscfg files. One may then logon to www.azure.com and create Windows Azure project if not already created. To deploy these files on the cloud, upload the generated (.cspkg and .cscfg) files as shown below. More information on deploying Azure services is available here.

Once you click upload, the following screen appears:

It takes a while before the application is deployed and one has to be a little patient. Once WebRole1 status is updated to 'Started'; you may test your application in staging more itself by clicking the given URL - http://6c0873bd9a2d47d7a38e1a87af9c0b35.cloudapp.net/. Further you may deploy the application by moving to production mode, if you are satisfied with it during the staging mode. Below is a screenshot of the application running in staging mode.

Points of Interest
As one may realize, it is very easy to ramp up to cloud computing using your existing expertise in .NET Framework. More information and analysis about cloud computing is available at my blog.
History
- 25 Oct 2009 - Finally got some time! Completed the article and uploaded v 1.0
- 23 Oct 2009 - Created first outline of the article
