Prerequisites
You must have Windows 8 and Visual Studio 2012 installed in order to use the tools mentioned and complete the walkthrough here.
Introduction
Laurent Bugnion, is the creator of the MVVM Light toolkit and I, as well as many others, have been using this for Windows Phone development for a while now. I am porting on of my applications to Windows 8 and wanted to take the knowledge of this toolkit to the new platform hoping that there were either some new enhancements and/or not many changes so that I could just go.
Well that was the deal.
MVVM Light Toolkit for Windows 8 RTMThe latest installer for the toolkit, "MVVM Light Toolkit V4 RTM", is available from CodePlex. According to Laurent's blog it is a side by side install with previous versions:
MVVM Light for Windows 8 is a side-by-side install with the standard MVVM Light V3 or V4 beta. Simply download and run the MSI from Codeplex. As usual, the last step of the installation performs a “/setup” of Visual Studio to actualize the project template cache, and unfortunately this last step can last very long. Please be patient and don’t cancel before the end! The installation process is very similar to that described on the MVVM Light installation page (except that there is no NuGet installer for VS11 yet).
The following link states the summary of the ported components from the previous versions, but I'll paraphrase here:
- ObservableObject including all ways to raise
PropertyChanged. - ViewModelBase including all ways to raise
PropertyChanged. - Messenger including all message types except
DialogMessage (see below). - RelayCommand with and without parameter.
- SimpleIoc which might well be the very first IOC container working on Windows 8.
Man do I love the SimpleIoc! Makes adding the new views soooo much easier than in the Windows Phone version.
There are a few missing components, one of which is
EventToCommand, however thanks to a new friend I have made, Joost van Schaik (see his blog here), there is a solution to that and it's available as a nuget package with some additional behavior features I encourage you to look into but I'll at least cover the
EventToCommand features he offers.
Getting Started
MVVM Project Template
After installing the toolkit you will see that there is a new project template available in the Visual Studio 2012 New Project Dialog:

Name the project "MvvmLight_Walkthrough" and click Ok.
The project template is simple, but add some new features that were not in previous versions of the toolkit. In the Solution Explorer you'll notice a Design folder with a class called
DesignDataService. This is a great feature; the default template putting in a design data class repository.
Second, as in the past version of the toolkit there is the normal
ViewModelLocator class, but in this version there is new feature -
SimpleIoc, a container class which if you are like me had everything else in a container for DI with the exception of the ViewModels unless you rolled your own.
public class ViewModelLocator
{
static ViewModelLocator()
{
ServiceLocator.SetLocatorProvider(() => SimpleIoc.Default);
if (ViewModelBase.IsInDesignModeStatic)
{
SimpleIoc.Default.Register<IDataService, Design.DesignDataService>();
}
else
{
SimpleIoc.Default.Register<IDataService, DataService>();
}
SimpleIoc.Default.Register<MainViewModel>();
}
[System.Diagnostics.CodeAnalysis.SuppressMessage("Microsoft.Performance",
"CA1822:MarkMembersAsStatic",
Justification = "This non-static member is needed for data binding purposes.")]
public MainViewModel Main
{
get
{
return ServiceLocator.Current.GetInstance<MainViewModel>();
}
}
public static void Cleanup()
{
}
}
And last, in the Model folder, Laurent has been kind enough to also include an IDataService interface and
DataService class to show in the example how to use the real time and design time data models. These are all wired up in the ViewModelLocator as shown above.
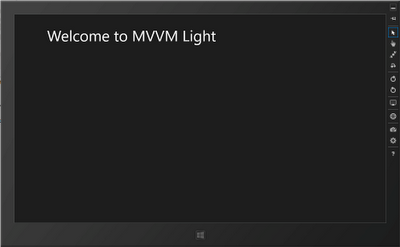
Now if we simply run the application you should get the following to make sure it's all good to go!

As you may or may not notice, this is not to dis-similar from the previous project template test from the previous version
MainViewModel
The binding of the ViewModel to the View is the same as it was in the previous model and there are no noticeable changes to the ViewModelTemplate. On thing to note is that all options for
RaisePropertyChanged are included in this release where as in the previous version you would have to get the "Pre-release" version from nuget in order to use them. For example, the built in template puts in the following:
public const string WelcomeTitlePropertyName = "WelcomeTitle";
private string _welcomeTitle = string.Empty;
public string WelcomeTitle
{
get
{
return _welcomeTitle;
}
set
{
if (_welcomeTitle == value)
{
return;
}
_welcomeTitle = value;
RaisePropertyChanged(WelcomeTitlePropertyName);
}
}Noticeably where RaisePropertyChanged is using a string value, one of the options now available in the release is to remove the
WelcomeTitlePropertyName variable and then change
RaisePropertyChanged(WelcomeTitlePropertyName);
to
RaisePropertyChanged(() => WelcomeTitle);
The other nice benefit here is that the template has also put in the wiring for injecting the
IDataService into the constructor for the ViewModel. Some of these little thing we developers either take for granted that someone has gone through the trouble of putting the plumbing in there or call it the boring work that has to be done before we get the real work done. You can easily put other dependencies in the constructor here and then just add the mappings in the constructor of the ViewModelLocator by simply registering the types with the SimpleIoc container.
public MainViewModel(IDataService dataService)
{
_dataService = dataService;
_dataService.GetData(
(item, error) =>
{
if (error != null)
{
return;
}
WelcomeTitle = item.Title;
});
}Now What?
A simple example here is to add some content to the MainPage and see how we navigate to a second view. I won't bore you with the details of adding in the controls to the page but here's what the page should look like when you're done.

EventToCommand
Now let's just add a prompt to the submit button. But wait, what where's my EventToCommand??? Sure with the button there is a Command property and you can set that to an ICommand in the ViewModel and everything is happy. But, there are plenty of controls, both baked into WinRT and third party controls that do not have that property. So, for simplicity sake I'm using this control and will get the EventToCommand back in your toolbox, or your Joostbox I should say.
Off to nuget!
I had this issue where I was looking for the behaviors when porting an app I was working on and could find the dang behaviors in Blend so I went to nuget and did some searching and there wasn't anything that was shaking my fancy. Then I came across Joost van Schaik (see his blog here) and his WinRTBehaviors library and just so happens I hit him in the middle of uploading the nuget package for Win8nl. Now this is a package of Behaviors that was originally a Windows Phone 7 library and It's now growing in its own direction and now contains some Windows 8 specific stuff (according to nuget). So let's get it installed real quick. Install the package by typing the following into the Nuget Package Manager Console or searching for Win8nl in the package explorer.
PM> Install-Package Win8nl
It will add the library and the necessary dependencies to the project, which include WinRTBehaviors. For more information on the other behaviors there check out Joost's blog.
Adding EventToCommand
First, let's add the references to the XAML page:
xmlns:WinRtBehaviors="using:WinRtBehaviors"
xmlns:Win8nl_Behavior="using:Win8nl.Behaviors"
Next, locate the button control and add the following inside the button XAML:
<Button x:Name="btnSubmit" Content="Submit"
                  FontFamily="{StaticResource MyFont}" FontSize="{StaticResource MyFontSize}"
                  HorizontalAlignment="Center" Margin="0,20,0,0">

  <WinRtBehaviors:Interaction.Behaviors>

     <Win8nl_Behavior:EventToCommandBehavior Event="Tapped"
                                    Command="AreYouSureCommand"
                                    CommandParameter="{Binding MyName}"/>

 </WinRtBehaviors:Interaction.Behaviors>

</Button>
Now, open the MainViewModel.cs code and we can add the command for the new behavior here when the button is tapped.
As usual the Command property is expecting an
ICommand, add the following code to the MainViewModel and return a new instance of
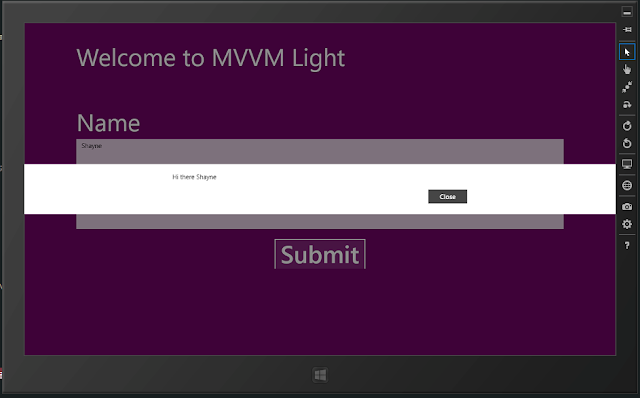
RelayCommand to execute whatever behavior you wish. In this example, I'm just doing a little popup to show whatever the user input into the
myName TextBox.
public ICommand AreYouSureCommand
{
    get
    {
        return new RelayCommand<string>((p) =>
        {

            var msg = new MessageDialog(string.Format("Hi there {0}", p));

            msg.ShowAsync();

        });
    }
}
See the result here:

And that is
EventToCommand for MVVMlight for Windows 8!
There are many more behaviors in the WinRTBehaviors library that you should take advantage of, for me the most notable ones being FlipViewPanoramaBehavior and
NavigationService being ported to Windows 8.
See more MVVM Light related articles and other content on my blog
at TattooCoder.com
