This post describes how we can create multilingual user experience in SharePoint 2010. Let’s say we’ve a site named “HR” and under that site, we’ve a document library called “Leave Requests”.
Let’s assume we’ve both English and Arabic users. We’ve been asked to give them interface in their respective languages, creating variations for site and creating two separate lists is an option but then we’ll have to manage two lists and deal with them separately and most importantly variation only works with Publishing sites. Now there is another option and a better one for this type of scenario which is Multi-lingual user interface (MUI).
MUI simply allows us to select a display language so after we configure it, users can simply change their display language and all out-of-the-box stuff will be displayed in the respective language and we can also very easily translate custom columns, menus and stuff. From a developer’s point of view, it is the same as localizing content in ASP.NET using resource files but this time we don’t have to create them (More benefits of multilingual user interface).
Okay, enough talking, let’s see this in action.
Step 1
Download and install the desired language pack.
Step 2
Rerun the SharePoint Product and Technologies configuration wizard.
Step 3
Now let’s go to HR site settings.
Step 4
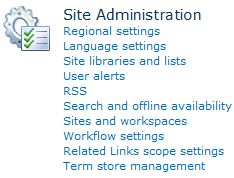
Let’s go in to Language settings under Site Administration.

Step 5
Select Arabic and click ok.

Step 6
Now we should be able to see Select Display Language in User Settings menu.

Step 7
Let’s go to Leave Request library in our HR site and select Arabic and see what happens

Step 8
Okay, now we can see the interface is in Arabic, let’s relax for a while but wait, the list title “Leave Requests” is still in English as well the title of default view “All Documents”, we can easily change them. Let’s go to Library setting and then General settings and replace the English title with its Arabic counterpart.

Step 9
Now we can see the list name is appearing in Arabic and we’ll go in English we can see it’s the English one because SharePoint keep them in resource files. We can also change view name, menus, quick launch and custom column names like this as well. (More details on what’s supported and what’s not on.)
Step 10
Now changing titles and other stuff might be cumbersome if we keep going in to settings just to change title and to avoid this, we can export translation which will give us the resource file, we can very easily edit it using Visual Studio or any other XML editor and translate our content and then upload it again by importing translations. Let’s go to Site settings and then Language settings to export translation.

Step 11
Let’s select Arabic and export. Afterwards, we’ll get a prompt to save resource file for our site, we can then edit it and upload it back.

That’s all for now my friends, thanks for reading. I hope you find this post useful.


