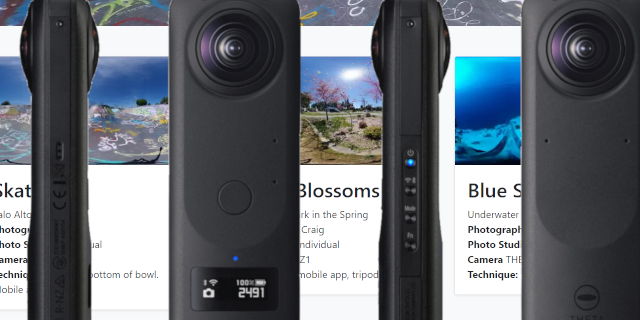
Introduction
Existing image sharing sites like Instagram and Flickr do not deliver compelling 360 image experiences. Many sites like Instagram do not even support 360 image format and although sites like Facebook can display 360 images, many people feel that the experience is poor with low resolution images and a small viewport. To test different ideas for image resolution, file size, viewport size, head tracking, text and image layering, and metadata sharing, I'm working with an online community to display RICOH THETA images and share 360 photography techniques using Django and Bootstrap.
The code for the site is available on GitHub. The experimental testbed is available at https://gallery.theta360.guide (here).
The site is not a production site to host images. It's a framework to test ideas and get feedback.
Building the site was straightforward, thanks to A-Frame, which handles all the 360 navigation and display.

Background
The images using in 360 sites are often larger than standard images. This is because the audience only views a small portion of the 360 image through the viewport.
Here's the same image viewed in a Chrome browser window. The image on the left is displayed using <img src="filename.jpg">
The image on the right is viewed using the <a-sky src="filename.jpg"> tag of A-Frame.

A-Frame pushes the image movement processing to the browser. Too many 360 images displayed on one page will lead to a sluggish browser experience. One strategy is to display lists or grids of images as thumbnails. When the audience clicks on a thumbnail, the image is displayed as a 360 image.
To help with network latency, the thumbnails are resized to 400px by 200px, which reduces the file size from 8MB to roughly 7KB.

A typical image from a RICOH THETA Z1 is a 8MB JPEG that is 6,720 pixels wide by 3360 pixels high. To load the full-size images faster, we are applying a number of techniques to reduce image size to roughly 1.5MB.
Uploading Images
Right now, images and stories about how the photograph was taken are uploaded by registered users using the unmodified Django interface.

Although the interface is old-school, it gets the job done for testing.

Developing the Layout of the Image Grid
The album is based on copying the Bootstrap Album example.

Mobile Resizing
Thanks to Bootstrap, the album will automatically resize and reduce the columns from 3 to 1 column on mobile.


A-Frame
A-Frame is really easy to use. In the <head> of your HTML file, put this:
<script src="https://cdnjs.cloudflare.com/ajax/libs/aframe/0.7.1/aframe.min.js"
integrity="sha256-SNDsmWBFQwJAjxLymQu5Fqh6rW4RKLJXUQboy3O0BUA=" crossorigin="anonymous">
</script>
In the body, this is the section that calls up the image:
  <div id="main-image">
  <a-scene embedded>
    <a-sky src="{{blog.image.url}}"></a-sky>
  </a-scene>
</div>
The CSS styling:
a-scene {
  height: 600px;
  width: 100%;
}
#main-image {
  margin: auto;
}
webp
As part of the effort to reduce image file size, I converted the images to webp.
Grid
The grid of images is copied from the Bootstrap album example. It uses a Python for loop embedded in the HTML. Each image is called, a "job". Each job has attributes stored in the PostgreSQL database running on a hosted server. I pass the entire database of jobs to the HTML using simple Django commands. Once I have all the jobs accessible from within the HTML, I use Python. No JavaScript needed for this part.
Using Django, you can mix the Python code directly into the HTML through the use {{ }} or {% %}.
<div class="album py-5 bg-light">
    <div class="container">

    <div class="row">

        {% for job in jobs.all %}
        <div class="col-md-4">
        <div class="card mb-4 shadow-sm">
            <a href="{{job.more_info_url }}">
            <img class="card-img-top" src="{{ job.image.url }}" />
        </a>
            <div class="card-body">
            <h2>
                {{ job.title }}
            </h2>
                <p class="card-text">

                {{ job.summary }}
                <br />
                <strong>
                Photographer:
                </strong>
                {{job.photographer}}
                <br>
                <strong>
                Photo Studio:
                </strong>
                {{job.photo_studio}}
                <br />
                <strong>
                    Camera
                </strong>
                {{job.camera_model}}
            <br />
                <strong>
                    Technique:
                </strong>
            {{ job.technique }}
        </div>
        </div>
    </div>
    {% endfor %}
    </div>
</div>
Deploying 360 Image Gallery
I am using a $5/month virtual server for testing with these specifications:
- 1 GB memory
- 25 GB disk
- 1 TB transfer
- 1 CPU
- Ubuntu 18.04 x64
Points of Interest
The size of the original images from the camera and the network latency caught me by surprise. When I was developing the site on my Linux workstation and running Django locally, I didn't notice the problem. After uploading the hosted site, it took 45 seconds to load the front page that listed all the images. I reduced this to a few seconds by reducing the image size. I was surprised that the images could be reduced in size considerably with only a minor loss in visual quality. If you have any advice on dealing with large images in Django, please let us know. There's a discussion on this topic here.
To assess the impact of reducing image quality on the artistic experience, we created 12 different images with the same 6,720x3,360 pixel size, but with different lossy compression settings applied. You can assess the quality changes yourself here.

One of the problems with this technique is that images lose metadata. To get around this problem, I plan to extract the metadata from the original image. Choosing the best quality is a relative decision. If you have an opinion, I'd be interested in hearing it.
History
- 3rd July, 2019: Initial version
- 3rd July, 2019 evening: Updated with examples of image lossy compression tests
