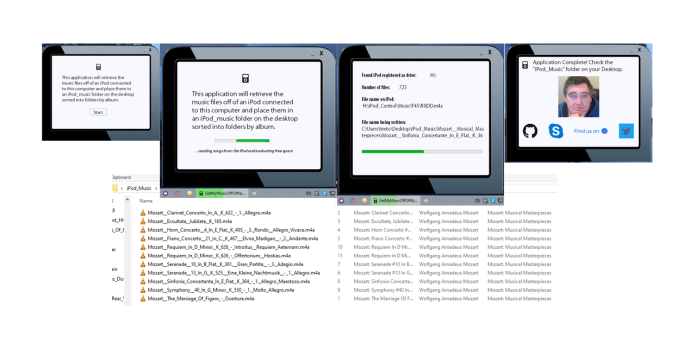
Originally this application was a console application that I developed to get the music off of my iPod. After my post on transparent forms in Visual Basic I decided to port it to a Widget format to make it easier to use and demonstrate what goes into creating a transparent Windows Forms application…
Necessity Drives Innovation – The Need For This App
Let’s start with the music eating iTunes application. My iPod is the only music player that I have ever owned that does not make it easy to get my music files off of. Even the very cheapest music player you can buy allows you to get your music off of the device easily. If I want to play the music on my computers’ speakers I get a purchase driven interface that concentrates more on selling me something than anything else.
OK, enough applesauce for now. Suffice it to say, I like my iPod – I just don’t like iTunes. I needed to get my music files off of my iPod so that I could play them on my computer without tying up a USB port. I would rather run my code than anyone else s’ on my computer – so an application was born. This application does only one thing without any other options, so it’s a sure fire shoe-in for a widget.
Creating The Background For The Application

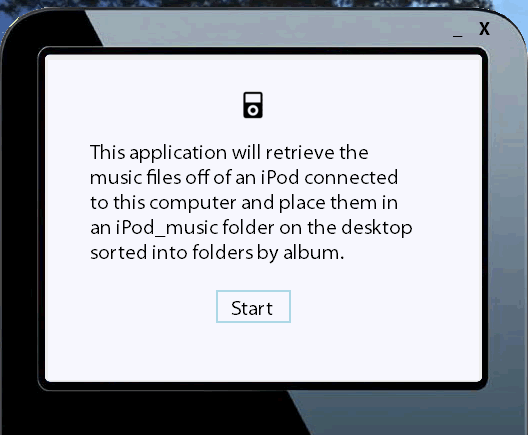
My transparent forms application startup screen.
In my opinion, transparent forms applications are really only good for developing widget style application. So the background image you choose should be relatively small. However, with modern new tablet/hybrid systems your interface should be designed to handle both desktop/laptop and tablets. Think small form size with big buttons that are easy to pluck at with your digits. Also, your application should stay the same size (width and height) throughout execution.
Visual Studio will automatically tile whatever image you choose for your background on the form designer by default. This will help you with the layout for the multiple panel interface you will most likely need to come up with. The size of your interface (form) should be the width and height of the tile in the upper left corner of the designer.

My application background tiled in the forms designer with the panels in place.
You should create as many panels as needed to hold the different UI states of your app inside of the different tiles. The tiled background gives you a chance to see what your app states UI will look like as you design them. Use the upper left tile inside of the designer to place your designed chrome buttons (min, close etc…). Like I stated earlier, your interface should be panel based to make it easier to swap them out between application states. Simply take note of the size and location of the panel in the upper left corner tile and swap out panels assigning those values to the other panels as you need to in code.
Beyond that, read my previous post on transparent forms for more info – it’s an easy and short read through.
Adding Modern Application Features
Windows forms applications lack some of the more modern features that their XAML based counterparts come with out of the box. One of those features, specifically the taskbar based progressbar, can be added to any winforms application with a quick visit to Nuget.

WindowsAPICodePack in the Nuget package manager.
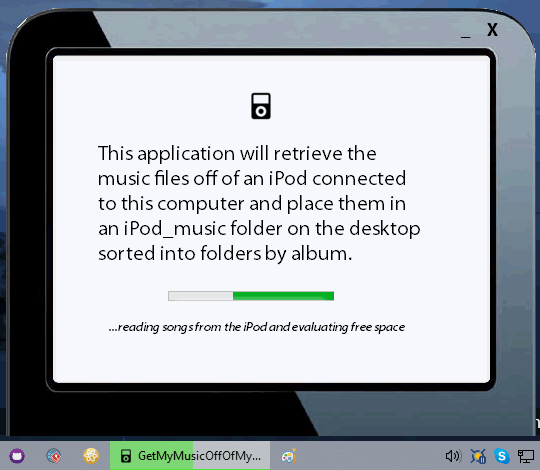
Being able to see the progress of a long running task while the application is minimized is an important feature for an application such as this. So, with the Nuget package manager opened, search for WindowsAPICodePack and add it to your project. That package gives you all of the code pack API goodness you’ll need to implement that taskbar progressbar functionality. Coding it is pretty much like coding a regular progressbar. You just have to Import the taskbar library from that package in your form and use it.
Most of the time you’ll be coding something like:
TaskbarManager.Instance.SetProgressState(TaskbarProgressBarState.Normal)
TaskbarManager.Instance.SetProgressValue(somecountingint, somecountedint)
' update somecountingint till done
TaskbarManager.Instance.SetProgressState(TaskbarProgressBarState.NoProgress)
Take a look at the file on Github to see how I coded everything.
Recovering Music from an iPod in Visual Basic

Most of the music files on my iPod were imported from CD which iTunes turns into .m4a files instead of .mp3 files. The extended properties are the same in both cases however.
Recovering the music from an iPod involves reading the extended properties from the music files themselves (which is what the iPod uses). The music files on the iPod itself are contained within a hidden folder named “iPod_Control\Music” (on my iPod video). My code enumerates the connected external drives and searches for the existence of that folder. Inside that folder there are a bunch of randomly named folders – your music files exist in those folders, randomly named of course.
Getting the extended property values turned out to be a bit more daunting than I first thought. I searched to internet and came across a good stackoverflow post that helped me. That code gave me problems – so it wasn’t as easy as cut and paste, but it “got the job done” in the end.

Windows Explorer doesn’t use the Shell – it IS the graphical shell of the Windows OS.
I used the Windows Shell to parse out the extended properties of the music files and used those values to rename and sort them. I wrote a class to hold all of the information about the music files as I parsed them and made it sort-able by implementing the IEquatable and IComparable interfaces on it. See the file on GitHub to see how I coded it.
The About Page

When the application completes an about pane pops up with my information. Do I use PictureBox controls with the pointer set to a hand for all of my links? You bet I do! It’s probably the easiest way to get an Internet shortcut in your Visual Basic application. Don’t forget to code the PictureBox.Click handler to open the default browser with my URLs.
Dim strUrl As String = "https://someniftywebaddressgoeshere.something"
Process.Start(strUrl)
What This Application Does Not Do
This application just copies the music files into the folder on the desktop. It doesn’t copy any album art or anything else other than the music files. Also, none of the files on the iPod are altered in any way.

Evaluating the music files on the iPod takes an excruciatingly long time in my opinion. Everything is being done over a USB wire and it takes a toll.
On Porting and Portability
Most of the code can probably be moved to .NET Core 3 without a problem by removing all of the Windows specific code such as the Taskbar Progressbar code. The problems come in when you try to port the code used to read the extended properties of the music files. I’ve read that there is a way to make the code portable by using the actual byte offsets of the extended properties on the files to get the values. Maybe I’ll experiment with that at a later date. But for now, not experimenting with byte offsets seems the wisest and less frustrating path to take for me.
Advertisements
__ATA.cmd.push(function() {
__ATA.initSlot('atatags-26942-5d3244fdc1bd8', {
collapseEmpty: 'before',
sectionId: '26942',
location: 120,
width: 300,
height: 250
});
});
