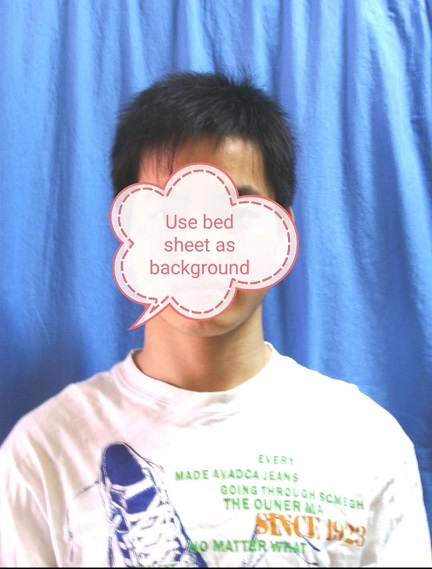
It's an application level development and we won't go through the algorithm of image segmentation. I use Huawei Mlkit help to develop this app and it provides the capability of image segmentation. Developers will learn how to quickly develop a ID photo DIY applet using such SDK.
Background
I don't know if you have had such an experience. All of a sudden, schools or companies needed to provide one inch or two inch head photos of individuals. They needed to apply for a passport or student card which have requirements for the background color of the photos. However, many people don't have time to take photos at the photo studio. Or they have taken them before, but the background color of the photos doesn't meet the requirements. I had a similar experience. At that time, the school asked for a passport, and the school photo studio was closed again. I took photos with my mobile phone in a hurry, and then used the bedspread as the background to deal with it. As a result, I was scolded by the teacher.
Many years later, mlkit machine learning has the function of image segmentation. Using this SDK to develop a small program of certificate photo DIY could perfectly solve the embarrassment in that year.
Here is the demo for the result.


1. Preparation
1.1 Add Huawei Maven Warehouse in Project Level Gradle
Open the Android studio project level build.gradle file.

Add the following Maven addresses:
buildscript {
    repositories {
        maven {url 'http://developer.huawei.com/repo/'}
    }
}
allprojects {
    repositories {
        maven { url 'http://developer.huawei.com/repo/'}
    }
}
1.2 Add SDK Dependency in Application Level build.gradle
Introducing SDK and basic SDK of face recognition:
dependencies{
implementation 'com.huawei.hms:ml-computer-vision:1.0.2.300'
implementation 'com.huawei.hms:ml-computer-vision-image-segmentation-body-model:1.0.2.301'
}
1.3 Add Model in Android manifest.xml File
To enable the application to automatically update the latest machine learning model to the user's device after the user installs your application from the Huawei application market. Add the following statement to the Android manifest.xml file of the application:
<manifest
   <application
       <meta-data
           android:name="com.huawei.hms.ml.DEPENDENCY"
           android:value= "imgseg "/>
   </application>
</manifest>
1.4 Apply for Camera and Storage Permission in Android manifest.xml File
<uses-permission android:name="android.permission.WRITE_EXTERNAL_STORAGE" />
2. Two Key Steps of Code Development
2.1 Dynamic Authority Application
@Override
protected void onCreate(Bundle savedInstanceState) {
super.onCreate(savedInstanceState);
setContentView(R.layout.activity_main);
if (!allPermissionsGranted()) {
getRuntimePermissions();
}
}
@Override
public void onRequestPermissionsResult(int requestCode, @NonNull String[] permissions,
@NonNull int[] grantResults) {
super.onRequestPermissionsResult(requestCode, permissions, grantResults);
if (requestCode != PERMISSION_REQUESTS) {
return;
}
boolean isNeedShowDiag = false;
for (int i = 0; i < permissions.length; i++) {
if (permissions[i].equals(Manifest.permission.READ_EXTERNAL_STORAGE) &&
grantResults[i] != PackageManager.PERMISSION_GRANTED) {
isNeedShowDiag = true;
}
}
if (isNeedShowDiag && !ActivityCompat.shouldShowRequestPermissionRationale
(this, Manifest.permission.CALL_PHONE)) {
AlertDialog dialog = new AlertDialog.Builder(this)
.setMessage(getString(R.string.camera_permission_rationale))
.setPositiveButton(getString(R.string.settings),
new DialogInterface.OnClickListener() {
@Override
public void onClick(DialogInterface dialog, int which) {
Intent intent =
new Intent(Settings.ACTION_APPLICATION_DETAILS_SETTINGS);
intent.setData(Uri.parse
("package:" + getPackageName()));
startActivityForResult(intent, 200);
startActivity(intent);
}
})
.setNegativeButton(getString(R.string.cancel),
new DialogInterface.OnClickListener() {
@Override
public void onClick(DialogInterface dialog, int which) {
finish();
}
}).create();
dialog.show();
}
}
2.2 Creating an Image Segmentation Detector
The image segmentation detector can be created through the image segmentation detection configurator "mlimagesegmentation setting".
MLImageSegmentationSetting setting = new MLImageSegmentationSetting.Factory()
                .setAnalyzerType(MLImageSegmentationSetting.BODY_SEG)
                .setExact(true)
                .create();
this.analyzer = MLAnalyzerFactory.getInstance().getImageSegmentationAnalyzer(setting);
2.3 Create "mlframe" Object through android.graphics.bitmap for Analyzer to Detect Pictures
The image segmentation detector can be created through the image segmentation detection configurator "MLImageSegmentationSetting".
MLFrame mlFrame = new MLFrame.Creator().setBitmap(this.originBitmap).create();
2.4 Call "asyncanalyseframe" Method for Image Segmentation
Task<MLImageSegmentation> task = analyzer.asyncAnalyseFrame(frame);
Task<MLImageSegmentation> task = this.analyzer.asyncAnalyseFrame(mlFrame);
task.addOnSuccessListener(new OnSuccessListener<MLImageSegmentation>() {
@Override
public void onSuccess(MLImageSegmentation mlImageSegmentationResults) {
if (mlImageSegmentationResults != null) {
StillCutPhotoActivity.this.foreground =
mlImageSegmentationResults.getForeground();
StillCutPhotoActivity.this.preview.setImageBitmap
(StillCutPhotoActivity.this.foreground);
StillCutPhotoActivity.this.processedImage =
((BitmapDrawable) ((ImageView)
StillCutPhotoActivity.this.preview).getDrawable()).getBitmap();
StillCutPhotoActivity.this.changeBackground();
} else {
StillCutPhotoActivity.this.displayFailure();
}
}
}).addOnFailureListener(new OnFailureListener() {
@Override
public void onFailure(Exception e) {
StillCutPhotoActivity.this.displayFailure();
return;
}
});
2.5 Change the Picture Background
this.backgroundBitmap = BitmapUtils.loadFromPath
(StillCutPhotoActivity.this, id, targetedSize.first, targetedSize.second);
BitmapDrawable drawable = new BitmapDrawable(backgroundBitmap);
this.preview.setDrawingCacheEnabled(true);
this.preview.setBackground(drawable);
this.preview.setImageBitmap(this.foreground);
this.processedImage = Bitmap.createBitmap(this.preview.getDrawingCache());
this.preview.setDrawingCacheEnabled(false);
Conclusion
In this way, a small program of ID photo DIY has been made. Let's see the demo.

If you have strong hands-on ability, you can also add and change suits or other operations. The source code has been uploaded to GitHub. You can also improve this function on GitHub.
Please stamp the source code address of GitHub (the project directory is id-photo-diy).
Based on the ability of image segmentation, it cannot only be used to do the DIY program of ID photo, but also realize the following related functions:
- People's portraits in daily life can be cut out, some interesting photos can be made by changing the background, or the background can be virtualized to get more beautiful and artistic photos.
- Identify the sky, plants, food, cats and dogs, flowers, water surface, sand surface, buildings, mountains and other elements in the image, and make special beautification for these elements, such as making the sky bluer and the water clearer.
- Identify the objects in the video stream, edit the special effects of the video stream, and change the background.
For other functions, please brainstorm together!
For a more detailed development guide, please refer to the official website of Huawei developer Alliance:
History
- 23rd March, 2020: Initial version
