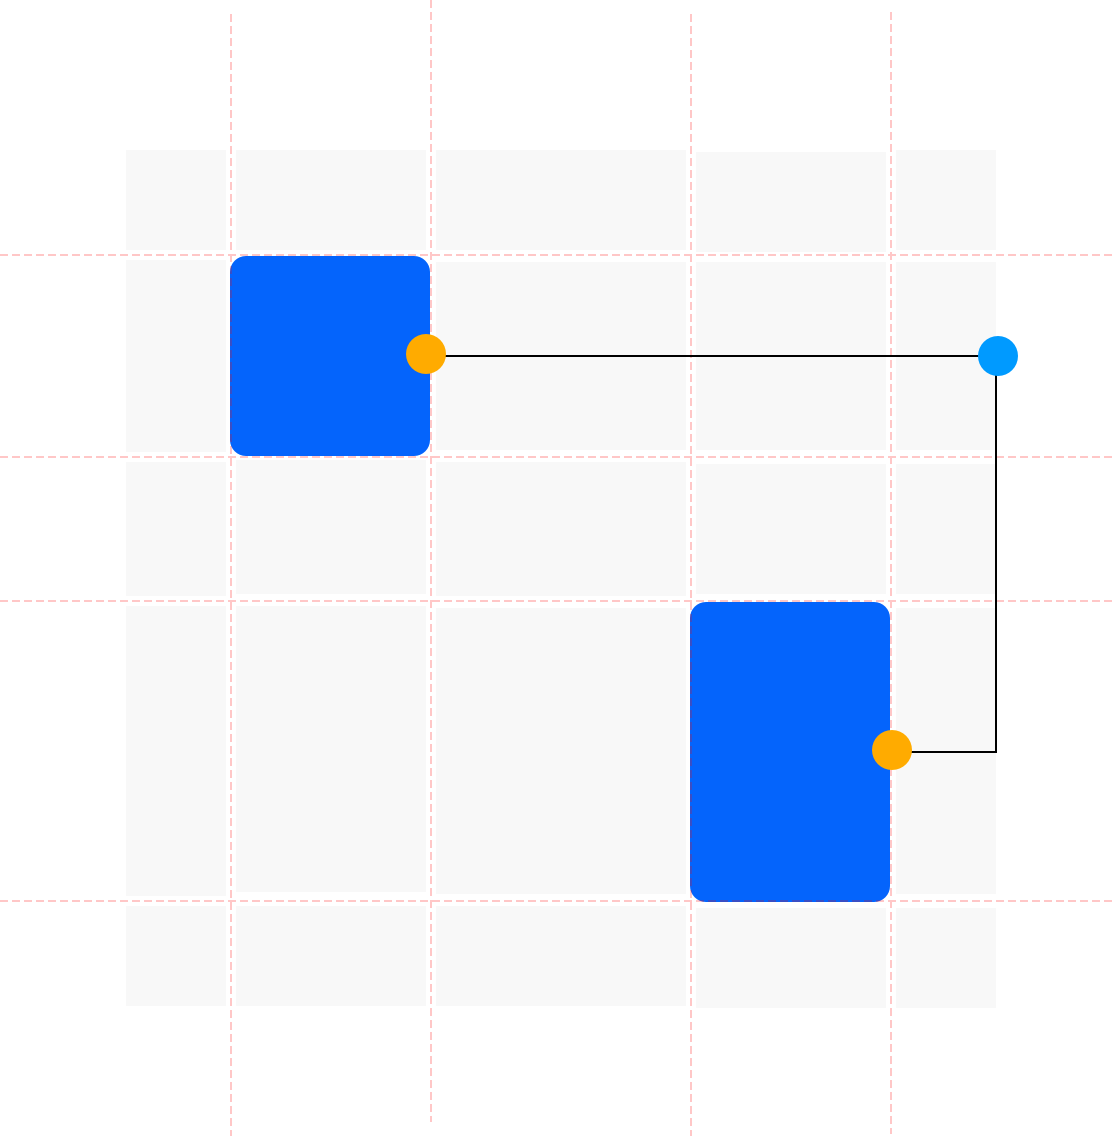
This article was written because it was hard to find an explanation of simply how to achieve routing using orthogonal connectors as the best way of displaying beautiful diagrams.

An orthogonal connector uses only vertical and horizontal lines to connect two shapes
Background
TL;DR I had a pending issue with this, it became personal. :)
Not that long ago, I was working on an app that required modeling some flows using a diagram-like editor. The use case was simple and enclosed enough not to go to a complex and chunky third party solution for it.
I won’t enter full-rant mode about libraries, but it was a small piece of code to bring along an entire chunk of a very specialized library for such a seemingly small task.
Everything was going all right until we hit the point of connecting the shapes. We were shooting of course for orthogonal connectors as the best way of displaying beautiful diagrams. It was one of those things you just don’t think much about, how it works or how complex the implementation could be; but turned out to be a way more sophisticated task than anticipated.
A few years later, still feeling the ghost of that challenge haunting me from my closet, I decided to give it a try again. This is the story of how I came with the approach presented in this article.
The way the live demo displays information is specifically designed to enable a good understanding of how the algorithm works. In my opinion, the solution is production-ready.
I decided to write this article because of how hard it was to find someone that explains simply how to achieve this routing. I even gave up when trying to follow the code on the popular libraries that do this. Code about geometry is often almost unreadable if there is not a graphical reference.
You might find the work useful, it might inspire you to tackle a ghost of your past, or just find the process entertaining enough to give it a read.
Getting There
Quote:
You can read more detail about how the algorithm works on this Medium Post
The short version of steps of how the algorithm works are:
- Draw rulers around the shapes of interest
- Come up with a slice grid from those rulers
- Mark spots using the corners and middle points of those slices
- Make an orthogonal graph by connecting the spots
- Find the connection of the spots (I used a little modified Dijkstra)
Using the Code
The algorithm returns an array of point objects with the coordinates to connect.
const shapeA = {left: 50, top: 50, width: 100, height: 100};
const shapeB = {left: 200, top: 200, width: 50, height: 100};
const path = OrthogonalConnector.route({
pointA: {shape: shapeA, side: 'bottom', distance: 0.5},
pointB:{ shape: shapeB, side: 'right', distance: 0.5},
shapeMargin: 10,
globalBoundsMargin: 100,
globalBounds: {left: 0, top: 0, width: 500, height: 500},
});
const context = document.getElementById('canvas').getContext('2d');
const start = path.shift();
context.strokeRect(shapeA.left, shapeA.top, shapeA.width, shapeA.height);
context.strokeRect(shapeB.left, shapeB.top, shapeB.width, shapeB.height);
context.beginPath();
context.moveTo(start.x, start.y);
path.forEach(pt => context.lineTo(pt.x, pt.y));
context.stroke();
Quick API
Only one method is exposed:
OrthogonalConnector.route(routeOptions: RouterOptions)
RouteOptions
pointA: ConnectorPoint. The origin point of the connectorpointB: ConnectorPoint. Destination point of the connectorshapeMargin: number. Margin around shapes for routingglobalBoundsMargin: number. The margin that routing expandsglobalBounds. Rectangle. Defines confinement bounds of the connector
ConnectorPoint
shape: Rectangle. Bounds of shape representing the pointside: top,right,bottom,left. The side where the connector departs/arrivesdistance: number. From 0 to 1, to calculate the connector departure/arrival relative to the edge this point represents
Points of Interest
I did learn a few things in the making of this piece of code. As a father of two, in the middle of a pandemic and working from home, my spare time is short. Never mind. I don’t have spare time. What I did is to allocate bursts of 30 minutes per day to give this a few cycles, first to propose theories, then to implement them.
One of the big realizations of this work was, I took too long to take it to code experimentation. Code the ideas to sketch and validate them when you're trying to come up with something. The sooner, the better.
History
- 8th December, 2020: Original post
