Introduction
Although bringing products to life with high-quality video started as a nice-to-have feature, video has become a key part of e-commerce. Consumers expect to see product videos before making purchasing decisions, especially since the COVID-19 pandemic has prevented them from browsing products in person, significantly expanding the e-commerce market.
Oftentimes, once they discover the convenience of shopping online, many consumers stop patronizing brick-and-mortar stores.
This article shows web developers how to create a custom Shopify app and then perform two tasks for a superior user experience (UX):
Integrate Cloudinary Into Your Shopify Store
Already have a Shopify store and are looking how to better optimize your page with Cloudinary? Check out the below resources to start optimizing your performance budget.
Enhancing a Shopify Store With Apps
To add features to Shopify stores, start with building web apps called Shopify apps, which seamlessly integrate with the Shopify platform. Even though they leverage the power of that platform, you can host those apps in your own infrastructure or somewhere else. Shopify offers extensive documentation on the procedures for developing Shopify apps in the most relevant programming languages. Also, depending on your purpose and your client’s needs, you can choose from several different types of Shopify apps: public, custom, private, etc.
However, custom apps have limitations, especially if you plan to expand their audience someday. Because you tailor them for specific retailers, you can't sell custom apps in the Shopify App Store. Nor can you charge clients with the Shopify’s Billing API for using your custom apps.
Nonetheless, if the standard apps don’t offer the tools you need or don’t help your client’s store stand out, a custom app is the way to go. For example, even though Shopify supports video out of the box, that platform limits video size. Such a restriction and other factors might pose too much constraint for your needs.
In contrast, Cloudinary enhances e-commerce UX by serving optimized videos tailored to the visitor’s device. Additionally, the UX offered by Cloudinary’s Product Gallery widget outshines Shopify’s default by far. Once you’ve learned how to create custom apps, as described below, you’ll be well on your way to mastering the techniques of building advanced, video-based Shopify apps.
Creating a Node.js App
To integrate Cloudinary into Shopify, first create a Shopify app based on Node.js, React, and Next.js. The Shopify App CLI is a superb command-line interface for efficiently creating, installing, and launching Shopify apps by quickly scaffolding Node.js and Ruby on Rails apps, automating many everyday development tasks.
For the procedure on how to create a custom Shopify app, see this section in the Shopify documentation: Getting started with Shopify App CLI.
Uploading Product Media to Cloudinary
After creating a Node.js custom app, add a product video. For an overview of how Cloudinary works and integrates with websites and apps, read the related documentation.
You can upload videos to Cloudinary in either of these two ways:
- With the upload widget — By using Cloudinary's interactive, feature-rich, and simple-to-integrate upload widget, you can upload media directly to Cloudinary, saving you the hassle of developing an in-house tool for interactive uploads.
- With a direct call to the REST API — To enable you to perform tasks beyond the upload widget’s capabilities, Cloudinary's client libraries (SDKs) wrap the upload API, greatly simplifying the use of the API methods (see the upload API reference documentation for details). Nevertheless, to upload files with a direct call to the API from within your custom code, simply send an HTTPS POST request to a Cloudinary URL.
I recommend uploading media to your Cloudinary Media Library with the upload widget for its user-friendly user interface (UI).
Leveraging Your Cloudinary Credentials
Do the following:
-
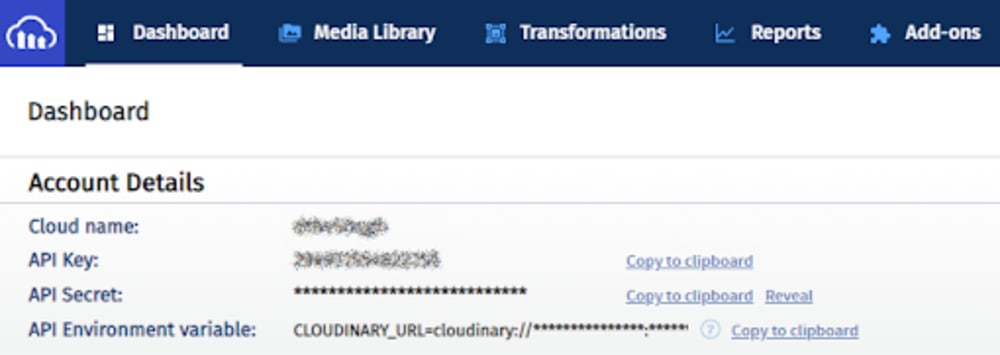
Sign up for a free Cloudinary account and log in to access the Cloudinary management console's dashboard for your account details. Note your account's Cloud name, which you'll use later in the custom Shopify app.
-
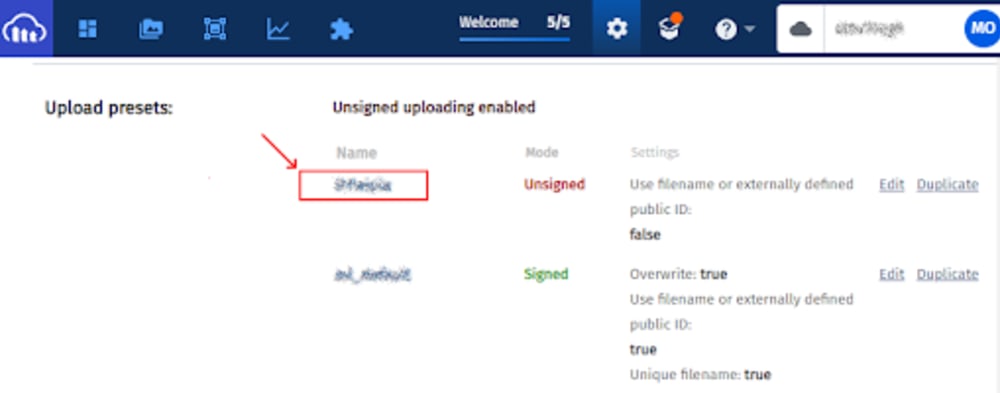
Click Settings at the top of the Cloudinary management console and, under Upload presets, ensure that the mode reads Unsigned:
-
Open your custom app’s root directory and, in a text editor of your choice, update the .env file by adding the values of your account’s cloud name and upload preset, like this:
SHOPIFY_API_KEY="YOUR_SHOPIFY_API_KEY"
SHOPIFY_API_SECRET="YOUR_SHOPIFY_SECRET"
HOST="YOUR_TUNNEL_URL"
SHOP="YOUR-SHOP-NAME.myshopify.com"
SCOPES=write_products,write_customers,write_draft_orders
CLOUDINARY_CLOUD_NAME="YOUR_CLOUDINARY_CLOUD_NAME"
CLOUDINARY_UPLOAD_PRESET="YOUR_CLOUDINARY_UPLOAD_PRESET"
-
Open the next.config.js file and add the values of your account’s cloud name and upload preset, like this:
const withCSS = require("@zeit/next-css");

const webpack = require("webpack");
const apiKey = JSON.stringify(process.env.SHOPIFY_API_KEY);
const cloudinaryCloudName = process.env.CLOUDINARY_CLOUD_NAME;
const cloudinaryUploadPreset = process.env.CLOUDINARY_UPLOAD_PRESET;

module.exports = withCSS({
  webpack: config => {
    const env = { API_KEY: apiKey };
    const env = {
      API_KEY: apiKey
    };
    config.plugins.push(new webpack.DefinePlugin(env));
    return config;
  },
  publicRuntimeConfig: {
    staticFolder: '/static',
    cloudinaryCloudName: cloudinaryCloudName,
    cloudinaryUploadPreset: cloudinaryUploadPreset
  }
});
Implementing the Product Gallery Widget
Next, follow these steps:
1. Open the index.js file in the pages folder and add the JavaScript link required by Cloudinary’s upload widget:
const Index = () => (
  <div>
    <Page>
      <script src="https://widget.cloudinary.com/v2.0/global/all.js" type="text/javascript"></script>
    </Page>
  </div>
)
2. Add a React component to list the products and enable uploading of media by creating a folder called components and a file there named ProductList.js with this code:
import {
  Card,
  ResourceList,
  Stack,
  TextStyle,
  Thumbnail,
} from '@shopify/polaris';

  const ResourceListWithProducts = () => {

    return (
      <Card>
        <ResourceList
          showHeader
          resourceName={{ singular: 'Product', plural: 'Products' }}
          renderItem={item => {

            return (
              <ResourceList.Item>
                <Stack>
                  <Stack.Item fill>
                      <TextStyle variation="strong">

                      </TextStyle>
                  </Stack.Item>
                </Stack>
              </ResourceList.Item>
            );
          }}
        />
      </Card>
    );
  }

export default ResourceListWithProducts;
Note: Later on, you’ll list your client’s products in your Shopify app with the ResourceListWithProducts React component. You’re also importing the Card, ResourceList, Stack, TextStyle, and Thumbnail React components from Shopify’s Polaris design system.
3. Obtain the store’s product list with a query through Shopify’s GraphQL API. Start with importing the gql template so that you can write a GraphQL query that is parsed into a standard GraphQL abstract syntax tree:
import gql from 'graphql-tag';
4. Declare a GET_PRODUCTS GraphQL query with the gql template:
const GET_PRODUCTS = gql`
{
  products(first: 100) {
    edges {
      node {
        id
        handle
        title
        images(first:1) {
          edges {
            node {
              id
              originalSrc
            }
          }
        }
        variants(first: 1) {
          edges {
            node {
              id
              displayName
            }
          }
        }
      }
    }
  }
}
`;
Afterwards, import the Query component from the react-apollo package to render the results returned by the GraphQL query above:
import { Query } from 'react-apollo';
5. Modify the return of the ResourceListWithProducts function so that the Query component can render its results:
const ResourceListWithProducts = () => {

  return (
    <Query query={GET_PRODUCTS}>
      {({ data, loading, error }) => {
        if (loading) return <div>Loading…</div>;
        if (error) return <div>{error.message}</div>;

        return (
          <Card>
            <ResourceList
              showHeader
              resourceName={{ singular: 'Product', plural: 'Products' }}
              items={data.products.edges}
              renderItem={item => {
                const media = item.node.images.edges.length > 0
                ? (<Thumbnail source={item.node.images.edges[0].node.originalSrc}/>)
                : (<Thumbnail source=''/>);

                return (
                  <ResourceList.Item
                    id={item.node.id}
                    media={media}>
                    <Stack>
                      <Stack.Item fill>
                          <TextStyle variation="strong">
                            {item.node.title}
                          </TextStyle>
                      </Stack.Item>
                    </Stack>
                  </ResourceList.Item>
                );
              }}
            />
          </Card>
        );
      }}
    </Query>)
}

export default ResourceListWithProducts;
6. Obtain your Cloudinary credentials from your app and import the getConfig function from Next.js:
import getConfig from 'next/config';
Afterwards, obtain the publicRuntimeConfig function from the getConfig function:
const { publicRuntimeConfig } = getConfig();
7. Add a function named uploadMediaClick to the ResourceListWithProducts component:
const ResourceListWithProducts = () => {

  const uploadMediaClick = (productId) => {

    const productIdNumber = productId.split('/')[productId.split('/').length - 1];

    var myWidget = cloudinary.createUploadWidget({
      cloudName: publicRuntimeConfig.cloudinaryCloudName,
      upload_preset: publicRuntimeConfig.cloudinaryUploadPreset,
      showAdvancedOptions: true
    }, (error, result) => { if (result.event == "success") {

      console.log(result.info);
  } })

  myWidget.update({tags: [productIdNumber]});
  myWidget.open();
}
8. Modify the list details by adding a button followed by an upload of product-related media:
<ResourceList.Item
  id={item.node.id}
  media={media}>
  <Stack>
    <Stack.Item fill>
        <TextStyle variation="strong">
          {item.node.title}
        </TextStyle>
    </Stack.Item>
    <Stack.Item>
      <button
      name="upload_widget"
      className="cloudinary-button"
      onClick={uploadMediaClick.bind(this, item.node.id)}>Upload media</button>
    </Stack.Item>
  </Stack>
</ResourceList.Item>
Note that the button’s click event calls the uploadMediaClick function you created earlier.
Using the ProductList Component
Proceed with these steps to make use of the ProductList component:
1. Open the index.js file under the pages folder again and import the ProductList component you just created:
import ProductList from '../components/ProductList';
2. Add the ProductList component to the index page:
const Index = () => (
  <div>
    <Page>
      <ProductList />
      <script src="https://widget.cloudinary.com/v2.0/global/all.js" type="text/javascript"></script>
    </Page>
  </div>
)
3. Compile and install your app on the development store with Shopify’s serve command:
...\YOUR-APP-DIRECTORY> shopify serve
The Shopify CLI now compiles and launches your custom app locally:
√ ngrok tunnel running at https:
√ .env saved to project root
? Do you want to update your application url? (You chose: yes)
√ Whitelist URLS updated in Partners Dashboard
* To install and start using your app, open this URL in your browser:
https:
┏━━ Running server... ━━━━━━━━━━━━━━━━━━━━━━━━━━━━━━━━━━━━━━━━━━━━━━━━━━━━━━━━━━
┃
┃ > shopify-app-node@1.0.0 dev YOUR-APP-DIRECTORY
┃ > cross-env NODE_ENV=development nodemon ./server/index.js --watch ./server/index.js
┃
┃ [nodemon] 2.0.6
┃ [nodemon] to restart at any time, enter `rs`
┃ [nodemon] watching path(s): server\index.js
┃ [nodemon] watching extensions: js,mjs,json
┃ [nodemon] starting `node ./server/index.js`
┃ Loaded env from YOUR-APP-DIRECTORY\.env
┃ Warning: Built-in CSS support is being disabled due to custom CSS configuration being detected.
┃ See here for more info: https:
┃
┃ event - compiled successfully
┃ > Ready on http:
Note that the Shopify serve command generates this URL, which you can open in your browser to install and start using your app:
https://XXXXXXXXXXXX.ngrok.io/auth?shop=cloudinaryapp.myshopify.com
Alternatively, open another command-line console and type this command to start your app:
...\YOUR-APP-DIRECTORY> shopify open
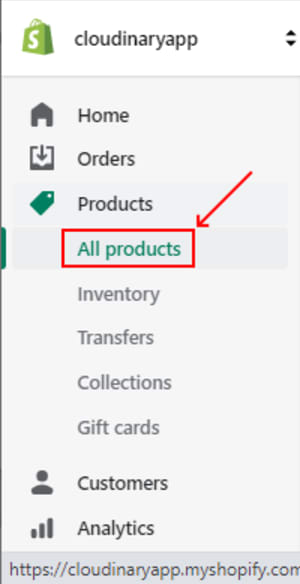
Next, follow the steps below to create two product entries on your Shopify admin website:
- Ballet Dance Shoes
- Short-Sleeve T-Shirt
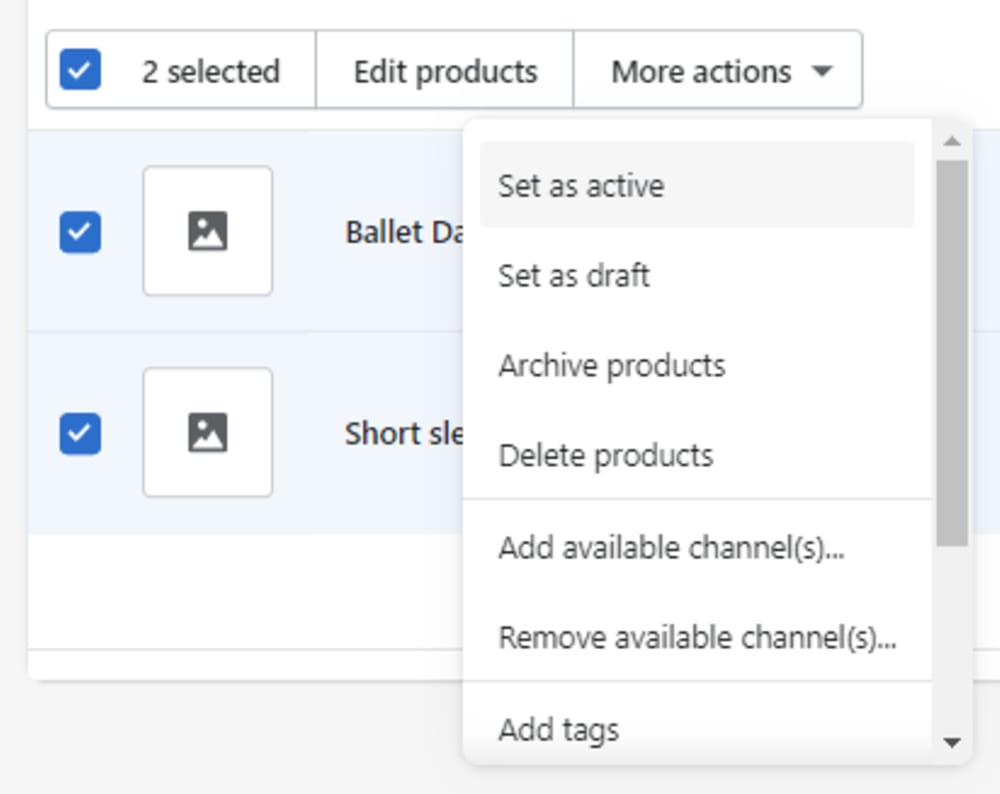
- Select both entries and choose Set as active from the More actions menu so that they appear in the store’s catalog.
- Click Ballet Dance Shoes for the product details. Note that the URL ends with the
product ID 6065347199138.

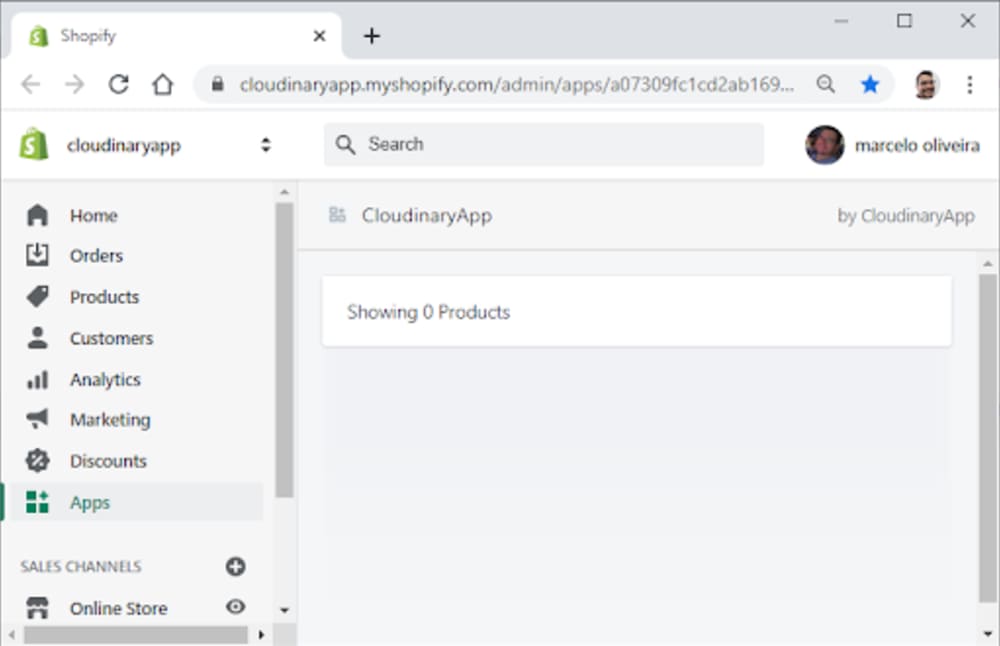
- Next, click Apps on the left and select the name of your custom app (in this case CloudinaryApp) for a display of the two product entries you just added.
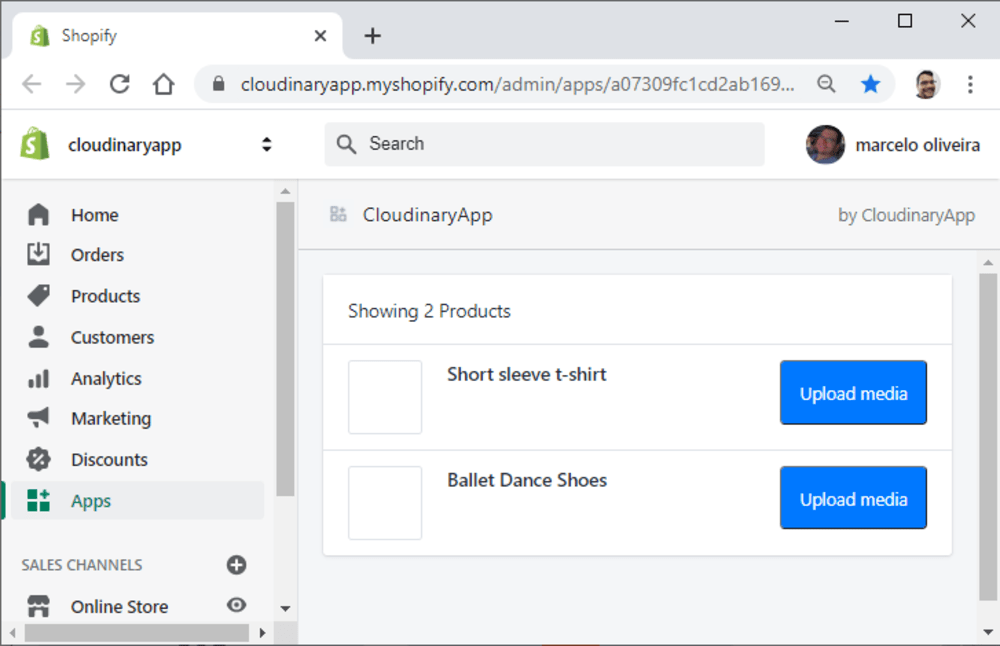
- Click Upload media under Ballet Dance Shoes for the dialog box of Cloudinary’s upload widget.
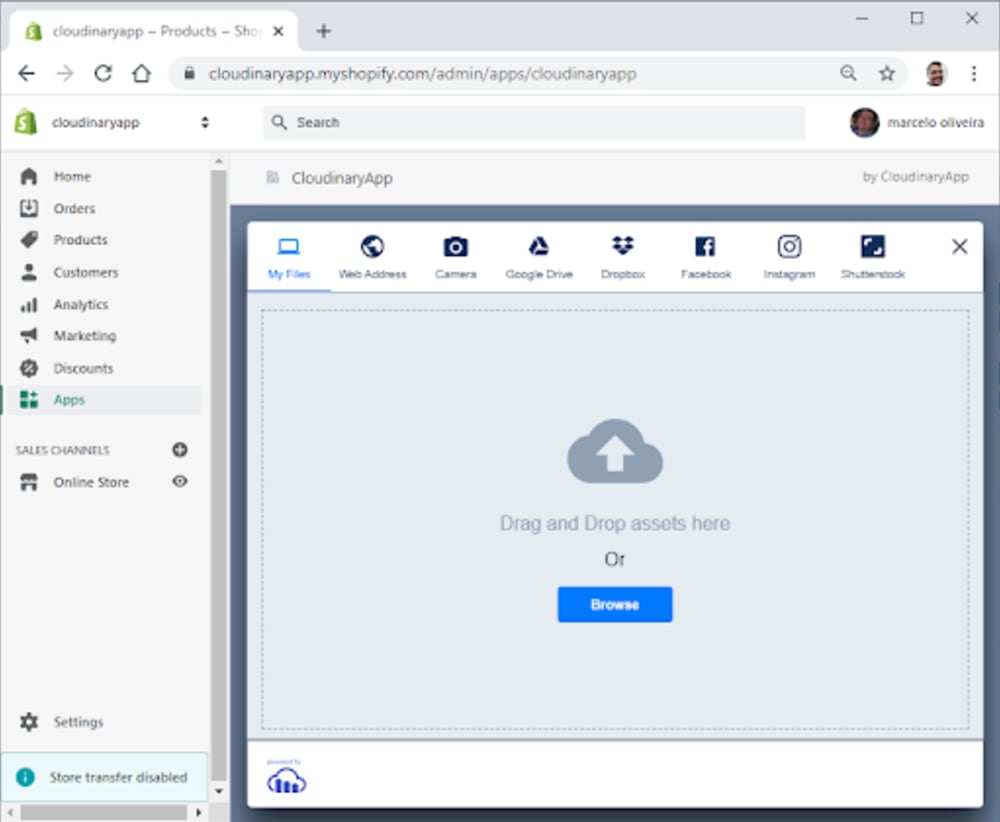
- Click Browse and select a few images and videos that relate to Ballet Dance Shoes.
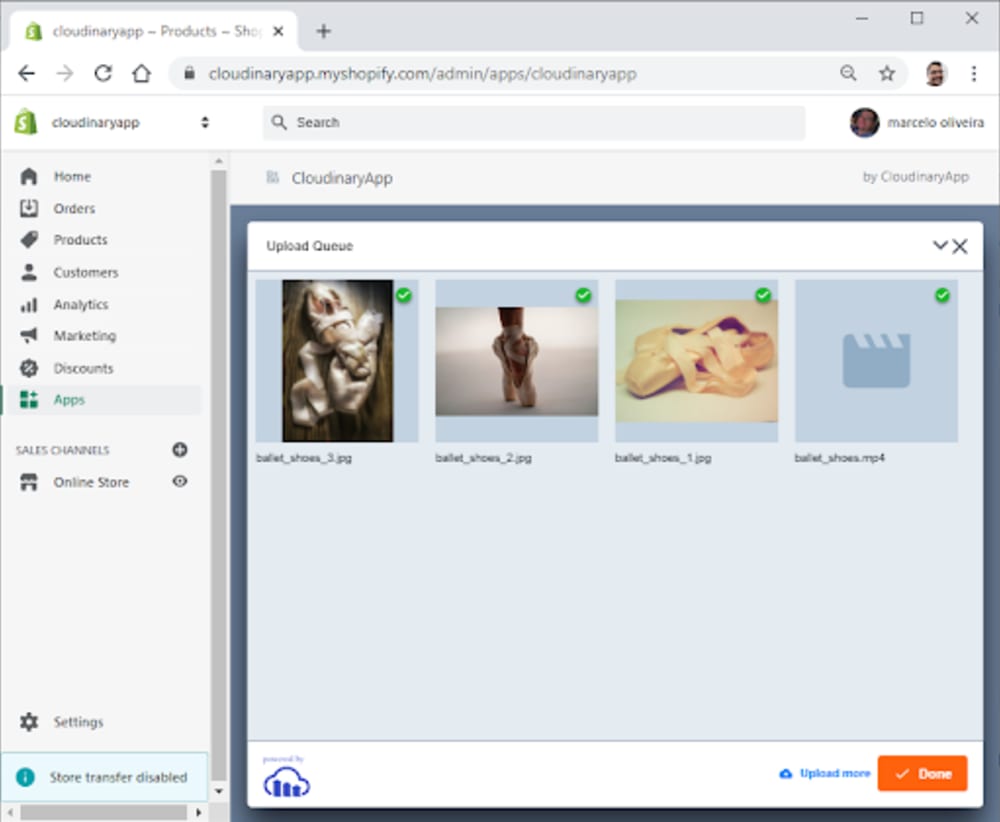
The four media files above have already been uploaded to Cloudinary, each tagged with a Shopify product ID.
- Open your Cloudinary Dashboard to see those files.
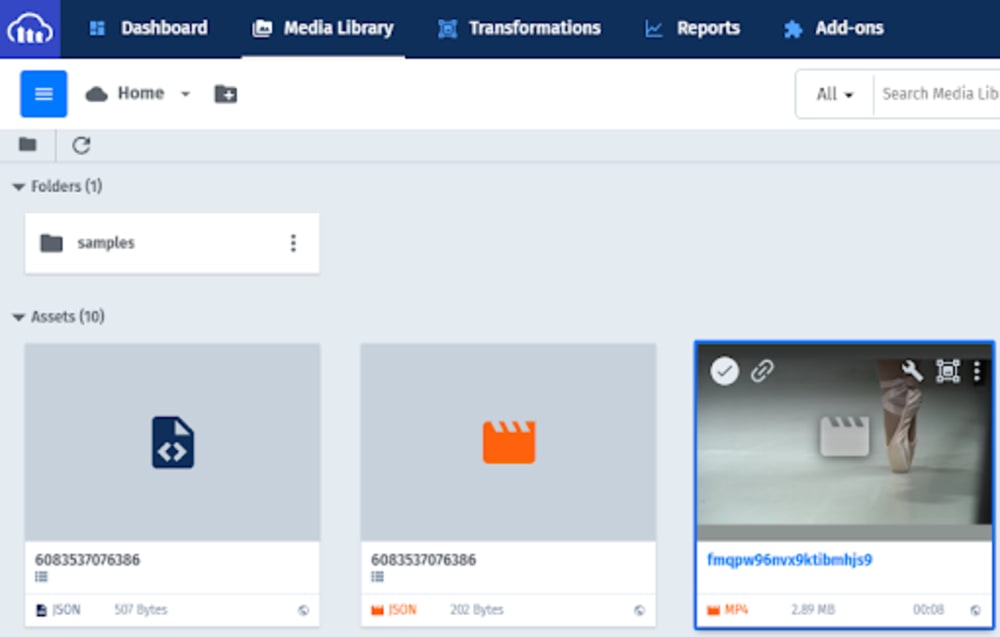
- Open one of the files and verify that it’s tagged with
6065347199138, Shopify’s product ID for Ballet Dance Shoes.

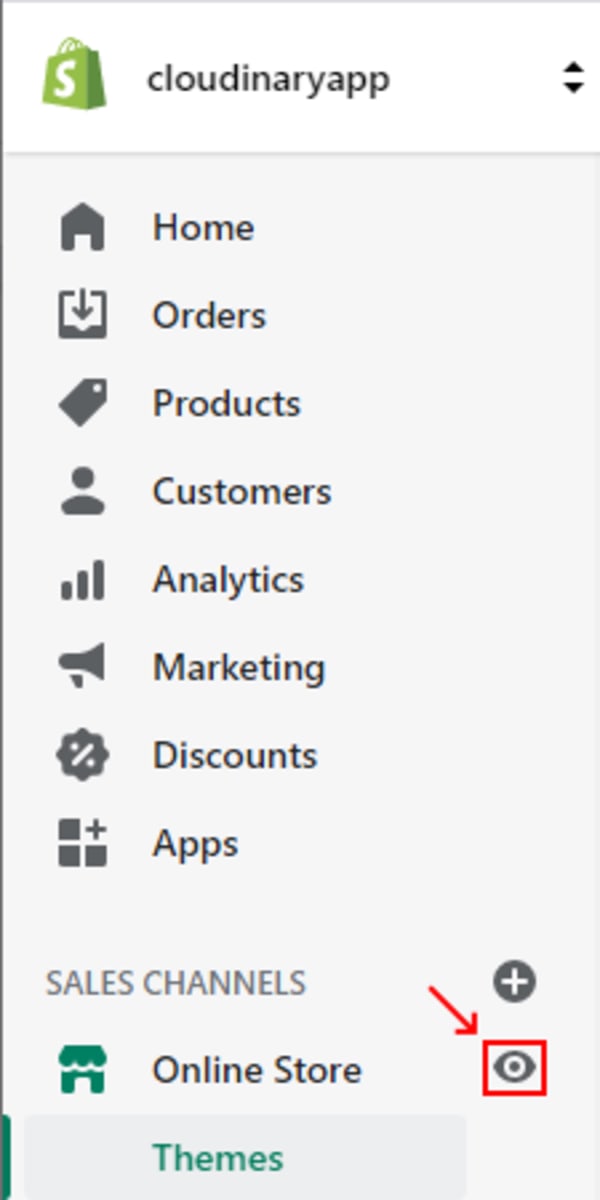
- Click the eye icon to the right of the Online Store to open your store’s website.
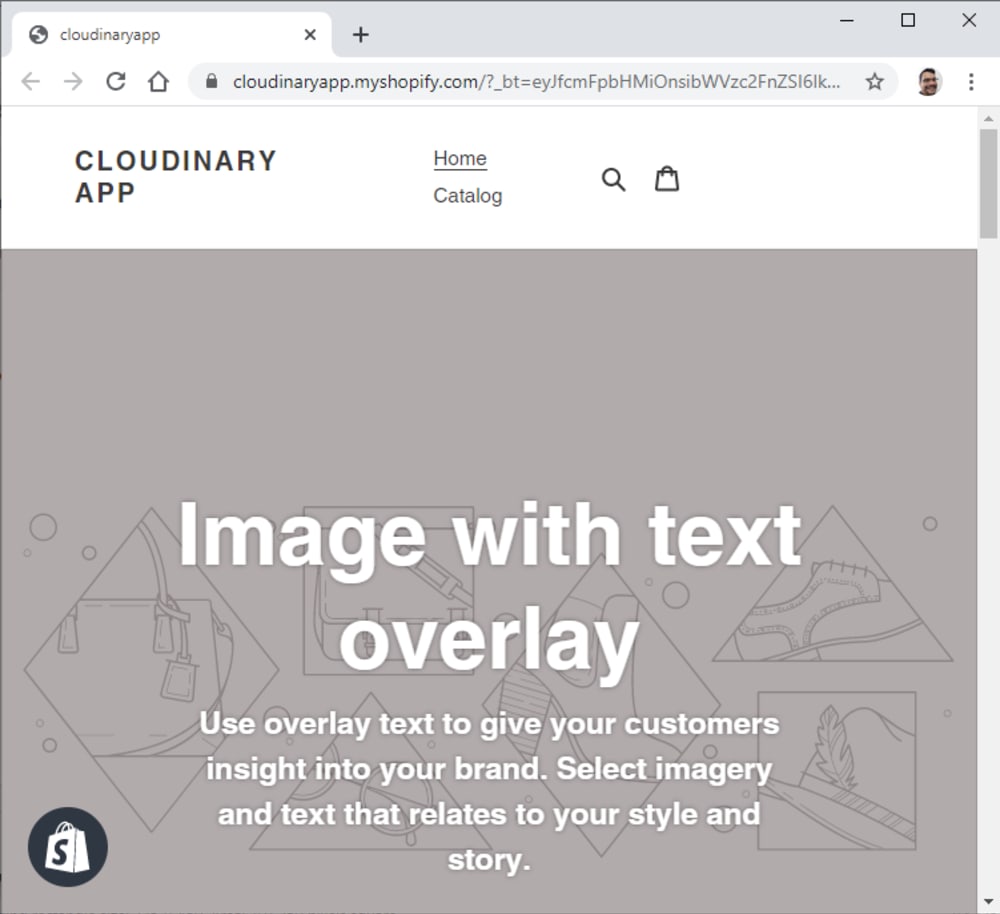
- Click the Catalog link at the top of the home page:

- Click Ballet Dance Shoes for its details page.
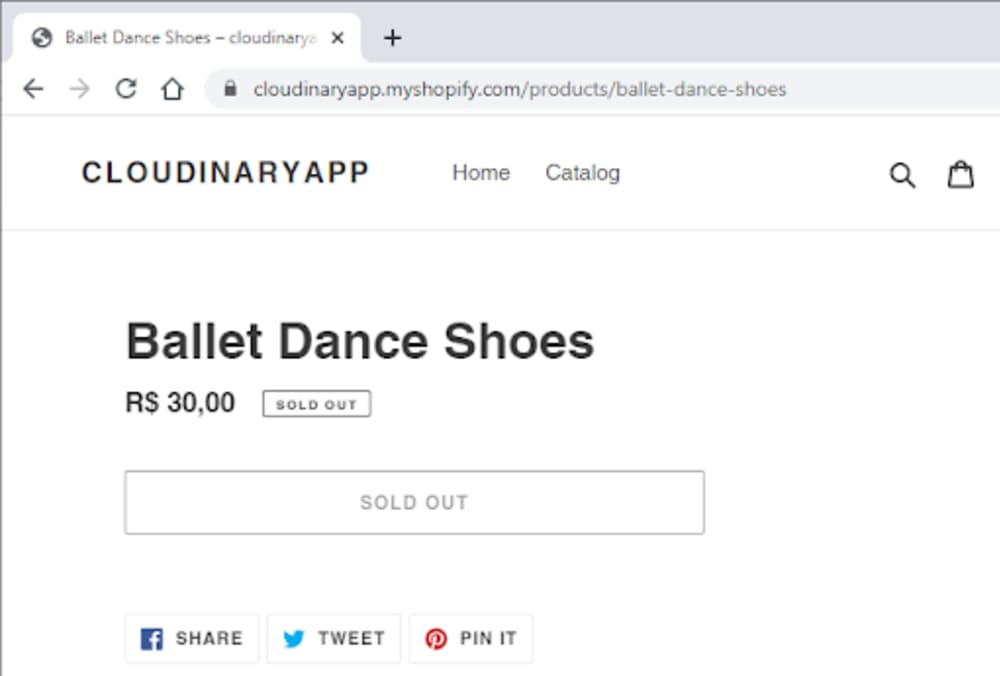
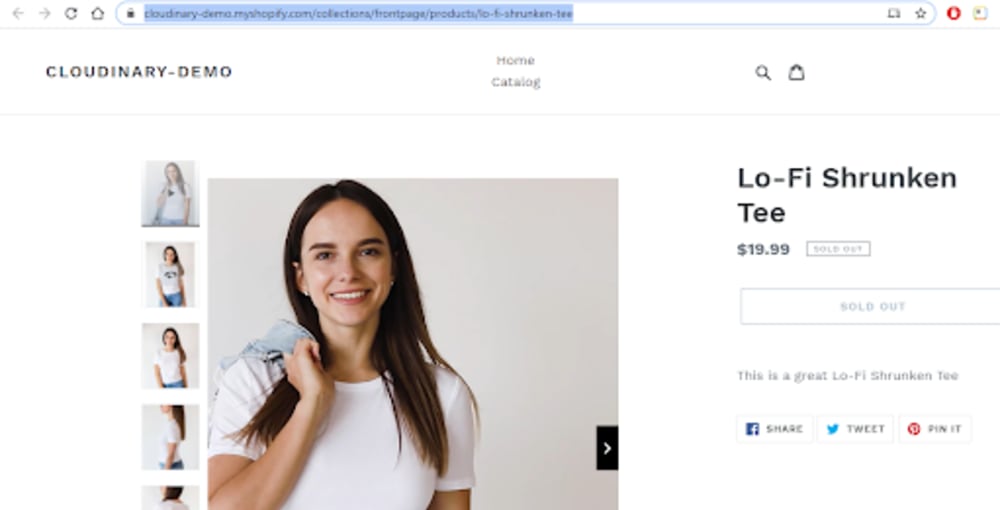
No related media is displayed. Edit a few Shopify templates to show the product images and videos, as in this sample Shopify website:
Modifying the Theme for Your Shopify Store
Since the Shopify platform knows nothing about your Media Library on Cloudinary, you must modify a Shopify theme file, e.g., the one called Debut, to store your Cloudinary credentials and leverage the Cloudinary Product Gallery. Follow these steps:
- Open your Shopify admin dashboard and click Themes.

- Click Explore free themes under Free themes, select the Debut theme, and add it to your theme library:

- Pull down the Actions menu to the right of the Debut name and choose Publish.

Adding Cloudinary Settings to Your Shopify Installation
Next, download from Cloudinary this ZIP file, which contains all the code changes you must make for Shopify's Debut theme. Cloudinary offers a collection of such files, from which you can conveniently copy and paste Cloudinary-specific code into your own themes.
To apply changes to the Debut theme:
- Log in to your Shopify admin console, navigate to Online Store > Themes and choose Actions > Edit code for the theme you want to change.

- Select the settings_schema.json file in the Config folder and then, from settings_schema.json in the ZIP file, copy and paste to the file the block with
"name": "Cloudinary".

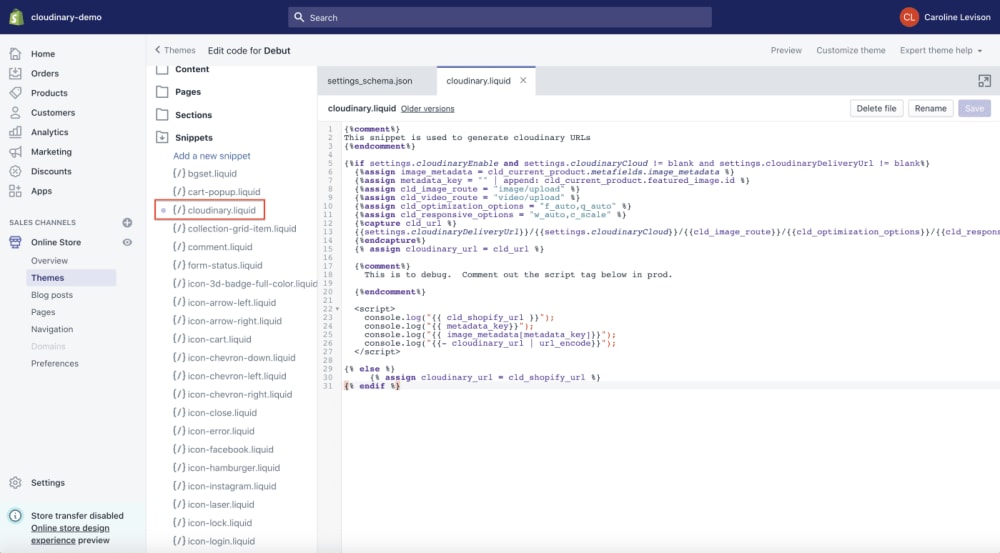
- Under Snippets, click Add a new snippet and name it
cloudinary.liquid. Copy and paste to the snippet the entire content of cloudinary.liquid in the ZIP file.
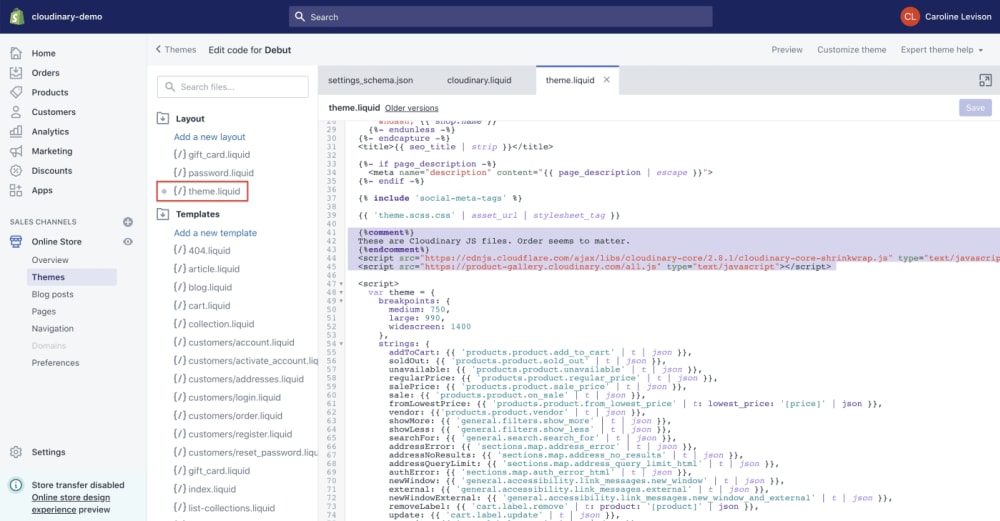
- Select
theme.liquid under the Layout folder. From theme.liquid in the ZIP file, copy and paste the code to add Cloudinary’s JavaScript files.
- Select
product-card-grid.liquid under the Snippets folder. From product-card-grid.liquid in the ZIP file, copy and paste the entire block to the snippet, starting from the comment "This whole block is to get Cloudinary urls."

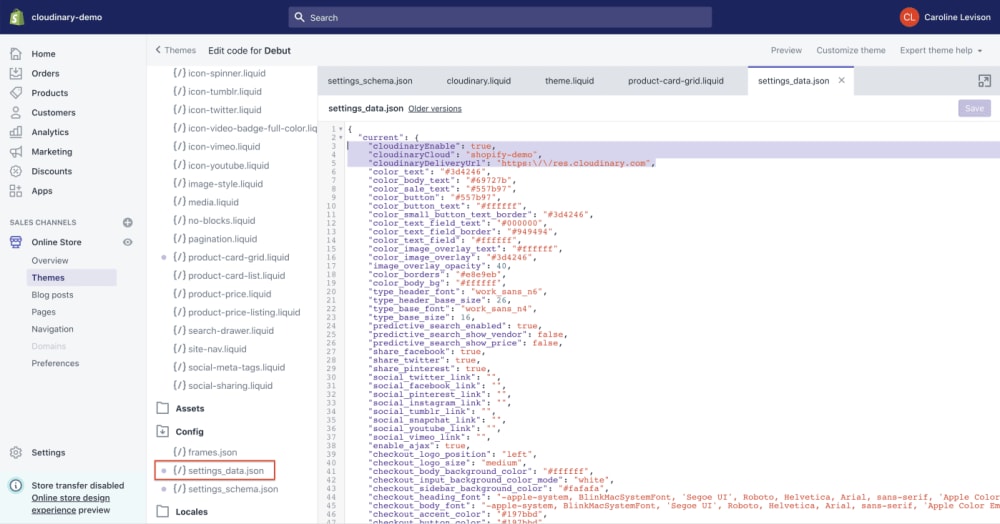
- Select the
settings_data.json file under the Config folder. From settings_data.json in the ZIP file, copy and paste to the file the Cloudinary settings at the top and replace shopify-demo with your cloud name.
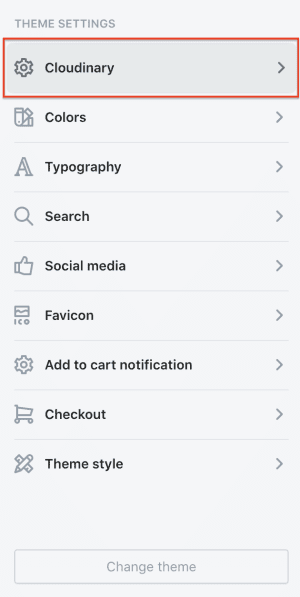
- Navigate to Online Store > Themes and choose Actions > Edit in the online store for the theme you just changed. You'll see Cloudinary under Theme Settings.
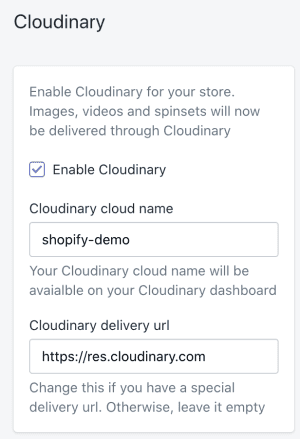
- In the Cloudinary settings dialog box, configure whether to enable asset delivery from Cloudinary. Alternatively, specify a different cloud and change your delivery URL to the corresponding one.
Leveraging Cloudinary's Product Gallery
The same ZIP file you used in the previous section includes the code for integration with Cloudinary's Product Gallery. Your goal is to replace Shopify’s product gallery with Cloudinary’s on each of the product pages.
Once you’ve completed the edits, Cloudinary automatically adds to each product gallery all the media, tagged with the related product IDs, from the configured Cloudinary account. You need not upload those assets to Shopify—a tremendous convenience! Note, however, that the order of images is important in galleries; be sure to verify it's correct.
Do the following:
- Go back to the code editor and select
product-template.liquid in the Sections folder. From product-template.liquid in the ZIP file, copy and paste the code from the comment "Cloudinary product gallery" to "Cloudinary changes end.”

- Select
theme.scss.liquid in the Assets folder. From theme.scss.liquid in the ZIP file, copy and paste the CSS in the comments that start with /* Cloudinary changes.

- By default, Cloudinary’s Product Gallery cannot access your media files. To grant that access, navigate to your management console's dashboard on Cloudinary, click the Settings icon (⚙), click the Security tab, and deselect Resource List under Restricted media types.

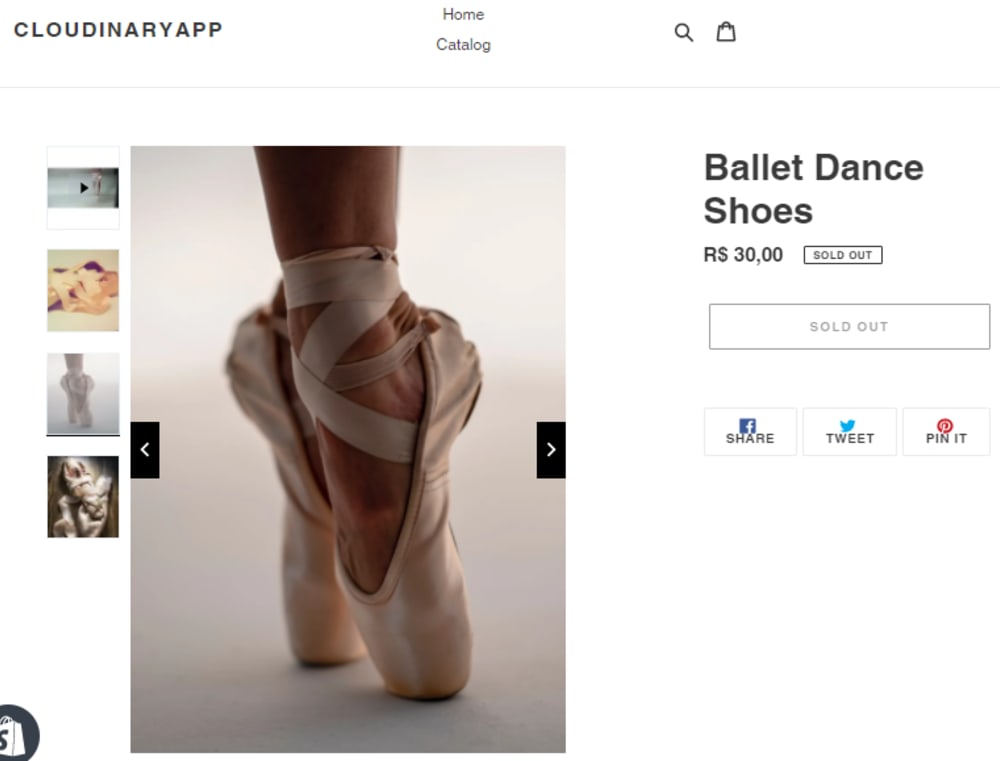
- Now open your Shopify admin dashboard, go to Products, and select Ballet Dance Shoes for the details. Magically, displayed in the gallery are the images and videos you’ve associated with the product, as in this example:
Moving on to the Next Steps
You just learned how easy it is to integrate video into a custom Shopify app with the Cloudinary and Shopify APIs. And, you're just getting started.
Consider the huge volume of transformations you can apply with Cloudinary's API after uploading a video but before making it visible on a Shopify product page. Cloudinary covers almost all the video-integration scenarios you’ll likely encounter as an e-commerce developer and works with major e-commerce platforms like Magento and BigCommerce.
With Shopify apps, you can offer e-commerce clients robust and effective administration features. For details on how to properly integrate apps with APIs, see GraphQL Admin API reference and Shopify REST Admin API reference.
Additionally, you can configure Cloudinary Product Gallery in many ways. Watch this demo and then try out some of the customization options yourself.
Cloudinary’s video tools help distinguish your Shopify app and your client’s store from the crowd, complete with a superior UX for customers and store owners alike. Again, to incorporate Cloudinary’s video tools into your app, first register for a free account.
Integrate Cloudinary Into Your Shopify Store
Already have a Shopify store and are looking how to better optimize your page with Cloudinary? Check out the below resources to start optimizing your performance budget.
