In our last article, we used Azure Active Directory B2C’s cloud-managed authentication to add a user login to our cloud-native application. Since your application should focus on its core competencies, and outsource other processes, this time we’ll integrate some of Azure’s cloud artificial intelligence services into our application with just a couple of lines of code. Perhaps it will inspire you to explore the possibilities of cloud-native applications even further!
Azure Cognitive Services
Azure Cognitive Services makes sophisticated and powerful artificial intelligence incredibly easy to use through the cloud. You don’t need to invest in hardware for large-scale computational power or the data and time necessary for training an AI. Azure provides a variety of different AI capabilities, ranging from natural language processing (NLP) technologies, for text and speech analysis, to computer vision, including face and object detection.
Explore Azure’s wide range of APIs and check out some fun and useful Azure projects. You may notice how using these services makes it quick and easy to integrate highly complex AI into projects.
For this article, let’s use the Text Analytics and Language Translation services in our application.
Setting up the Project
The starting point for this project is where the previous article left off with job listings and authentication. Take a look and fork this repository as the starting point if you need.
If you like skipping ahead to the final code first, to know what to expect, you can find the full repository on GitHub.
Job Description Analysis
Text Analytics is an NLP service that uses AI to infer and extract information from text data. It enables us to do things like detect the text language, anticipate the positive or negative sentiment of articles, and even extract key phrases and terms from paragraphs or entire research papers. To learn more about text analytics and natural language processing, check out Microsoft’s documentation.
Let’s apply these analytics to our application.
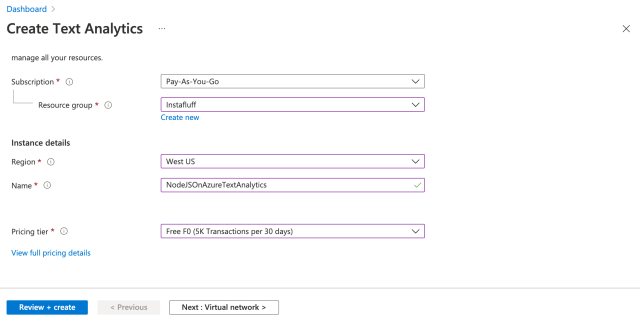
First, create a Text Analytics resource and name the resource. You can use the free F0 tier to try the service with 5,000 free transactions per month.
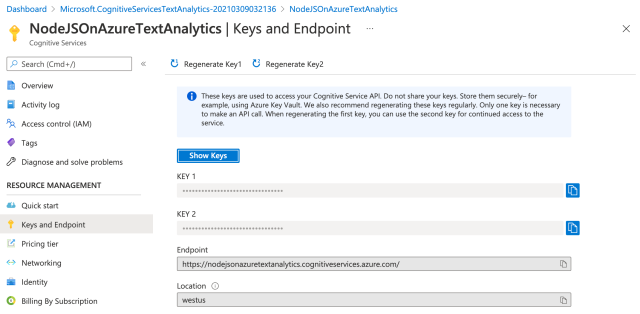
Open the resource and copy one of the two API keys provided in the Keys and Endpoint page. You will use this key and the endpoint to call the Text Analytics API from code.
In the jobs folder for the Jobs Cache process, install the Text Analytics library by running:
npm install @azure/ai-text-analytics@5.1.0-beta.3
Import Text Analytics and set up the client object in index.ts. Be sure to replace the values for the textAnalyticsKey and textAnalyticsEndpoint with the text copied from the resource, so the service connects properly:
import { TextAnalyticsClient, AzureKeyCredential } from "@azure/ai-text-analytics";

const textAnalyticsKey = "SECRET KEY";
const textAnalyticsEndpoint = "TEXT ANALYTICS ENDPOINT";
const textAnalyticsClient = new TextAnalyticsClient( textAnalyticsEndpoint,  new AzureKeyCredential( textAnalyticsKey ) );
Let’s add three new APIs using the Text Analytics client: sentiment detection, language detection, and key phrase extraction.
Web.APIs[ "/sentiment" ] = async ( qs, body, opts ) => {
    const sentiment = await textAnalyticsClient.analyzeSentiment( [ qs.text ] );
    return sentiment;
};

Web.APIs[ "/language" ] = async ( qs, body, opts ) => {
    const language = await textAnalyticsClient.detectLanguage( [ qs.text ] );
    return language;
};

Web.APIs[ "/phrase" ] = async ( qs, body, opts ) => {
    const phrases = await textAnalyticsClient.extractKeyPhrases( [ qs.text ] );
    return phrases;
};
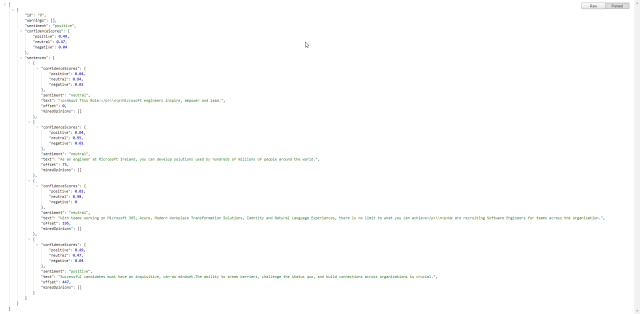
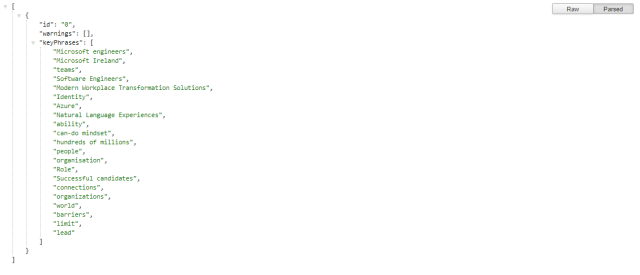
You can test these APIs locally with a job listing description by passing in the text as a query string parameter. For example, the sentiment analysis output from the local endpoint at http://localhost:8081/sentiment provides the overall sentiment and confidence scores and breaks down the text into different sentences with individual analyses. You can also test the API output with the /language and /phrase endpoints.
Here is an example link you can try:
http://localhost:8081/sentiment?text=<p>About This Role:</p>\n<p>Microsoft engineers inspire, empower and lead. As an engineer at Microsoft Ireland, you can develop solutions used by hundreds of millions of people around the world. With teams working on Microsoft 365, Azure, Modern Workplace Transformation Solutions, Identity and Natural Language Experiences, there is no limit to what you can achieve</p>\n<p>We are recruiting Software Engineers for teams across the organisation. Successful candidates must have an inquisitive, can-do mindset.The ability to break barriers, challenge the status quo, and build connections across organizations is crucial.

You have now added powerful AI text analysis to your application. Now, if you like, take this code a step further and integrate it directly with the main job listing web page.
Translating Job Descriptions
Another API we’ll integrate into this project is Azure Translation. This API provides real-time text translation supporting 90 different languages and dialects. It helps break language barriers for any business, so it’s a potential game-changer to "go global" with your application. Let’s use it to translate job descriptions from our listings.
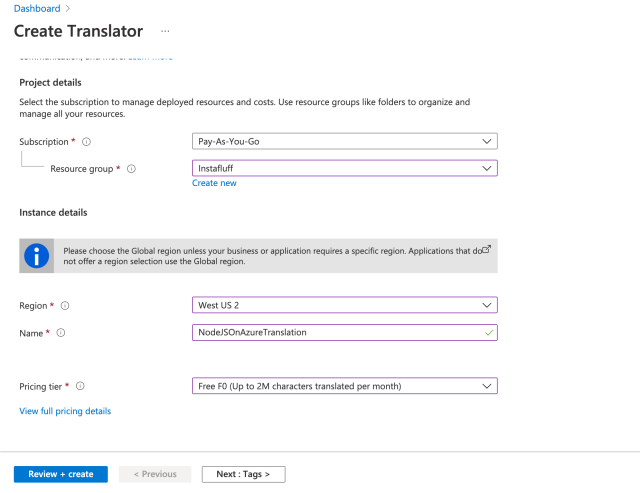
To add Azure Translation to your Node.js application, first create a Translator resource and name the resource. You can use the free F0 tier to translate up to two million characters per month.
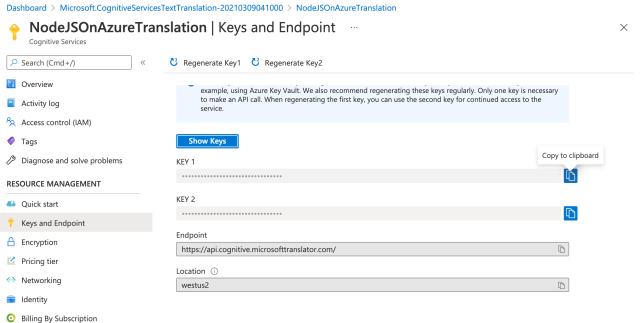
Next, open the resource and copy either one of the two API keys provided in the Keys and Endpoint page. We need the key, endpoint, and location to call the Translation API from the code.
In the index.ts file inside the jobs folder containing the Jobs Cache process, add the credentials and a translation helper function:
const translationKey = "TRANSLATION KEY";
const translationEndpoint = "TRANSLATION ENDPOINT";
const translationRegion = "TRANSLATION LOCATION";

async function translate( text, to ) {
    let translation = await fetch( `${translationEndpoint}translate?api-version=3.0&to=${to}`, {
        method: "POST",
        headers: {
            "Ocp-Apim-Subscription-Key": translationKey,
            "Ocp-Apim-Subscription-Region": translationRegion,
            "Content-type": "application/json",
        },
        body: JSON.stringify([{
            "text": text
        }])
    } ).then( r => r.json() );
    return translation;
}
Let’s add a new API to translate text to any supported language specified in the query string:
Web.APIs[ "/translate" ] = async ( qs, body, opts ) => {
    const translation = await translate( qs.text, qs.to );
    return translation;
};
Test this API locally with a job listing description by passing in the text and target language as query string parameters. The API detects the text language and provides the translation.
For example, open this URL to test a job description translation from English to French: http://localhost:8081/translate?to=fr&text=<p>About This Role:</p>\n<p>Microsoft engineers inspire, empower and lead. As an engineer at Microsoft Ireland, you can develop solutions used by hundreds of millions of people around the world. With teams working on Microsoft 365, Azure, Modern Workplace Transformation Solutions, Identity and Natural Language Experiences, there is no limit to what you can achieve</p>\n<p>We are recruiting Software Engineers for teams across the organisation. Successful candidates must have an inquisitive, can-do mindset.The ability to break barriers, challenge the status quo, and build connections across organizations is crucial.

With Azure’s translation AI at your fingertips, languages are no longer an obstacle for your job listings. How about integrating it directly with the main web page to display jobs in the user’s preferred language?
The final code for this project is available on GitHub.
Wrapping Up
Congratulations, you’ve made it to the end of this series!
First, we deployed an Azure Functions app to work together in a Kubernetes pod and automated pod deployment using an Azure DevOps pipeline. Then, we added monitoring to the containerized Kubernetes app and enabled scaling to meet demand. From there, we protected access to our app with Azure AD’s cloud-based authentication. Finally, in this article, we explored Azure AI’s capabilities by analyzing and translating text.
This is only the beginning of your adventure in building cloud native Node.js applications. Now that you’re officially cloud native, you can easily create your own authenticated and automated app with powerful AI tools like content moderation, speaker recognition, emotion detection, and much more.
Thank you for taking this journey from zero to cloud native on Azure. We hope it inspires you to create more and do more with these technologies!
To learn more about creating cloud-native applications with Kubernetes and Azure, explore The Kubernetes Bundle and Hands-On Kubernetes on Azure.
