Ray tracing implementation based on Peter Shirley's Ray Tracing books, but going beyond those. Object files loading, textures, Beer-Lambert law, Phong model and so on.
Introduction
The idea of this project came at the time when Nvidia released the RTX graphic cards. I've seen lots of comments on various sites about them and realized that many people do not understand what Ray Tracing is about. Since it has Monte Carlo, including importance sampling and obviously it is related with optics, I thought it would be a nice addition to the projects. The project is not about how it’s implemented by Nvidia, they had to use some ‘tricks’ to have it working in real-time, for example the number of reflections is cut out drastically, the number of rays/pixel is limited, the scene for ray tracing might be smaller than the normal one, the noise is eliminated by using ‘AI’, the model is a hybrid, using both rasterization and ray tracing and so on… The project is about regular ray tracing.
Program in Action
Usually, I record a movie showing the program during execution, but now I changed the code to record an animation, frame by frame, so I show that instead:
This is how I generated the movie from the frames, using gstreamer:
gst-launch-1.0 multifilesrc location="c:\\temp\\frame%06d.jpg"
caps="image/jpeg,framerate=30/1" ! jpegdec ! x264enc pass=quant ! avimux !
filesink location="out.avi"
For the program execution, you’ll have to compile the code and look at it yourself, hopefully the UI is not a big deal, it allows you to generate either the ‘one weekend’ scene, a Cornell box or some other scene that allows you to specify a sky box and some obj file to load. The generated image can be saved in several image format files.
Some Theory
This time, I started by looking for articles, blog posts and so on before jumping onto implementing the project, I knew that there is a lot to find about it on the internet. Indeed there is a lot, so I won’t repeat it here, instead I will point out links to useful info.
The most important is that I found some free books by Peter Shirley which were very helpful. You may find his GitHub repositories very useful. I did not look into those when implementing the project, but the resemblances you may find are not a coincidence, you’ll have to parse the books to find out why.
Here are some other links you may want to check if you look into the project:
Of course, those are only a start, you should find plenty of information starting from those links, though.
Some Images Generated While Developing and Testing
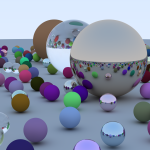
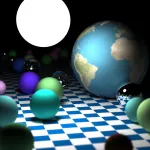
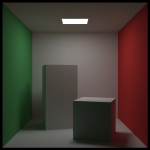

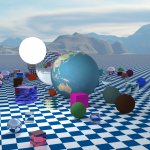
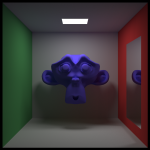
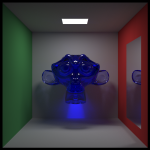

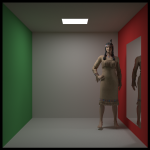
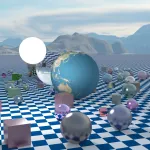
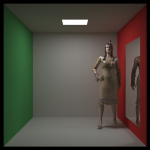
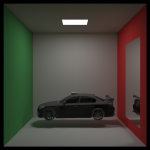

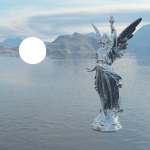
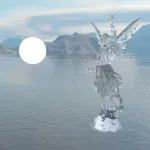
The Code
Generalities
I followed the books quite carefully, although I skipped some more boring parts for me, as textures generation and motion blur, they are straightforward to implement. I chose some different class hierarchy and naming, also there are changes in implementation. Sometimes I chose something faster, as it is the case of ray intersection with the bounding box, sometimes out of convenience I chose a slower implementation, like the rotation for the rectangles. I chose to have a different class for colors, I used the vector class implementation that is already used in some projects for this blog and I used double instead of float for values. It does not make such a big difference in speed, the advantages from a better precision are more important. I also used smart pointers a lot and a C++ random number generator. The only library used is for UI: wxWidgets. I went beyond the ‘rest of your life’ book, first I added triangles to objects, they I added an obj file loader. I thought about using the tinyobjloader library, but I preferred to implement my own. With some changes, I might use it in the future in some other projects that use OpenGL. Maybe I’ll also enhance it in time, because it has various issues, one of the biggest is that it cannot load properly concave polygons.
Namespaces and Classes
In order to understand the code, you’ll have to look over it and also over Perter Shirley’s books and referenced articles. I will describe here the namespaces and classes, very briefly.
The Camera class is similar to the one I used in the projects that use OpenGL, but simplified, with the addition of getRay function. Vector3D is the same as in the other projects, Color is a very simple class that contains r, g, b components. The ObjLoader class is obviously for loading obj files. It’s not portable and far from perfect, I wrote it very quickly, but it works in many cases. It can load not only the objects but also materials, with colors and textures. OrthoNormalBasis is for the local ortho normal basis. To see how it is used, check out for example the AnisotropicPhongPDF::Generate function. PointInfo and ScatterInfo are for some objects that are passed along, containing useful information. Random is for what the name suggests, it can generate various random number distributions. It uses std::mt19937_64. Ray represents, as you guessed, a ray and contains the origin and direction, together with the inverse of direction which is used to speed up computations. Scene implements the scene, it’s derived from Objects::VisibleObjectComposite and its main function is the one for ray casting, RayCast.
There are several namespaces in the project, separating classes depending on their purpose. The BVH namespace is for bounding volume hierarchy classes, it contains the AxisAlignedBoundingBox class and the BVHNode class. Materials contains material classes, such as Dielectric, Metal, Isotropic, Lambertian and AnisotropicPhong. Objects contains the objects such as Triangle, Sphere, Box and so on. PDFs contains probabilistic density function classes like CosinePDF and AnisotrophicPhongPDF. Textures contains texture classes like ColorTexture and ImageTexture. Actions contains some classes for transformations that could be applied on some objects, like TranslateAction or FlipNormal.
There are some other classes that are for UI implementation, options and so on, I’ll let you discover those in the project.
Some Resources
I’ve got some obj files for tests and displaying from here: free3d. I downloaded the sky boxes from here. The ‘Earth’ texture I used for some generated images is the same I used in the Newtonian Gravity project, so you can visit that page for a download link.
Conclusions
Such a program could be extended indefinitely. I would first try to improve its performance. Probably it could benefit from a better bounding volume hierarchy construction. If I would have patience and time, I would also go for some other performance enhancements. For example, I used the already built-in rotation in vector implementation, computing it again and again for rectangles, instead of caching the cosines and sines as in the book. That’s not exactly optimal. I bet the program could benefit from many such optimizations. Since the random number generation is used a lot, probably a faster number generator would help, but I guess it’s quite hard to find a good faster one than the one I used. If you find one, please let me know.
I would also switch to a spectral rendering, this way you could have truly realistic refractions, for example. Here is a nice way to start: Lazy spectral rendering on Peter Shirley’s blog. Spectral rendering was one reason why I have a Color class in the project instead of using the vector class as in the books. During development, I also found a problem in the last book and associated project, so I signaled it: Importance Sampling issue. You can see the issue in action in the book, too, it manifests itself by those black dots in the images and it required the deNaN cleaning that is also described in the book. That’s why I love open source, people can contribute, they get something for free and give something in return. Thanks to Peter Shirley for sharing his experience!
As usual, if you have suggestions or you find bugs, please let me know, either here or on GitHub.
The post Ray Tracing first appeared on Computational Physics.
