Here we start by exploring key usage scenarios, then explain Azure ML on Azure Arc means organizations no longer have to choose between Azure ML or on-prem, and finally, show how to deploy the Azure ML Arc Kubernetes extension and connect to our cluster from the Azure ML portal.
Over the past few years, digital adoption curves have accelerated across all industries. Organizations are developing cloud-native patterns to enhance digital capabilities, improve time to value, reduce cost, and increase agility. However, implementing machine learning operations (MLOps) models is still challenging since the existing tools do not support the new cloud-native patterns.
To bring the flexibility of cloud-native development and infrastructure to machine learning (ML) applications, Kubernetes is becoming a popular choice for most enterprises. It helps run, orchestrate, and scale models efficiently, separate from their dependencies. Kubernetes enables you to run machine learning services on any hardware without compatibility issues and without updating or replacing dependencies each time.
Although there are many open-source ML tools for Kubernetes, setting up infrastructure and deploying data science productivity tools and frameworks takes significant time and effort. Moreover, provisioning, governing, and maintaining these Kubernetes clusters in data centers, on the edge, and in multi-cloud environments brings new compatibility, networking, and other challenges.
To cope with such challenges, Microsoft offers Azure Arc-enabled machine learning. This approach brings the Azure Machine Learning (AML) service’s open architecture to any infrastructure using Kubernetes. Azure Arc-enabled machine learning allows us to extend AML deployment capabilities to Kubernetes clusters on the hardware of our choice. This flexibility helps us deploy and serve the model in hybrid cloud environments and on-premises.
AML enables us to train machine learning models close to where we’re managing our data while ensuring complete consistency between the cloud and the edge. Its design helps IT operators leverage native Kubernetes concepts to operate, use, and optimize ML setups. Since IT operators are responsible for the setup, ML engineers and data scientists can work with ML tools and focus on training models.
This article is the first part of a three-part series that provides hands-on tutorials teaching how to use an Arc-enabled Kubernetes cluster to run and manage Azure ML workloads.
This article explains why ML and MLOps practitioners want to use Azure Arc for machine learning. It explores key scenarios, including companies that love the streamlined workflow that AML provides but want to run an on-prem GPU-enabled machine cluster to train ML models. Other companies may prefer to work in the cloud, but compliance obligations require them to keep training data and models on-premise.
Finally, this article demonstrates how to deploy the AML Arc Kubernetes extension and connect to a cluster from the Azure ML portal.
Exploring Use Cases
In practical machine learning workloads, various scenarios have different infrastructure requirements for training and deploying ML solutions. Regulated industries like the financial industry must comply with security standards and keep their training data and models on their premises. Banks frequently run risk-modeling predictions for fraudulent transactions and credit risk and rely heavily on machine learning models.
The same holds for healthcare organizations that depend on machine learning for vital operations like medical imaging analysis and diagnostics. Compliance obligations require these organizations to keep training data and models on-premises. However, these solutions often have limited capacity and require more powerful hardware to run on the cloud.
In another example, Internet of things (IoT) sensors generate petabytes worth of data that require real-time analysis. Uploading this data to the cloud for analysis introduces unnecessary overhead, which we can avoid using on-prem infrastructure.
In these scenarios, companies might want to take advantage of cloud-based ML services such as AML since it streamlines and accelerates data analysis and the process of building and managing the ML project lifecycle. Companies can then simultaneously run an on-premises GPU-enabled machine cluster to train ML models. Effectively deploying ML solutions in such scenarios requires a hybrid solution to ensure consistency and compatibility between cloud and on-premises infrastructures.
One of the most significant advantages of using Arc-enabled ML is that organizations no longer choose between AML and on-premises. Instead, it encourages organizations to leverage the existing local infrastructure to train models on-premises and then seamlessly run inference on-prem, in the cloud, or at the edge. It facilitates onsite data training without movement restrictions, and as the data and conditions change, models can retrain themselves to achieve and maintain the desired accuracy.
Now that we have built an understanding of arc-enabled ML and its use cases let's try it ourselves and experience how easy Microsoft has made managing and using Kubernetes environments for machine learning.
Setting up the Environment
To run Azure Arc-enabled ML, we must first configure Azure Arc-enabled Kubernetes on the premises.
Note: The Kubernetes cluster should be running on a machine with four CPUs and 8 GB of RAM to run an Arc-enabled ML. I use a MacBook Pro for this article with six cores and 16 GB of memory. The process of setting up Arc-enabled Kubernetes clusters should be similar for any other machine. Docker is also required.
To begin, we must have an active Azure account. We’ll run an on-premises single-node Kubernetes cluster in Docker and connect it to Azure Arc.
Creating an On-Premises Kubernetes Cluster Using KIND
To run a Kubernetes cluster in Docker, we first must install KIND (Kubernetes in Docker).
On macOS
$ brew install kind
On Linux
$ curl –Lo ./kind https:
$ chmod +x ./kind
Installing KIND using brew automatically adds it to the system’s PATH environment variable. But if we use Linux or install KIND using binaries, we must make sure to add it to the PATH variable.
Once the installation is successful, we create a cluster as follows.
$ kind create cluster

Installing Helm
Next, we install Helm to help us effectively manage Kubernetes applications.
On macOS
$ brew install helm
On Linux
$ curl https:
After installing Helm, we can register our local cluster as an Azure Arc-enabled Kubernetes resource.
Connecting the Kubernetes Cluster Using Azure Arc
To connect our Kubernetes cluster to Azure Arc, we first must install Azure CLI on our system.
On macOS
$ brew install azure-cli
On Linux
$ curl -sL https:
After installing the CLI, we install the connectedk8s extension in the CLI:
$ az extension add --name connectedk8s
Before we proceed, let’s log in to our Azure account as follows:
$ az login
Executing this command opens the Azure portal in the browser to continue signing in. Once we log in, it will print our account details on the terminal, including the subscription ID.

We use the subscription ID in the following command to set our Azure subscription.
$ az account set --subscription {SubscriptionID}
The next step is to register providers for Azure Arc-enabled Kubernetes. We execute the following commands:
$ az provider register --namespace Microsoft.Kubernetes
$ az provider register --namespace Microsoft.KubernetesConfiguration
$ az provider register --namespace Microsoft.ExtendedLocation
Registration might take a few minutes, depending on the network. We can monitor the registration process with the help of the following commands:
$ az provider show -n Microsoft.Kubernetes -o table
$ az provider show -n Microsoft.KubernetesConfiguration -o table
$ az provider show -n Microsoft.ExtendedLocation -o table
Once registered, the value of the RegistrationState variable for these namespaces changes to Registered. When done, we create a resource group:
$ az group create --name AzureArcML --location EastUS
Last but not least, we connect the Kubernetes cluster that we created earlier to the Azure resource by executing the following command:
$ sudo az connectedk8s connect --name ArcML --resource-group AzureArcML
Once the above command finishes, the Azure Arc component runs as pods in our cluster. We can view these pods as follows:
$ sudo kubectl get pod --namespace azure-arc

Installing an Arc-enabled ML Extension in the Cluster
Now that the Azure Arc components are successfully running in our cluster, we can install the Arc-enabled ML extension, Microsoft.AzureML.Kubernetes, in our cluster. But first, let’s install the Kubernetes extension as follows:
$ az extension add --name k8s-extension
Once done, we install the Arc-enabled ML extension like this:
$ az k8s-extension create --name arcml-extension \
  --extension-type Microsoft.AzureML.Kubernetes \
  --cluster-type connectedClusters \
  --cluster-name ArcML \
  --config enableTraining=True \
  --resource-group AzureArcML \
  --scope cluster
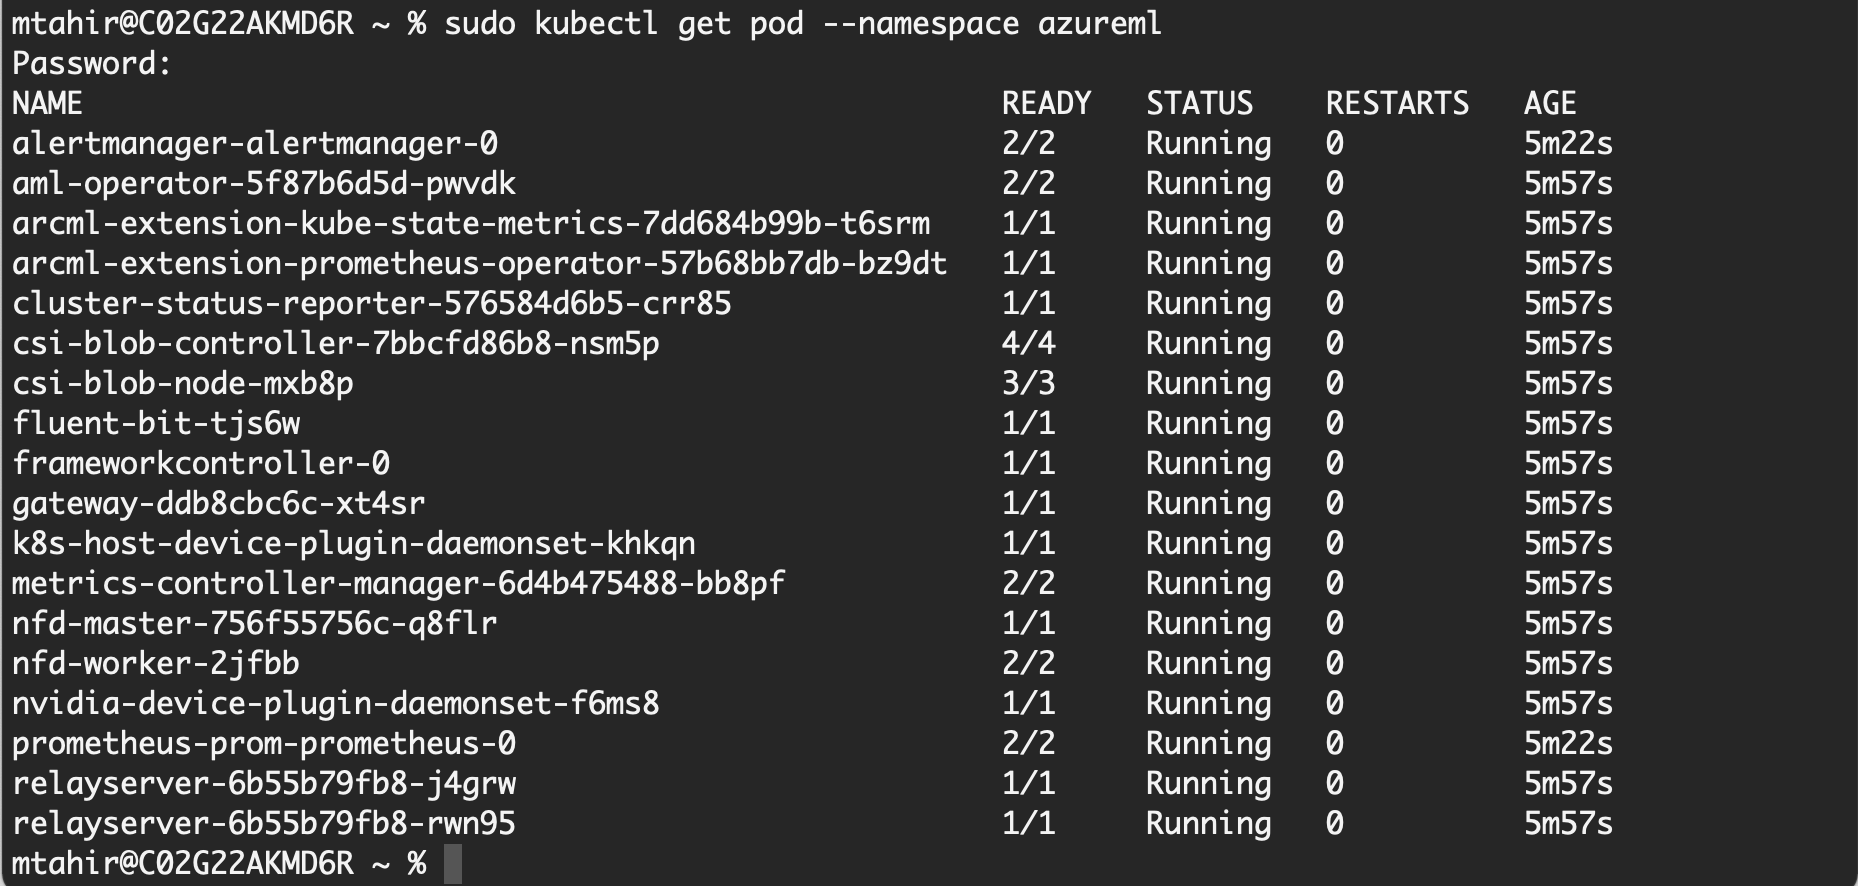
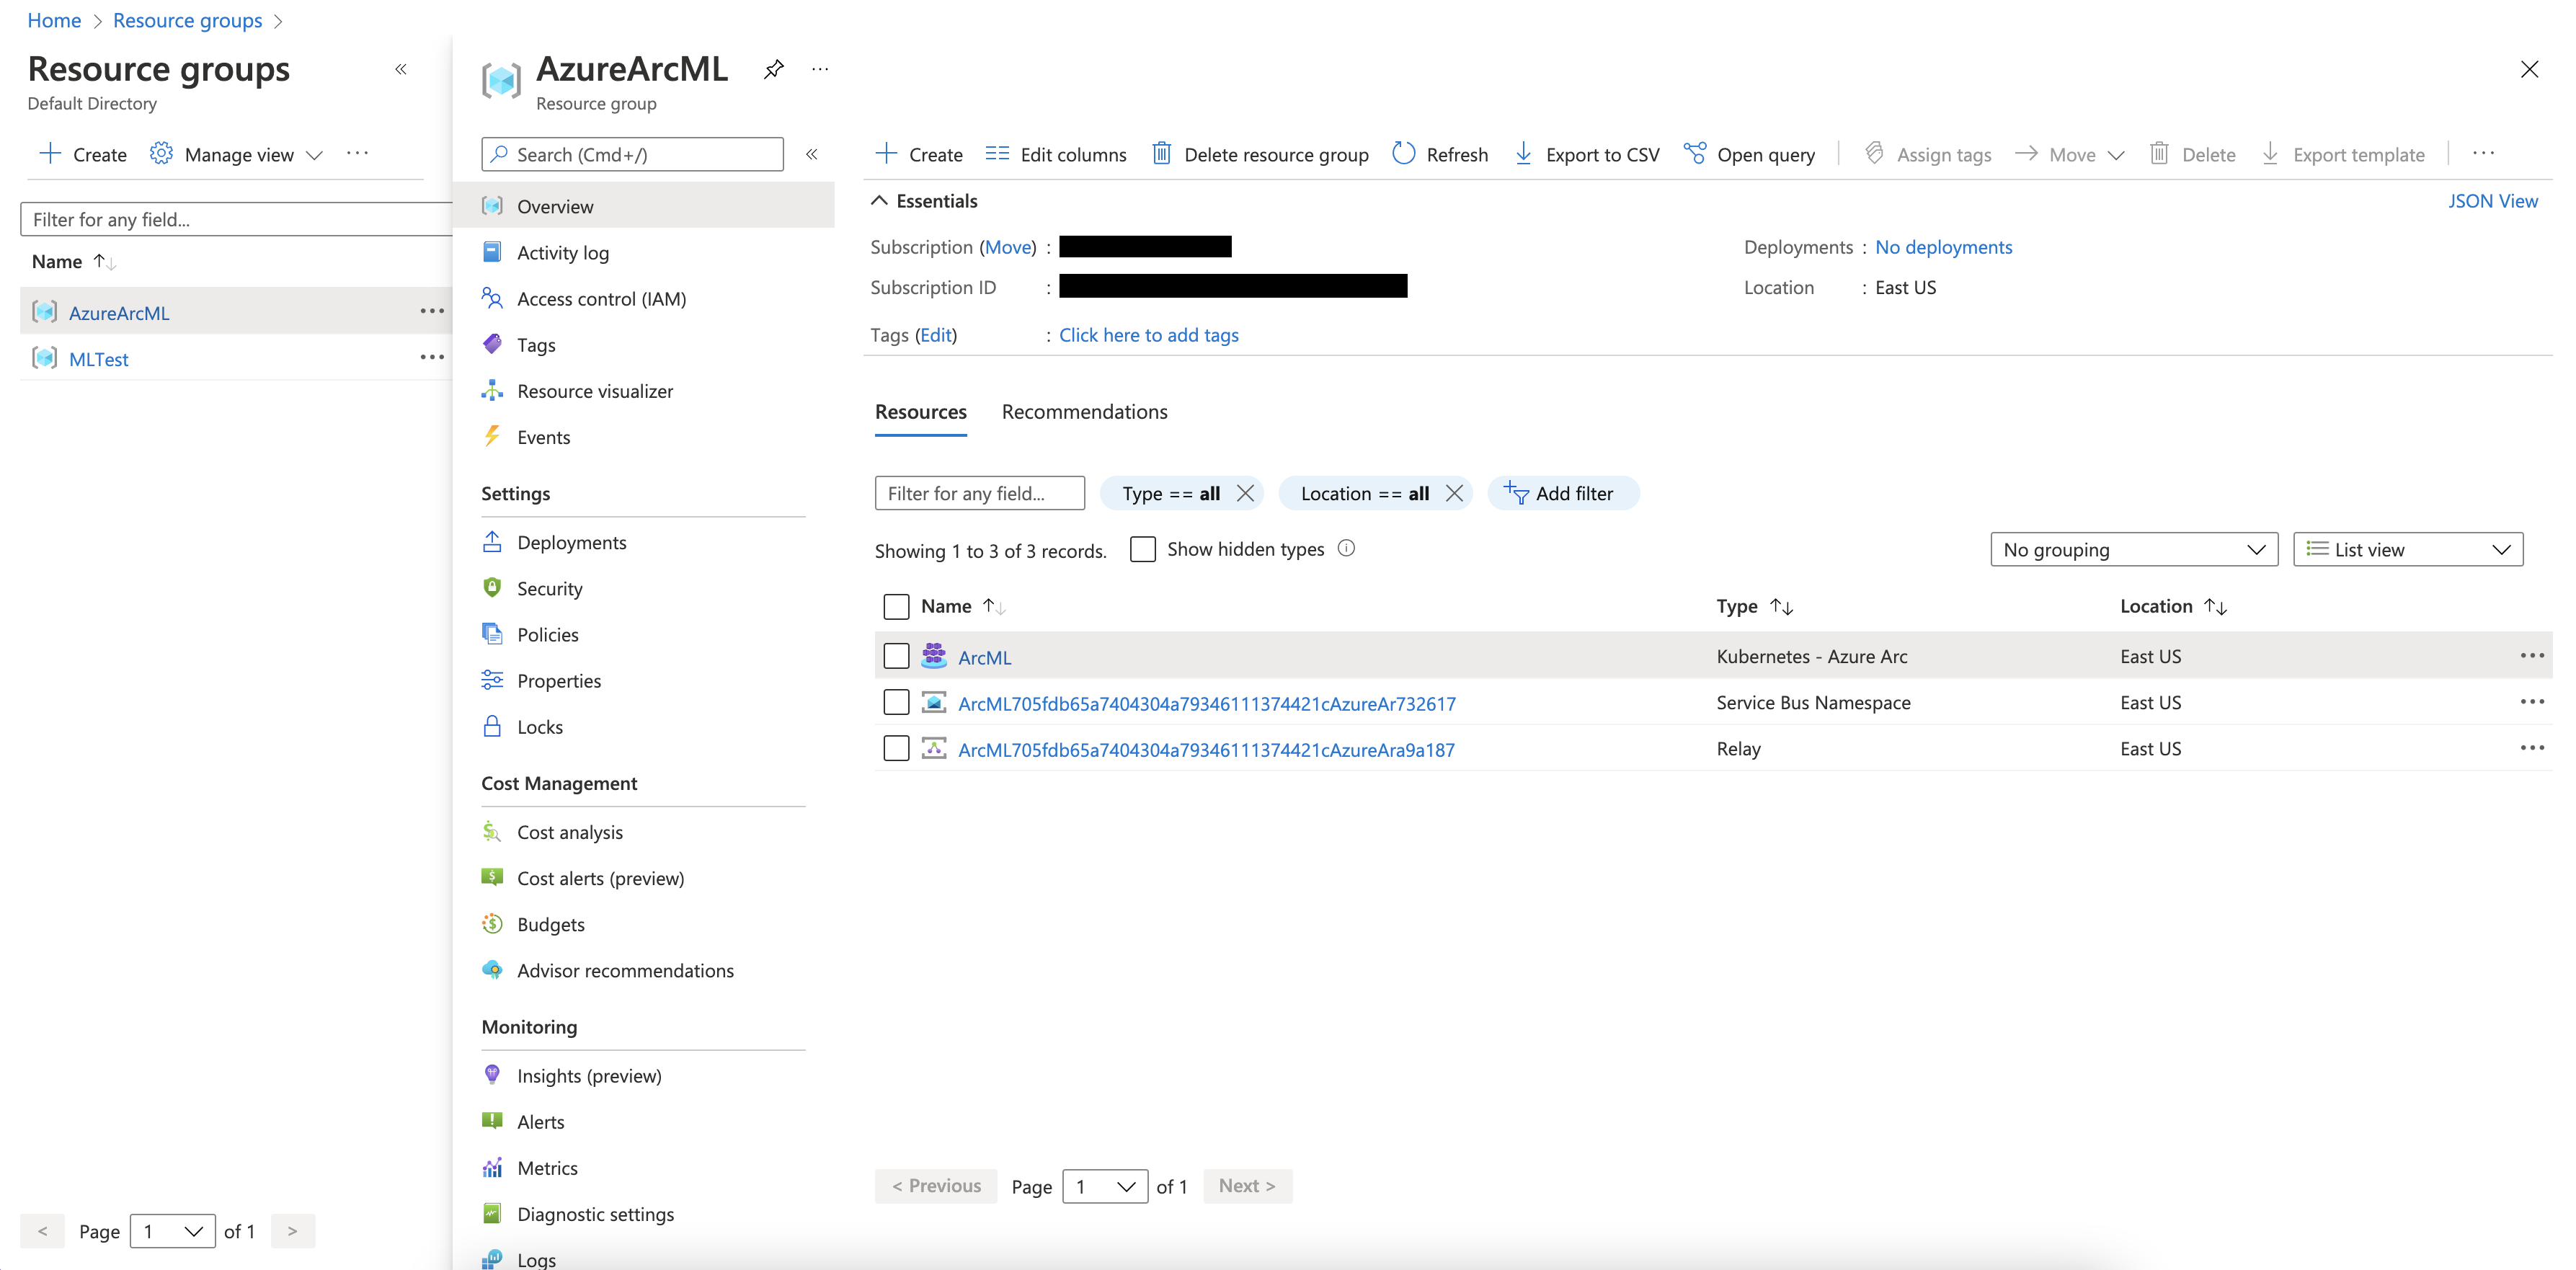
This command also creates the Azure Service Bus namespace and Relay resources that aid communication between the AML workspace and our local cluster. Once the installation is complete, we see the following pods running in our local cluster:
$ sudo kubectl get pod --namespace azureml

At this point, all our pods should be in a running state. When we head over to the Azure portal, we can see all the resources in our resource group.

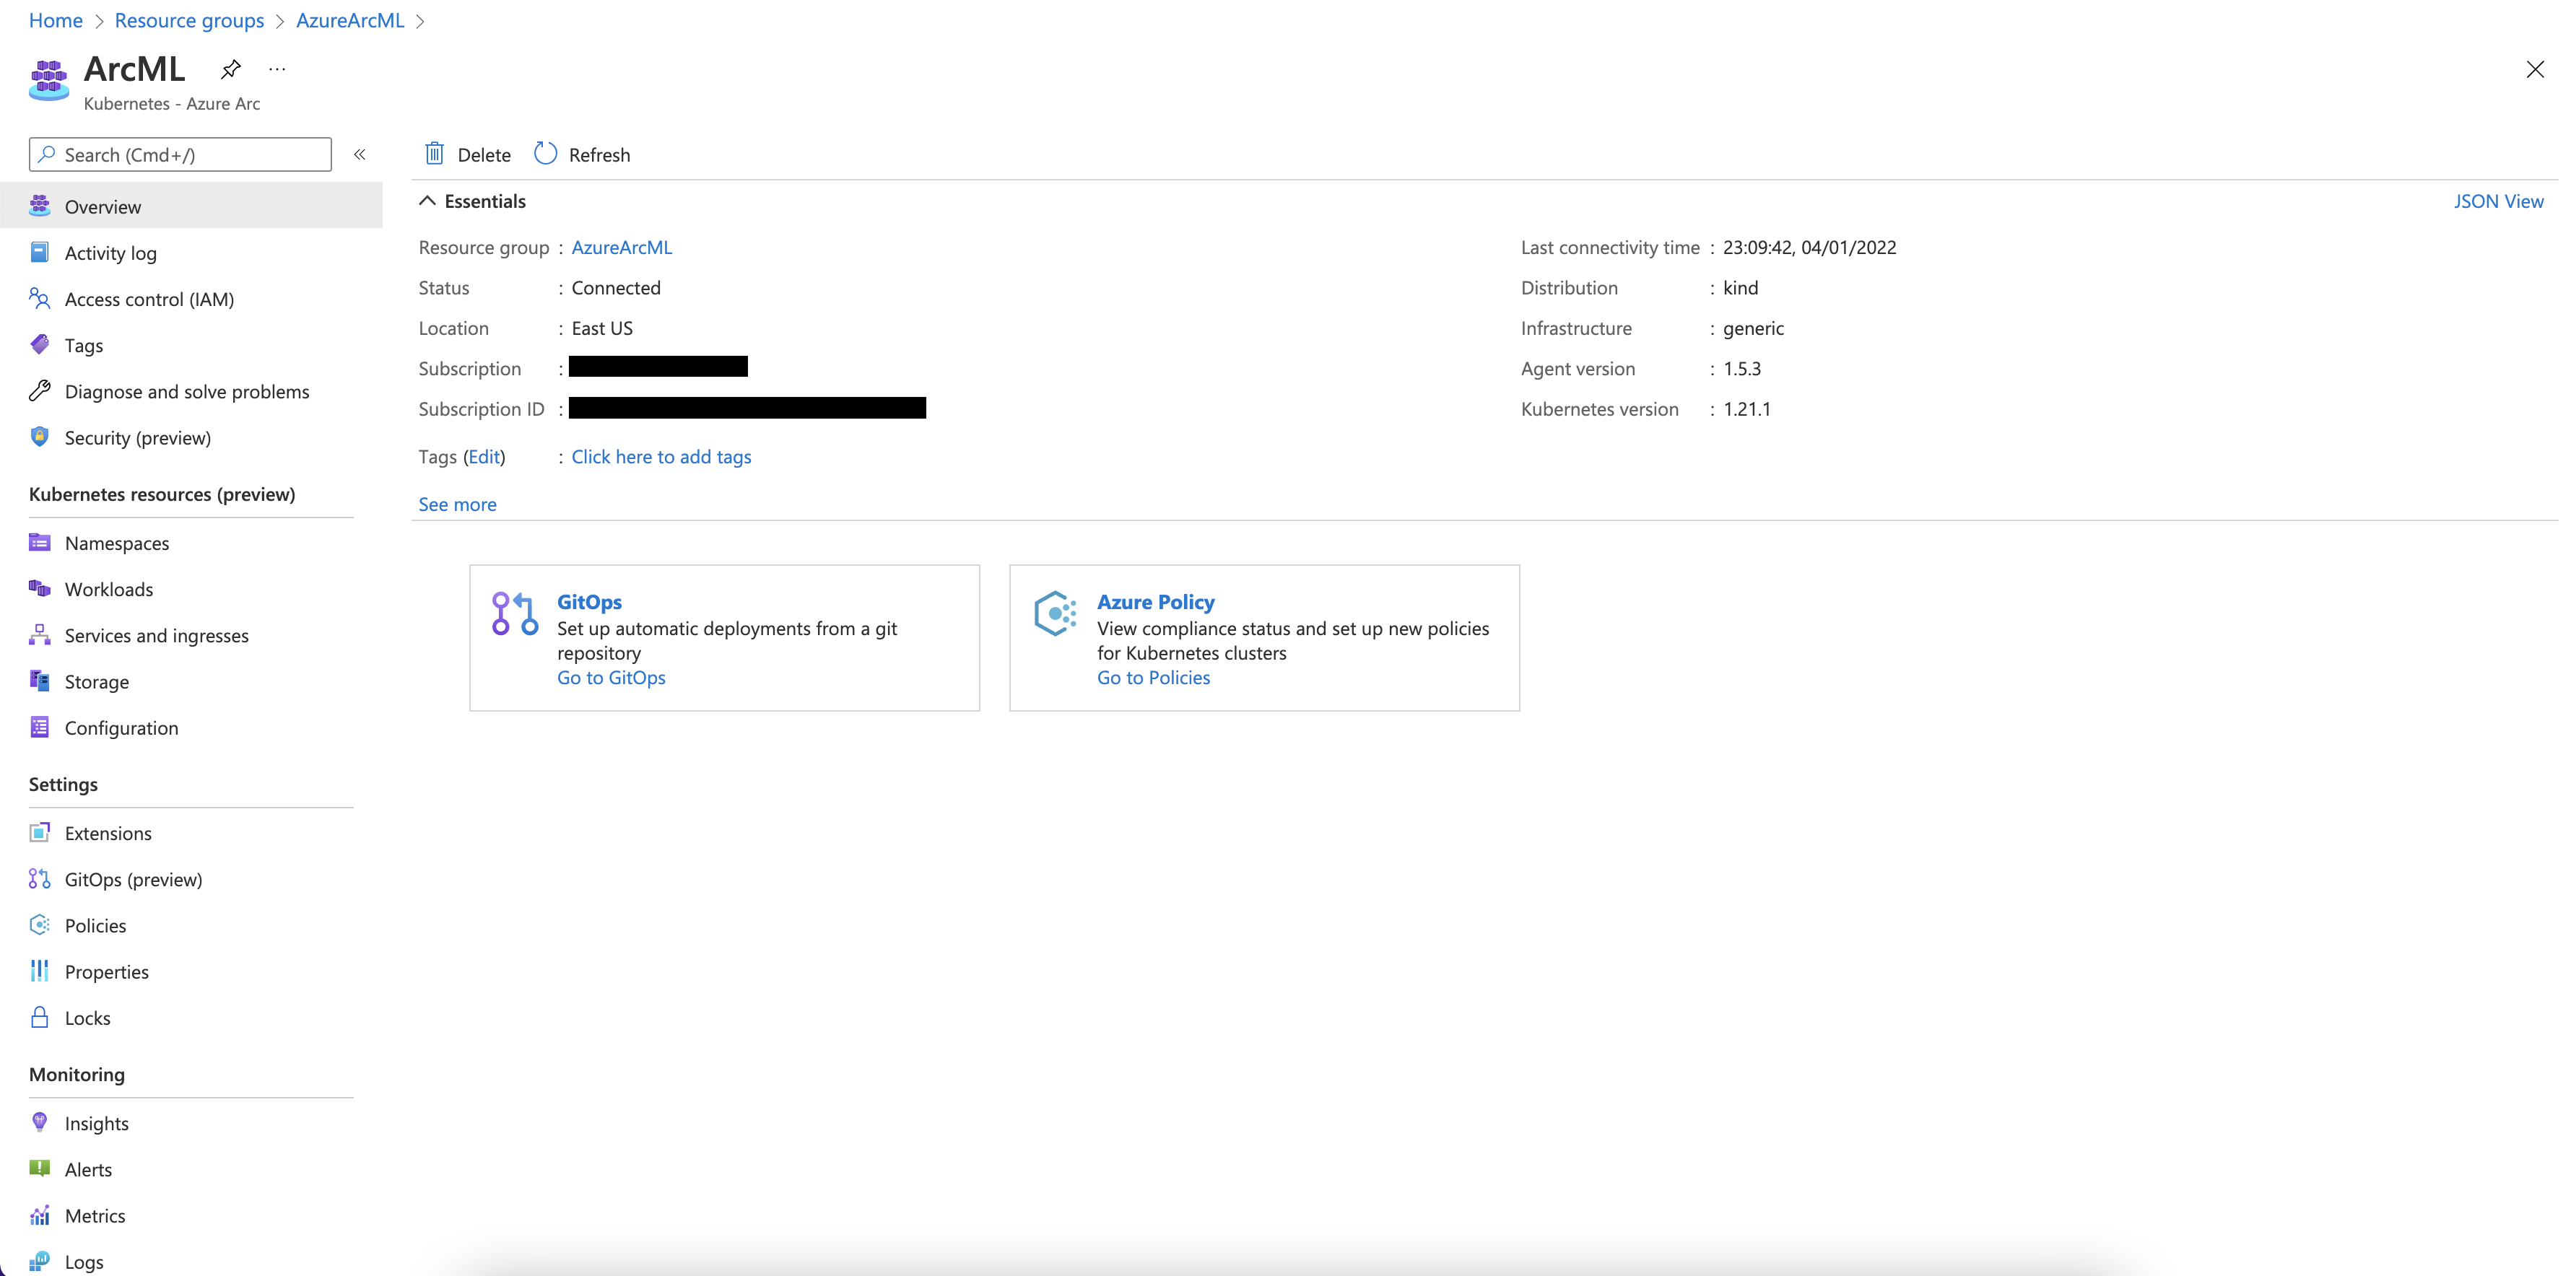
Click ArcML to view the Kubernetes cluster.

Notice that it shows a Connected status indicating that our local cluster connected successfully.
Next Steps
This article discussed Azure Arc-enabled ML and how it can be helpful in various scenarios. To start, we created a local Kubernetes cluster and connected the cluster using Azure Arc. Next, we learn to train an ML image classification model using TensorFlow in AML. Continue to the second article of this series to learn how to train ML models on-premises.
To learn more about how to configure Azure Kubernetes Service (AKS) and Azure Arc-enabled Kubernetes clusters for training and inferencing machine learning workloads, check out Configure Kubernetes clusters for machine learning.
