This is Part 1 of a 3-part series that demonstrates how to build Microsoft Teams apps in Java, with a focus on bots. This article shows how to create a simple chatbot with Spring, test it locally with the Bot Framework Emulator, and then deploy it to Azure.
As chat tools become the primary form of communication for many teams, ChatOps has become increasingly popular. There are many benefits to integrating common business processes into chat tools, such as the ease of a familiar interface, integrated history and search capabilities, and the availability of high-quality mobile apps.
Creating Azure and Microsoft Teams chatbots in Spring is easy with the Bot Framework SDK, allowing you to create a functional chatbot from existing templates with just a few commands.
In this article, you’ll create a simple chatbot with Spring, test it locally with the Bot Framework Emulator, and then deploy it to Azure.
Prerequisites
To follow along in this article, you’ll need a Java 11 JDK, Apache Maven, Node.js and npm, an Azure subscription to deploy the final application, and the Azure CLI.
I’ve also used a scaffolding tool, Yeoman, to simplify setup. Go ahead and install it with the following command:
npm install -g yo
The chatbot template is provided by the generator-botbuilder-java package, which you’ll need to install with this command:
npm install -g generator-botbuilder-java
You now have everything you need to create your sample chatbot application.
Example Source Code
You can follow along by examining this project’s source code on its GitHub page.
First, use Yeoman to create your sample application. Enter the following command to get started:
yo botbuilder-java -T "echo"
You are prompted to supply details such as the name of the new bot, the Maven package ID, and the template to use. I’ve named my example bot WelcomeBot, with the package name com.matthewcasperson, and based it on the Echo Bot template, which simply repeats anything the user says to the bot.
Yeoman then creates a new directory based on the bot's name, with a Maven project and Spring source code.
There is some official documentation about how to proceed with building and deploying the application, but at the time of writing, I found the steps provided did not quite align with the newer templates created by Yeoman. You also need to update some of the settings in the files created by Yeoman to work with the latest Azure tooling.
First, you’ll need to update your version of the azure-webapp-maven-plugin defined in the pom.xml file. The default version is too old to work with the latest Azure CLI tools, but updating the version to at least 2.2.1 allows you to successfully deploy the application to Azure.
Update this section in your pom.xml file:
<plugin>
     <groupId>com.microsoft.azure</groupId>
     <artifactId>azure-webapp-maven-plugin</artifactId>
     <version>2.2.1</version>
   ...
</plugin>
You’ll also need to update your runtime details. Set webContainer to Java SE and javaVersion to Java 11:
<plugin>
<groupId>com.microsoft.azure</groupId>
<artifactId>azure-webapp-maven-plugin</artifactId>
<version>2.2.1</version>
<configuration>
    ...
    <runtime>
        <os>linux</os>
        <webContainer>Java SE</webContainer>
        <javaVersion>Java 11</javaVersion>
    </runtime>
      ...
    </configuration>
</plugin>
Your bot is now ready to be tested locally.
Test the Bot Locally
To test your bot locally, use Microsoft’s Bot Framework Emulator. You’ll find installations files for the emulator on GitHub.
Run the Spring application locally with the following command:
mvn spring-boot:run
Then, download, install, and launch the emulator.
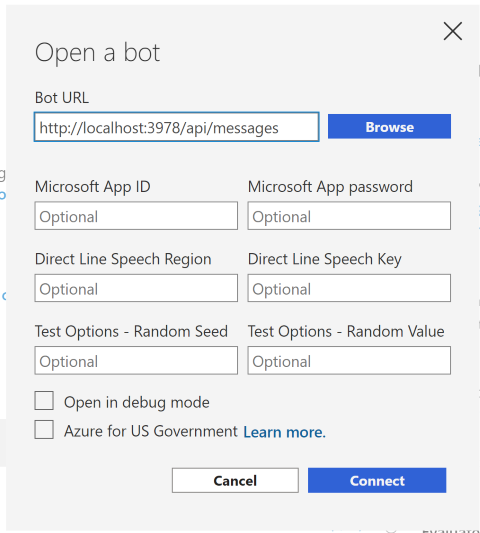
Select the Open Bot button, set the Bot URL to http://localhost:3978/api/messages, and select the Connect button:

Enter a message, and the bot should return the same message:

Now that you have confirmed the bot works locally, it’s time to deploy it to Azure.
The generated project includes two Azure Resource Manager (ARM) templates that you can use to generate the necessary resources in Azure. The first template, template-with-preexisting-rg.json, places the resources into an existing resource group. The second template, template-with-new-rg.json, places the resources into a new resource group.
I’ll use the second template. But before you apply the templates, you must create an Azure Active Directory (Azure AD) application to authenticate requests to the bot.
Use the following command to create the Azure AD Application. You can replace the display name argument with a name of your choosing, and you must supply your own password:
az ad app create --display-name "mattcWelcomeBot" --password "<your password goes here>"
    --available-to-other-tenants
The output of this command looks something like the text below, which I’ve truncated for clarity:
{
  "acceptMappedClaims": null,
  "addIns": [],
  "allowGuestsSignIn": null,
  "allowPassthroughUsers": null,
  "appId": "22c4ab4e-4ab2-4169-b656-38275da47cb7",
…
Note the appId (which is a unique value, not the one shown here), because you’ll soon need to pass it to some of your commands.
To create the resource group containing the resources required to host your bot, run the following command, making sure to replace the appId and appSecret parameters:
az deployment sub create --name "mattcWelcomeBot" --location "westus"
   --template-file ".\deploymentTemplates\template-with-new-rg.json"
   --parameters groupName="welcomeBot" appId="<the app id from the previous step>"
   appSecret="<your password goes here>" botId="mattcWelcomeBot"
   botSku=S1 newAppServicePlanName="asp-mattcWelcomeBot" newWebAppName="mattcWelcomeBot"
   groupLocation="westus" newAppServicePlanLocation="westus"
In the example above, I’ve prefixed many of the resource names with mattc to ensure they are unique. In particular, the App Service and Azure Bot resources require globally unique names. You’ll need to choose your own unique prefix (or entirely unique names) for these resources.
Also note the name of the App Service Plan, which has the prefix asp- followed by the name assigned to the newWebAppName property. The App Service Plan naming requires this specific format, because this matches the default values of the Maven plugin. If the App Service Plan had been named anything else, the next step using Maven to deploy the application would result in a second App Service Plan being created.
Before you build the Spring app, you need to define the Azure AD app ID and secret in the application.properties file.
Be aware that you cannot use interpolated values here. Normally, sensitive values like passwords would be defined as environment variables and referenced like ${APP_SECRET}. However, at the time of writing of this article, the Bot SDK reads this file literally, and does not support referencing environment variables:
MicrosoftAppId=<app Id goes here>
MicrosoftAppPassword=<password goes here>
server.port=3978
Build the application with the following command:
mvn package
Then, deploy the application with this command:
mvn azure-webapp:deploy -Dgroupname="welcomeBot" -Dbotname="mattcWelcomeBot"
The Maven plugin deploys the Spring application as an App Service. Because you ensured the App Service Plan was named with the default value expected by the Maven plugin, the existing resources will be used.
That’s all it takes. Your bot is now deployed on Azure.
Test the Bot on Azure
To verify the bot is working correctly, open the Azure Bot resource in the newly created resource group, select the Test in Web Chat link, and enter a message in the chat window. Your bot should welcome you to the chat and echo any message you type:

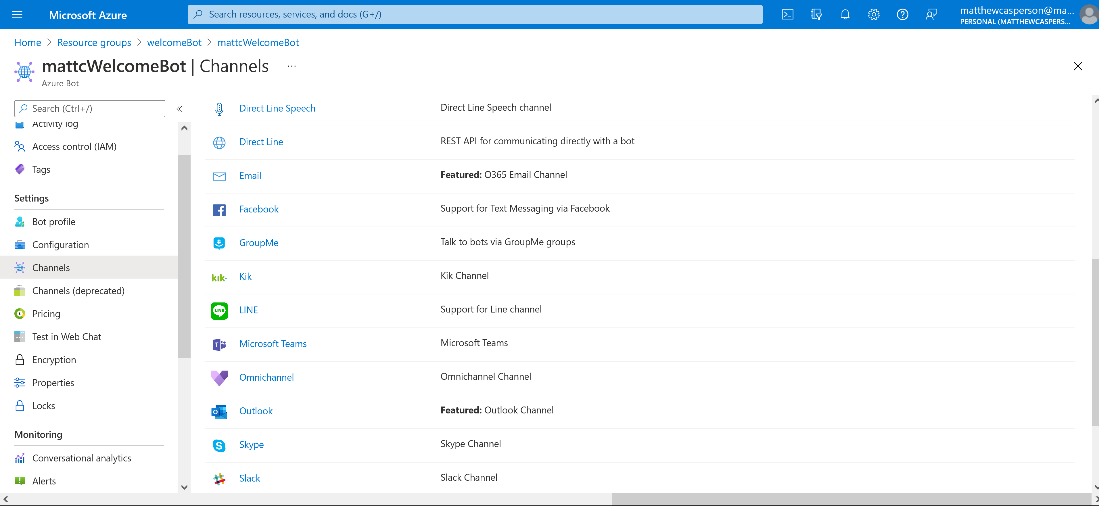
Now, you’ll link your chatbot to Microsoft Teams. Open the Azure Bot resource, select the Channels link, and select Microsoft Teams from the list of available channels:

Accept the terms of service. For Messaging, use the default value of Microsoft Teams Commercial, then select the Save button:

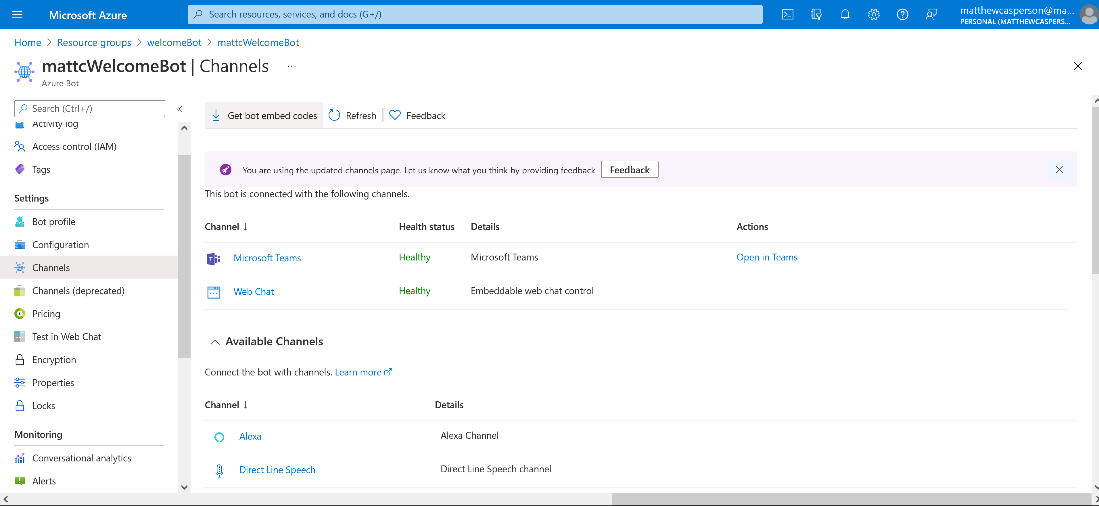
Microsoft Teams is now listed in the Channels list with an Open in Teams link. Select the link to start a conversation with the bot in the Teams application:

As it did during testing, the bot welcomes you to the chat and repeats anything you type:

And with that, you have successfully deployed your chatbot to Azure and integrated it with Teams.
Conclusion
Microsoft provides many tools to simplify deploying your first chat. Using Yeoman to build a base project, ARM templates to create your required cloud resources, and a Maven plugin to deploy your application, it only takes a few commands to deploy a fully functional chatbot in Azure. And thanks to the wide range of channels, connecting the bot to a chat application like Teams is quick and painless.
Continue to the next article in this series to learn how to create a lunch-ordering bot, complete with rich UI displayed in Teams. Then, we’ll build a bot that downloads and processes file attachments in chat messages.
To learn more about building your own bot for Microsoft Teams, check out Building great bots for Microsoft Teams with Azure Bot Framework Composer.
