In this post, you will see an explanation of the step-by-step approach to configure the popular development tool Postman to test/execute Infor ION API.
In this post, I'm going to explain the step-by-step approach to configuring the popular development tool Postman to test/execute Infor ION API. Even though this is straightforward, better to have a document to do quickly whenever you need it, to save time.
As you know, Infor ION APIs use OAuth2.0 (The OAuth 2.0 Authorization Framework) for authorization and Bearer Tokens which are the predominant type of access token.
Configuration from the Infor ION API
Create Postman as Authorized Apps in Infor ION.
Note: To complete the below steps, you must be in the IONAPI-Administrator security role.
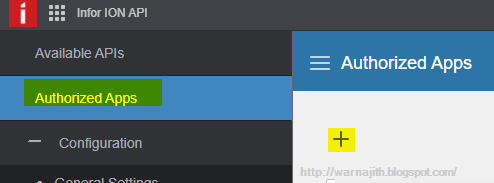
- Go to Infor ION API -> Authorized Apps
- Click on + icon on the left top (Add New App)

- Give it a name, description select type as "Backend Service", then Save.

- After Save, we can see additional information like Client ID, Secret, Associated Events, etc.
- Click on the Download Credentials button (next to the Secret text box).
- In the Download Credentials Dialog, toggle on the Create Service Account.
- Select a user from the Full Name text box. This is required because we configure this as Backend service and need impersonation. Or you will get Illegal impersonation attempt (error: 163) error.

- A file will be created (e.g., PostmanClient.ionapi) and downloaded to your local Download folder. After you download, store these credentials securely.
If you open the file, you can see it is a JSON file and contains several properties. Infor API Admin guide defines those properties as follows:
| Property | Description |
ti | Tenant identifier |
cn | Application name |
ci | ClientID that must be passed to the Authorization |
cs | ServerClient Secret to pass to the Authorization Server |
iu | Base URL for calling the ION API Gateway for this tenant/environment |
pu | Base URL for calling the authorization server for this tenant/environment |
oa | Path to append to "pu" to create the Authorization URL |
ot | Path to append to "pu" to create the Access Token URL |
or | Path to append to "pu" to revoke a previously obtained token |
SAAK | Service Account Access Key |
SASK | Service Account Secret Key |
Configuration in Postman
- On the Authorization tab in the Postman, select Type as OAuth 2.0

- On the right-hand side, under the Configure New Token-> Configuration Options, enter parameter values as below:
| Token Name | Name it as you want |
| Grand Type | Password Credentials |
| Access Token URL | value of "pu"+"ot" from the .ionapi file |
| Client ID | value of "ci" from the .ionapi file |
| Client Secret | value of "cs" from the .ionapi file |
| Username | value of "saak" from the .ionapi file |
| Password | value of "sask" from the .ionapi file |
| Scope | [blank] |
| Client Authentication | Send as Basic Auth header |
- Click on the Get New Access Token button.
- You will see the success message like this:

- In the next window, click on the Use Token.
- Now Postman client is ready to call Infor ION API.

