This post shows how I activated caching and compression for an Azure Storage blob cache that I wanted to use with my web application KlipTok.
I’ve written and used a lot of the Azure Storage service to work with applications that I’ve built that run in the cloud. It’s easy enough to use, just throw some files in there and they can be served internally to other applications or you can let the public access them remotely.
Something that always struck me about the public access to the service was that the content was never cached, never compressed, and in general, felt like a simple web server delivering content without some of those features that we REALLY like about the modern web. This will reduce the number of queries to the server and the bandwidth needed to deliver the content when it is requested.
In this post, I’m going to show you how I activated caching and compression for an Azure Storage blob cache that I wanted to use with my web application KlipTok.
Saving Data to Azure Storage – The Basics
I have a process that runs in the background every 30 minutes to identify the most popular clips on KlipTok and cache their data on Azure storage as a JSON file that can be downloaded on first visit to the website. The code to save this data looks like the following:
var blobServiceClient = new BlobServiceClient
    (EnvironmentConfiguration.TableStorageConnectionString);
var containerClient = blobServiceClient.GetBlobContainerClient("cache");
var client = containerClient.GetBlobClient("fileToCache.json");
await client.UploadAsync(myContentToCacheAsStream, true);
This creates a blob client, connects to the container named cache, defines a file named fileToCache.json and uploads the content with overwrite permissions turned on (with the true argument in the last line).
Note: I have this code embedded in an Azure Function and could use the output binding feature of Azure Functions to write this content. After running my application with that configuration for a month, I STRONGLY recommend you never use that feature. When the function is triggered, the output binding immediately deletes the content of the blob. If there is an error in the function or the function takes time to complete, then the rest of your system that depends on that content is going to struggle. Instead, build a BlobServiceClient and connect to your storage in this way so that you can properly error-handle and minimize the downtime while you are uploading content.
Adding Cache Headers
We can easily add caching headers for this file by adding a few lines to the HttpHeaders using the BlobClient. I’d like this file to be cached for 30 minutes and available on any public proxy or server. Let’s add those headers after the UploadAsync call:
await client.SetHttpHeadersAsync(new BlobHttpHeaders
{
    CacheControl = "public, max-age=3600, must-revalidate",
    ContentType = "application/json, charset=utf-8"
});
That’s easy enough. The CacheControl header has a clear definition that’s been around for a long time and takes a max-age in seconds. The must-revalidate directive states that caching servers must request a new copy of the file when the cache max-age expires and should not serve a file that is older than max-age.
Compressing Content
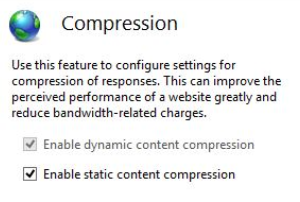
Azure Storage does not have a way to gzip compress or brotli compress content and serve it automatically like most webservers do. On IIS, there is a panel and you can clearly activate compression by just checking a box. With other webservers, there is an entry in the server’s configuration file that will enable gzip compression.

IIS Compression setting
With Azure Storage, we need to do the compression manually and add an appropriate header entry to indicate the compression. The .NET BCL has a GZipStream object available and we can route content through that using the standard System.Text.JsonSerializer with this code:
var MyContent = GetClipsToCache().ToArray();

using var myContentToCacheAsStream = new MemoryStream();
using var compressor =
      new GZipStream(myContentToCacheAsStream, CompressionLevel.Optimal);
await JsonSerializer.SerializeAsync(compressor, MyContent, options);
compressor.Flush();

myContentToCacheAsStream.Position = 0;
I get the data to cache with the first line, GetClipsToCache() and put that as an array into the MyContent variable. A MemoryStream is allocated that will receive the compressed content and a GZipStream is also allocated that will deliver its compressed output into the myContentToCacheAsStream. Finally, I serialize the data as JSON and write it to the compressor GZipStream that will do the compression and deliver it to the myContentToCacheAsStream variable. The GZipStream is flushed to ensure all of the data is compressed and the position of the target stream is reset to 0 so that it can be written to the blob storage.
We need to update the headers to include an indication that the content being served is GZip compressed. Easy enough to update the code we just added for caching headers to include this:
await client.SetHttpHeadersAsync(new BlobHttpHeaders
{
  CacheControl = "public, max-age=3600, must-revalidate",
  ContentType = "application/json, charset=utf-8",
  ContentEncoding = "gzip"
});
Bonus Points – Just Use Frontdoor
Maybe you don’t want to write this code and you just want to offload it to another service. You could configure Azure Frontdoor to deliver this content as another route with compression and caching by just checking a box on the route configuration panel:

Azure Frontdoor Caching and Compression Configuration
Summary
With this additional bit of code, I’ve reduced the size of the file used in the initial download when visiting KlipTok from 250k to 60k, a 76% reduction in bandwidth used. With the cache-control headers added, browsers and caching servers between my application and my users will keep copies of this file and reduce the number of requests for new content from my server. As the number of users for my site goes up, and the amount of data I need to deliver goes up, this was a welcome feature to reduce bandwidth and consequently my hosting costs as well.
