The aim of this article is to illustrate the use of GCP Cloud Run for Google Cloud deployment of a containerized web application such as a .NET 8 Blazor Web App. The cloud deployment procedure is demonstrated via several steps starting with.NET SDK command “dotnet new …” to scaffold a .NET 8 Blazor Web App, and ending with GCP Cloud Shell command “gcloud run deploy …”, which creates a GCP Cloud Run service from Docker image, and runs the containerized web application. The use case shows that the process is easy to manage, and, that it provides https access to the deployed web application out-of-the-box.
1. Introduction
One of my latest project challenges has been to provide deployment on GCP (Google Cloud Platform) of a containerized .NET 8 web application. A first obvious option has been to use GKE (Google Kubernets Engine). However, in the preparation stage, I found that providing https access to a GKE cluster required some extra steps. For this reason it has been reasonable to consider other options, and I decided to work on the use case involving GCP Cloud Run, which offers out-of-the-box https access to served Docker container clusters.
This article describes the use case of dockerization and deployment on Cloud Run of a default NET 8. Blazor Web Application. The procedure involves the following steps:
- Scaffolding a NET 8. Blazor Web App on Windows 10
- Configuring port number
- Compiling and publishing the scaffolded web application in a local folder (using Visual Studio 2022)
- Use of DockerDestop to build a Docker image of the web application on Windows 10
- Image exporting to *.tar format and importing into GCP Cloud Shell
- Docker image deployment to GCP Artifact Registry
- Bulding a Cloud Run service which pulls Docker image from GCP Artifact Registry, generates a https endpoint, and runs the application
- Testing https access to deployed .NET 8 Blazor Web Application running on GCP Cloud Run
The core part of this article illustrates the bash and PowerShell commands used to implement the above deployment scenario.
2. Source code
The attached zip file contains the project sources for building and running the docker image using a local Docker Desktop (Section 5, Steps 4-5).
3. Technologies and tools used
The technologies and tools used in this article include:
- .NET 8 SDK, installed on Windows 10 Pro
- Visual Studio 2022 Community Edition, installed on Windows 10 Pro
- DockerDesktop, installed on Windows 10 Pro
- Google Cloud Platform (GCP) personal account
- GCP Cloud Console and Cloud Shell
- GCP services and APIs, including GCP Artifact Registry, and GCP Cloud Run
4. Introducing the GCP Cloud Run command
Deployment of a dockerized web application on a GCP Kubernetes Engine (GKE) cluster can be a daunting process. In particular, exposing it via HTTPS involves extra steps, but GCP offers via Cloud Run a much simpler approach. In this approach, deploying a Docker image from Google Artifact Registry (GAR) as a Cloud Run service is done via executing a simple gcloud command in Cloud Shell, which results in building the service and providing a HTTPS endpoint of the application. This is the format of the Cloud Run command for such a scenario:
gcloud run deploy <service-name> \
 --image <region>-docker.pkg.dev/<project-id>/<repository>/<image>:<tag> \
 --platform managed \
 --port <port-nr>
In the above command, the parameter <service-name> is the name of a GCP Cloud Run service, for example “my-blazor-app”, <region> is a standard GCP region name such as “europe-west1”, <project-id> is a GCP project ID, <repository> represents the name of a Google Arttifact Registry repository holding the image, and <image>:<tag> pair represents the name and a tag string of the image. The parameter <port-nr> represents port number exposed by the web application.
When executed within the GCP Cloud Shell, this command will request some additional information, in particular a confirmation of the GCP region name and a confirmation of the operation mode allowing unauthenticated invocations of the service <service-name>. Next, it will build the service, and this build will generate a few lines of feedback about the process, among others providing the application https endpoint in the format:
https://<service-name>-<additional-id-string>.run.app
5. Implementing the use case
The deployment use case outlined in the introduction is implemented in the following 8 steps.
Step 1: Creating a .NET 8 Blazor web application
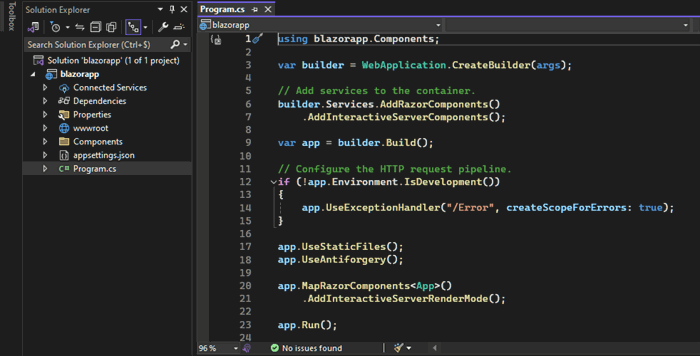
We start with creation of a .NET 8 Blazor web application by the use of .NET SDK command line. The command “dotnet new blazor …” uses the newest Blazor template to scaffold a default Blazor Web application, which initially has SSR-type (Server Side Rendering).
dotnet new blazor -n blazorapp -f net8.0 --no-https
Step 2: Setting port number
Next step is to start the csproj file in Visual Studio 2022, and to adapt appsettings.json, so that the http port 8088 will consistently be used before and after dockerizing this application.
appsettings.json
{
  "Logging": {
    "LogLevel": {
      "Default": "Information",
      "Microsoft.AspNetCore": "Warning"
    }
  },
  "AllowedHosts": "*",
  "Kestrel": {
    "Endpoints": {
      "Http": {
        "Url": "http://*:8088"
      }
    }
  }
}
Step 3: Running the Blazor application from Visual Studio 2022
We also adapt launchsettings.json to use port 8088, so that running in debug mode also happens with endpoint port number 8088.

Step 4: Publishing a binary release for Linux containerization
Next step is creation of the binary release for Linux-x64 in order to provide compatibility with Docker container OS which defaults to Linux. The publishing step in Visual Studio 2022 provides this functionality via menu options “Publish blazorapp” and “Publish to folder”.
With Target Runtime set to linux-x64, executing the above step creates the Blazor application files in the path specified as Target location ‘bin\release\net8.0\publish\’.
It shoud be noted that this step can also be done with .NET SDK command line as follows
dotnet publish -c Release -f net8.0 -r linux-x64 -o ./bin/release/net8.0/publish/ --self-contained false
This way, we are free to choose in the current use case how to publish the release.
It should be underlined that the command “dotnet publish …” is crucial in more advanced deployment scenarios, as it creates the possibility of an automated deployment. This aspect will be the subject of one of my future publications.
Another remark is that leaving the option “Target runtime” as “portable” will also generate an image compatible with Linux. The option “linux-x64” creates however a container which is optimized for Linux. Therefore, both options will work and there is no impact on the use case.
Step 5: Dockerfile, docker build, and local test
In order to create Docker image, we first create a docker file which will be used by the local DockerDesktop to generate the image. Here, we use ASPNET 8.0 runtime as base image, as opposed to the possibility of using .NET SDK as base image (from mcr.microsoft.com/dotnet/sdk:8.0). In this case, the base image would be much larger, thus generating a larger image from our build.
Dockerfile

FROM mcr.microsoft.com/dotnet/aspnet:8.0
COPY bin/Release/net8.0/publish/ BlazorAppPublish/
EXPOSE 8088
WORKDIR /BlazorAppPublish
ENTRYPOINT ["dotnet", "blazorapp.dll"]
To execute Docker build, the docker file should be located in the root folder of the Visual Studio 2022 project (next to the *.csproj file thus). It is important to set in PowerShell the working directory for Docker in the folder containing the dockerfile. The path to this folder is thus “path/to/blazorapp” (for example C:\Work\blazorapp). Docker build and Docker run are executed using the following commands.
docker build -t blazorapp-img -f Dockerfile .
docker run -it -p 8088:8088 --name blazorapp-cnt blazorapp-img
Running the created image blazorapp-img allows to test the application on localhost, it is however not necessary for the use case implementation.
Step 6: Image export to *.tar and deploying to GCP Artifact Registry
The following docker command exports the built image from the local DockerDesktop to a local *.tar file.
docker save blazorapp-img -o blazorapp-img.tar
Next, we upload the file blazorapp-img.tar from a local folder to GCP Cloud Shell using the upload menu of the shell.
After uploading the *.tar file to Cloud Shell, the image can be extracted using Cloud Shell's Docker. Then, it can be tagged and deployed to GCP Artifact Registry (GAR). These steps are done using the commands summarized next.
1. Loading *.tar into Docker in Cloud Shell
docker load --input blazorapp-img.tar
2. Tagging
docker tag blazorapp-img:latest europe-west1-docker.pkg.dev/winged-fact-431520-t4/gar-dockerimg-webapp/blazorapp-img
The tagging command uses the following pattern:
docker tag <image>:<tag> <region>-docker.pkg.dev/<project-id>/<registry-name>/<image>
3. Deploying/pushing to GCP Artifact Registry
docker push europe-west1-docker.pkg.dev/winged-fact-431520-t4/gar-dockerimg-webapp/blazorapp-img
Also in this case the pattern is easy to recognize
docker push <region>-docker.pkg.dev/<project-id>/<registry-name>/<image>
After implementing this step, the image is visible in GCP Artifact Registry.
Step 7: Creating a Cloud Run service
The uploaded image can now be used by the Cloud Run service. Creation of this type of GCP service is done via the command “gcloud run deploy <service-name> …” as follows:
gcloud run deploy blazorappsvc --image europe-west1-docker.pkg.dev/winged-fact-431520-t4/gar-dockerimg-webapp/blazorapp-img:latest --platform managed --port 8088
This command follows the pattern highlighted in Section 4. Upon executing it, the user is requested to enter the following information
- Region name
- Allow unauthenticated invocations to [blazorappsvc] (y/N)?
After providing this input, the Cloud Run service is created and the following lines are shown.
Deploying container to Cloud Run service [blazorappsvc] in project [winged-fact-431520-t4] region [europe-west1]
  OK Deploying new service... Done.
  OK Creating Revision...
  OK Routing traffic...
  OK Setting IAMPolicy... Done.
Service [blazorappsvc] revision [blazorappsvc-00001-ztw] has been deployed and is serving 100 percent of traffic.
Service URL: https://blazorappsvc-ekkselfpua-ew.a.run.app
This way, we succeded with deploying the Blazor container from GAR on Cloud Run. The dockerized Blazor application is now running as a service named blazorappsvc, and is accessible via a https endpoint on a temporary Internet domain https://blazorappsvc-ekkselfpua-ew.a.run.app . The status of Cloud Run can also be seen in GCP Console.
Step 8: Testing https access
The https endpoint generated by Cloud Run https://blazorappsvc-ekkselfpua-ew.a.run.app allows to access the deployed Blazor web application.
6. Points of Interest
This article shows that GCP Cloud Run is an interesting option for cloud deployment of dockerized web applications such as .NET 8 Blazor Web App, mainly because it hides many details of the GCP deployment process and provides https accesss out-of-the box.
Also, it needs to be underlined that GCP Cloud Run service is built on Knative technology, which is different from Kubernetes technology used in GKE. An additional benefit is also that container pool size is autoscaled to zero when there are no requests, which is a cost-saving behaviour.
See of example https://cloud.google.com/run/docs/configuring/cpu-allocation.
History
2024.08.20 - First final version.
2024.08.24 - Source code zip added, minor text errors corrected.

