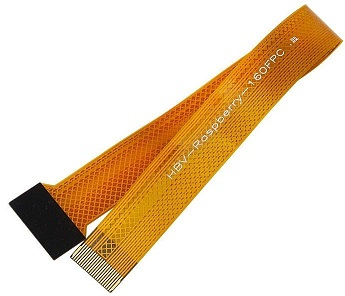
I have a bunch of unused Raspberry Pi Zero Wireless and associated camera boards from previous projects and decide to use them as cheap CCTV camera replacement. The first thing to do is to find a suitable cable, as the cable that comes with the camera board does not fit the Pi Zero. Fortunately, many such cables (length approximately 80cm) are available on eBay for around $2 each:

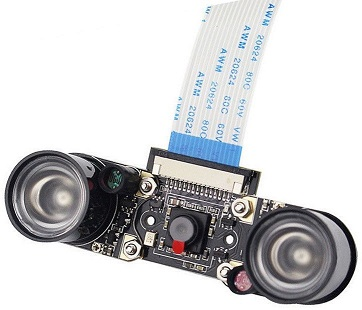
Longer cables are also available and although the documentation warns against using long cables for fears of data loss, I have not encountered such issues when using a 5m cable. The second challenge is to find a reasonably cheap module that supports night vision. The one I bought for less than $10 looks like the following:

The module has 2 IR LED modules on both sides screwed to the camera module located at the centre. Despite the fact that the LEDs are permanently on, the picture quality is satisfactory for both day and night modes and the camera module is still a good value for money.
The next task is to make the Pi work like a CCTV, that is to constantly take frame snapshot and record videos and make them accessible on the network. Although the default tools such as raspivid and raspistill can be used for this purpose, supporting RTSP requires the use of third party tools. After some research, I decided to use v4l2rtspserver which seems quite easy to setup and works well. The following script, when put in rc.local, runs the RTSP server after the Pi starts and delivers a 640×480 video stream at 5 fps:
while :
do
   v4l2rtspserver -W 640 -H 480 -F 5 /dev/video0 > /dev/null 2>&1 < /dev/null
done
The default RTSP address is rtsp://127.0.0.1:8554/unicast and can be changed by various command line options passed to v4l2rtspserver.
Since the camera module is now exclusively controlled by the RTSP server, raspivid and raspistill can no longer be used. We will need to use ffmpeg to take snapshots instead. A suitable cron job can be configured to run the following command at every minute to generate the required snapshots:
ffmpeg -nostdin -rtsp_transport tcp -stimeout 10000000
-i rtsp://127.0.0.1:8554/unicast -f image2 -vframes 1
-vf "crop=639:480:0:0, drawtext=fontfile=/Windows/Fonts/Arial.ttf:
text='%{localtime}': x=w-tw-10: y=10: fontcolor=white: box=1:
boxcolor=0x00000000@1: fontsize=15"  -strftime 1 snapshots/%Y-%m-%d_%H-%M-%S_img1.jpg
Although recording videos can also be done with FFmpeg, some timing issues prevent using FFmpeg with v4l2rtspserver. In my tests, although the recording works, FFmpeg will not split the video stream despite segment_time being specified, resulting in very large video file size. I have to resort to using VLC command line tool (cvlc) for recording instead. The following script will constantly record the camera video stream and store locally as 10-minute segments:
while :
do
cvlc rtsp://127.0.0.1:8554/unicast --sout-file-format
--sout file/ts:videos/video_%Y%m%d-%H%M%S.ts --run-time=600 --loop >
/dev/null 2>&1 < /dev/null
done
Take note that cvlc will not run as root, which is the default user when a process is started from rc.local. This can be overcome by starting the above script as a specific user, e.g., pi, using sudo -u pi instead. You might also want to modify the script to remove 0-byte files, generated by VLC from time to time if the connection to the RTSP server cannot be established, which may happen for example if VLC is called before the RTSP server has been started. On one of my devices, the RTSP server occasionally hangs and a cron job has been added to restart the RTSP server every 6 hours as a workaround.
For the setup, try to use good SD cards as the Pi will be constantly writing data onto it. In my case, I use high performance 128GB Sandisk card and monitor the lifetime writes using the following commands:
dumpe2fs /dev/mmcblk0p2 | grep Lifetime
After six months, the counter shows that almost 5TB of data has been written to the 128GB card and yet the Pi is still going strong!
The final step is to perform a basic setup of apache and vsftpd, after which the Pi Zero Wireless can be configured as a basic server for users to download snapshots and videos. With another cron job that runs periodically to remove outdated files, the Pi can be used as a cheap CCTV camera solution. It is even better in a sense, since we now have full control of the server without having to resort to reverse-engineering, like what I did for the IPC365 camera. The only minor issue is that the duration of captured segments via VLC is slightly shorter than 10 minutes for most segments, due to occasional frame loss. Still, the setup works well for my case and can also be applied to other high end Pi models in case there is a need to perform more expensive tasks such as video transcoding which cannot be done efficiently on the Pi Zero.
