Contents
What is AWS LocalStack
LocalStack is a popular open-source project that provides a fully functional local AWS cloud stack for testing and development purposes. It allows developers to emulate the AWS cloud environment locally on their machines, enabling them to develop and test AWS applications without incurring any costs associated with the real AWS services.
Key features of LocalStack include:
- Emulation of AWS Services: LocalStack provides emulations of various AWS services, including S3 (Simple Storage Service), SQS (Simple Queue Service), SNS (Simple Notification Service), DynamoDB (NoSQL database), Lambda (serverless compute), and many more.
- Easy Setup and Configuration: LocalStack is easy to set up and configure, typically requiring only a single command to start the local AWS environment.
- Testing and Development: It enables developers to test their applications locally against AWS services, facilitating rapid development and debugging cycles without needing to deploy to the real AWS cloud.
- Offline Development: Developers can work offline or in environments without internet connectivity by using LocalStack to simulate the AWS cloud locally.
- Customization and Extensibility: LocalStack allows customization and extensibility, enabling developers to add or modify features to better suit their testing and development needs.
- Integration with AWS SDKs: LocalStack seamlessly integrates with AWS SDKs and command-line tools, allowing developers to use familiar tools and APIs to interact with the local AWS environment.
Overall, LocalStack is a tool for AWS developers and teams looking to streamline their development workflows, improve productivity, and reduce costs associated with AWS development and testing.
Prerequisites
Start Desktop Docker

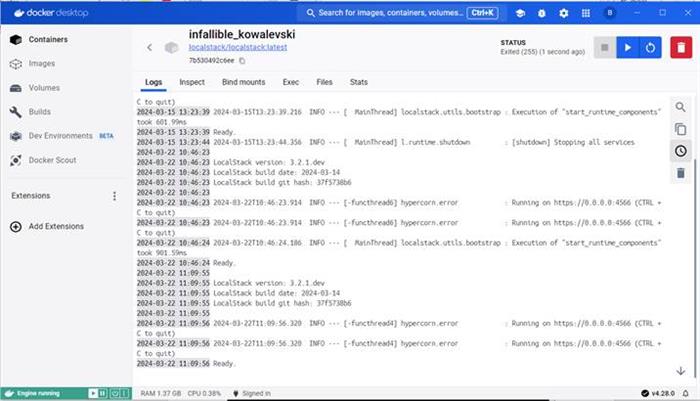
Download & Run LocalStack Using Docker
You’ll run and connect to LocalStack locally using Docker, which has a LocalStack image. Run the following docker CLI command within a Command prompt:
docker run --rm -it -p 4566:4566 -p 4510-4559:4510-4559 localstack/localstack

When you run the docker command for the first time, it may take a couple of minutes to download, but every time after that it will start within seconds.
Run the following CLI command to edit your configure file:
aws configure
- Enter
test for the Access Secret ID and Access Secret Key - Enter
us-east-1 for the Region - Enter
json for the Format

Edit the config file located at C:\Users\USERNAME\.aws\config, with
endpoint_url = http://localhost:4566


Create Queues
AWS LocalStack has two different types of queues, FIFO (First-In-First-Out) queues and Standard queues. Overview of the differences between FIFO and Standard queues within LocalStack:
- Message Ordering:
- FIFO queues ensure that messages are delivered in the order they are sent. This ordering is maintained even in a distributed system or in cases of high throughput.
- Standard queues do not guarantee strict message ordering. Messages might be delivered out of order, and ordering is not preserved across multiple message sends.
- Deduplication:
- FIFO queues support exactly-once processing and deduplication of messages. Each message must have a unique message deduplication ID.
- Standard queues do not provide built-in deduplication mechanisms. You may need to implement deduplication logic in your application if required.
- Throughput:
- FIFO queues have a maximum throughput of 300 transactions (API calls) per second per action (send message, receive message, delete message, etc.).
- Standard queues support higher throughput compared to FIFO queues, but the exact limits can vary depending on factors such as message size, message retention period, and other attributes.
- Attribute Support:
- FIFO queues support additional attributes such as message group ID and message deduplication ID, which are used for message ordering and deduplication.
- Standard queues have fewer attributes compared to FIFO queues.
- Delay Queues:
- FIFO queues support message delay queues, allowing you to delay the delivery of messages for a specified period.
- Standard queues also support message delay queues.
- Supported Operations:
- FIFO queues support all operations available in the real AWS environment, including sending, receiving, deleting messages, changing message visibility, and others.
- Standard queues support similar operations to FIFO queues, but with potential differences in behaviour and limitations.
To start, with we can create Standard queues, and if there is a need for the messages to be delivered in a certain order, the Standard queues can be deleted and FIFO queues created (they just have an extra switch).
Run the following AWS CLI commands:
aws --endpoint-url=http:
aws --endpoint-url=http:
aws --endpoint-url=http:
aws --endpoint-url=http:
NB: To create a FIFO queue:
aws --endpoint-url=http:
List Queues
To view the queues, run the following CLI command:
aws --endpoint-url=http:

Publish a Message Using a Command Prompt
To test that your (xhibit_DocAndEvents) queue is running you can send a message using the CLI:
aws --endpoint-url=http:
NB: Note the double quotes around the message body contents.
Subscribe to a Queue and Consume Message Using a Command Prompt
To test that you can consume a message from your (xhibit_DocAndEvents) queue, run the following CLI:
aws --endpoint-url=http:
Publish and Subscribe windows below:

Read the last 10 messages
aws --endpoint-url=http:
Delete a Message from the Queue
Subscribing to a message will not remove the message form the queue automatically, you or your application must delete the message. Once you have read a message, use the ReceiptHandle property to identify a specific message.

Use that handle in the delete message CLI command:
aws sqs delete-message --queue-url http:
Message removed:

Delete a Queue
To delete a queue, run the following CLI command:
aws --endpoint-url=http:
Below, I have listed the queues, deleted a queue and then relisted the queues again:

