This article provides a comprehensive guide to building Market Pulse, a real-time stock price tracking application using modern web development technologies. Leveraging .NET 8 and GraphQL with Hot Chocolate, the backend fetches live market data from the Finnhub API and delivers it to clients through efficient GraphQL subscriptions. On the frontend, React with TypeScript and Apollo Client is used to create a responsive user interface that dynamically displays stock prices for major companies like Apple, Microsoft, Amazon, and Bitcoin. By following this step-by-step tutorial, developers will learn how to integrate .NET, GraphQL, and React to build powerful, real-time web applications.
Introduction
In the ever-evolving landscape of software development, creating applications that provide real-time data and seamless user experiences has become increasingly essential. In this article, we will explore how to build a robust and dynamic stock price tracking application called Market Pulse using .NET 8 with GraphQL for the backend and React for the frontend. By leveraging the power of GraphQL, we enable efficient data fetching and real-time updates, while the React client provides a modern and responsive user interface. Whether you're a developer interested in learning more about GraphQL or looking to integrate real-time data in your applications, this guide will walk you through building a full-stack solution using the latest tools and technologies.
Create MarketPulse solution with Visual Studio 2022
Prerequisites
- Visual Studio 2022 (17.11 or above).
- Node.js 20.17 or above
Create MarketPulse.Server Web API Project
Start Visual Studio 2022, select “ASP.Net Core Web API” project.

After create project, change Url to “graphql/ui” in Debug Launch profile.
Then in the same solution add React App (typescript) project, marketpulse.client.
Solution Explorer should like the below.
Backend GraphQL Implementation
Install the necessary NuGet packages for Hot Chocolate
dotnet add package HotChocolate.AspNetCore

dotnet add package HotChocolate.Data

dotnet add package HotChocolate.Subscriptions
Or you can add them in Visual Studio Nuget Package Manager.
Configuring the GraphQL Server with Hot Chocolate
We need to configure our GraphQL server in Program.cs to handle queries, mutations, and subscriptions.
Open Program.cs and modify it as follows:
using MarketPulse.Server.Services;
using MarketPulse.Server.Queries;
using MarketPulse.Server.GraphQL;
using HotChocolate.AspNetCore;
using Microsoft.Extensions.DependencyInjection;
var builder = WebApplication.CreateBuilder(args);
builder.Services.AddCors(options =>
{
options.AddDefaultPolicy(policy =>
{
policy
.AllowAnyOrigin()
.AllowAnyMethod()
.AllowAnyHeader();
});
});
builder.Services.AddHttpClient<FinnhubService>();
builder.Services
.AddGraphQLServer()
.AddQueryType<Query>()
.AddSubscriptionType<Subscription>()
.AddProjections()
.AddFiltering()
.AddSorting()
.AddInMemorySubscriptions();
builder.Services.AddHostedService<StockPriceBackgroundService>();
var app = builder.Build();
app.UseCors();
app.UseWebSockets();
app.MapGraphQL();
app.MapBananaCakePop("/graphql/ui");
app.Run();
This configuration enables WebSockets for real-time updates, sets up CORS, and maps the GraphQL endpoint with Banana Cake Pop for testing.
Defining the GraphQL Schema and Types
Create a new folder named Queries and add Query.cs and Subscription.cs to define the schema:
Query.cs:
using HotChocolate;
using MarketPulse.Server.Models;
using MarketPulse.Server.Services;

public class Query
{
    public async Task<List<StockQuote>> GetStockQuotes([Service] FinnhubService finnhubService)
    {
        return await finnhubService.GetMultipleStockQuotesAsync(new List<string> { "AAPL", "MSFT", "AMZN", "NVDA", "BTC-USD" });
    }
}
Subscription.cs:
using HotChocolate;
using HotChocolate.Subscriptions;
using MarketPulse.Server.Models;
using System.Threading;
using System.Threading.Tasks;

public class Subscription
{
    [Subscribe]
    public async ValueTask<ISourceStream<StockQuote>> OnStockPriceUpdated(
        [Service] ITopicEventReceiver eventReceiver,
        CancellationToken cancellationToken)
    {
        return await eventReceiver.SubscribeAsync<StockQuote>("StockPriceUpdated", cancellationToken);
    }
}
These files define a Query to fetch stock quotes and a Subscription for real-time updates.
Creating the Stock Price Background Service
To provide real-time data to the GraphQL subscription, we need a background service that periodically fetches data from the Finnhub API.
Create a new folder named Services and add StockPriceBackgroundService.cs:
StockPriceBackgroundService.cs:
using Microsoft.Extensions.Hosting;
using Microsoft.Extensions.Logging;
using System;
using System.Threading;
using System.Threading.Tasks;
using MarketPulse.Server.Services;
using HotChocolate.Subscriptions;
using System.Collections.Generic;
public class StockPriceBackgroundService : BackgroundService
{
private readonly ILogger<StockPriceBackgroundService> _logger;
private readonly FinnhubService _finnhubService;
private readonly ITopicEventSender _eventSender;
private static readonly List<string> Symbols = new() { "AAPL", "MSFT", "AMZN", "NVDA", "BTC-USD" };
public StockPriceBackgroundService(
ILogger<StockPriceBackgroundService> logger,
FinnhubService finnhubService,
ITopicEventSender eventSender)
{
_logger = logger;
_finnhubService = finnhubService;
_eventSender = eventSender;
}
protected override async Task ExecuteAsync(CancellationToken stoppingToken)
{
while (!stoppingToken.IsCancellationRequested)
{
try
{
foreach (var symbol in Symbols)
{
var stockQuote = await _finnhubService.GetStockQuoteAsync(symbol);
if (stockQuote != null)
{
_logger.LogInformation($"Sending update for {symbol}: {stockQuote.CurrentPrice}");
await _eventSender.SendAsync("StockPriceUpdated", stockQuote, stoppingToken);
}
}
await Task.Delay(TimeSpan.FromSeconds(10), stoppingToken);
}
catch (Exception ex)
{
_logger.LogError(ex, "Error fetching stock prices.");
}
}
}
}
Fetching Data from Finnhub API
Create FinnhubService.cs in the Services folder to handle API requests:
FinnhubService.cs:
using System.Net.Http;
using System.Threading.Tasks;
using System.Text.Json;
using System.Collections.Generic;
using MarketPulse.Server.Models;
namespace MarketPulse.Server.Services
{
public class FinnhubService
{
private readonly HttpClient _httpClient;
private readonly string _apiKey = "YOUR_API_KEY";
public FinnhubService(HttpClient httpClient)
{
_httpClient = httpClient;
_httpClient.BaseAddress = new Uri("https://finnhub.io/api/v1/");
}
public async Task<StockQuote> GetStockQuoteAsync(string symbol)
{
var response = await _httpClient.GetAsync($"quote?symbol={symbol}&token={_apiKey}");
response.EnsureSuccessStatusCode();
var jsonResponse = await response.Content.ReadAsStringAsync();
var stockData = JsonSerializer.Deserialize<Dictionary<string, decimal>>(jsonResponse);
if (stockData == null) return null;
return new StockQuote
{
Symbol = symbol,
CurrentPrice = stockData.GetValueOrDefault("c"),
Change = stockData.GetValueOrDefault("d"),
PercentChange = stockData.GetValueOrDefault("dp"),
HighPrice = stockData.GetValueOrDefault("h"),
LowPrice = stockData.GetValueOrDefault("l"),
OpenPrice = stockData.GetValueOrDefault("o"),
PreviousClosePrice = stockData.GetValueOrDefault("pc")
};
}
public async Task<List<StockQuote>> GetMultipleStockQuotesAsync(List<string> symbols)
{
var stockQuotes = new List<StockQuote>();
foreach (var symbol in symbols)
{
var quote = await GetStockQuoteAsync(symbol);
if (quote != null)
{
stockQuotes.Add(quote);
}
}
return stockQuotes;
}
}
}
Banana Cake Pop
From Hot Chocolate 12, Banana Cake Pop is built in middleware for developer to test GraphQL. By default, when you map your GraphQL endpoints using MapGraphQL(), Banana Cake Pop is automatically served at the /graphql endpoint. Here we map Banana Cake Pop to /graphql/ui.
From Banana Cake Pop you can see all schemas you defined for GraphQL like the below.
Also you can test query and subscription on Banana Cake Pop.
Conclusion
With this setup, the Market Pulse backend is ready to serve GraphQL queries and subscriptions, providing real-time updates on stock prices. The integration of Hot Chocolate, .NET 8, and Finnhub API allows for a scalable and performant application that serves data efficiently.
Next, we will build the React client to consume this GraphQL API and display the data in a user-friendly interface.
React Typescript Client
Now we will build a React client to consume the GraphQL API provided by the Market Pulse backend. The client will display real-time stock prices using GraphQL subscriptions and provide a modern, responsive user interface using Chakra UI. By leveraging Apollo Client, we can efficiently manage data fetching, caching, and real-time updates.
Setting Up the React Project
Open marketpulse.client with Visual Studio Code.
Install necessary dependencies for Apollo Client, GraphQL, Chakra UI, and WebSocket support:
npm install @apollo/client graphql graphql-ws @chakra-ui/react @emotion/react @emotion/styled framer-motion
Setting Up Apollo Client for GraphQL
To connect the React client to the GraphQL backend, we need to set up Apollo Client with WebSocket support for subscriptions.
Create an Apollo Client setup file in src:
src/apolloClient.ts:
import { ApolloClient, InMemoryCache, split, HttpLink } from '@apollo/client';
import { GraphQLWsLink } from '@apollo/client/link/subscriptions';
import { createClient } from 'graphql-ws';
import { getMainDefinition } from '@apollo/client/utilities';
const httpLink = new HttpLink({
uri: 'http://localhost:7041/graphql',
});
const wsLink = new GraphQLWsLink(
createClient({
url: 'ws://localhost:7041/graphql',
})
);
const splitLink = split(
({ query }) => {
const definition = getMainDefinition(query);
return (
definition.kind === 'OperationDefinition' &&
definition.operation === 'subscription'
);
},
wsLink,
httpLink
);
const client = new ApolloClient({
link: splitLink,
cache: new InMemoryCache(),
});
export default client;
Integrate Apollo Client with React in the main entry file:
src/main.tsx:
import React from 'react';
import ReactDOM from 'react-dom/client';
import { ApolloProvider } from '@apollo/client';
import { ChakraProvider } from '@chakra-ui/react';
import App from './App';
import client from './apolloClient';

ReactDOM.createRoot(document.getElementById('root') as HTMLElement).render(
  <React.StrictMode>
    <ApolloProvider client={client}>
      <ChakraProvider>
        <App />
      </ChakraProvider>
    </ApolloProvider>
  </React.StrictMode>
);
Creating the Stock List Component
Next, let's create a component to display the list of stock prices and subscribe to real-time updates from the backend.
Create a StockList component in src/components:
src/components/StockList.tsx:
import React, { useEffect, useState } from 'react';
import { useSubscription, gql } from '@apollo/client';
import { Box, Flex, Heading, Text, VStack, HStack, Badge } from '@chakra-ui/react';
const STOCK_PRICE_SUBSCRIPTION = gql`
subscription OnStockPriceUpdated {
onStockPriceUpdated {
symbol
currentPrice
highPrice
lowPrice
previousClosePrice
openPrice
}
}
`;
interface StockQuote {
symbol: string;
currentPrice: number;
highPrice: number;
lowPrice: number;
openPrice: number;
previousClosePrice: number;
}
const StockList: React.FC = () => {
const { data: subscriptionData, error, loading } = useSubscription<{ onStockPriceUpdated: StockQuote }>(STOCK_PRICE_SUBSCRIPTION);
const [stocks, setStocks] = useState<StockQuote[]>([]);
useEffect(() => {
if (loading) {
console.log('Subscription is loading...');
}
if (error) {
console.error('Subscription error:', error.message);
}
if (subscriptionData) {
const updatedStock = subscriptionData.onStockPriceUpdated;
setStocks((prevStocks) =>
prevStocks.map((stock) =>
stock.symbol === updatedStock.symbol ? updatedStock : stock
)
);
}
}, [subscriptionData, loading, error]);
return (
<VStack spacing={6} align="start" p={4}>
<Heading size="md" mb={4}>
Stock Prices
</Heading>
<Flex wrap="wrap" justify="space-between" width="100%">
{stocks.map((stock) => (
<Box
key={stock.symbol}
p={4}
shadow="md"
borderWidth="1px"
borderRadius="lg"
width="30%"
mb={4}
>
<HStack justify="space-between">
<Text fontWeight="bold">{stock.symbol}</Text>
<Badge colorScheme={stock.currentPrice >= stock.previousClosePrice ? 'green' : 'red'}>
{stock.currentPrice >= stock.previousClosePrice ? '+' : ''}
{((stock.currentPrice - stock.previousClosePrice) / stock.previousClosePrice * 100).toFixed(2)}%
</Badge>
</HStack>
<Text mt={2}>Price: ${stock.currentPrice.toFixed(2)}</Text>
<Text>High: ${stock.highPrice.toFixed(2)}</Text>
<Text>Low: ${stock.lowPrice.toFixed(2)}</Text>
</Box>
))}
</Flex>
</VStack>
);
};
export default StockList;
Adding the Stock List Component to the App
Add the StockList component to the main App component to display it in the application:
src/App.tsx:
import React from 'react';
import { Container } from '@chakra-ui/react';
import StockList from './components/StockList';

const App: React.FC = () => {
  return (
    <Container maxW="container.xl" p={4}>
      <StockList />
    </Container>
  );
};

export default App;
Running the React Client
Start the development server:
npm run dev
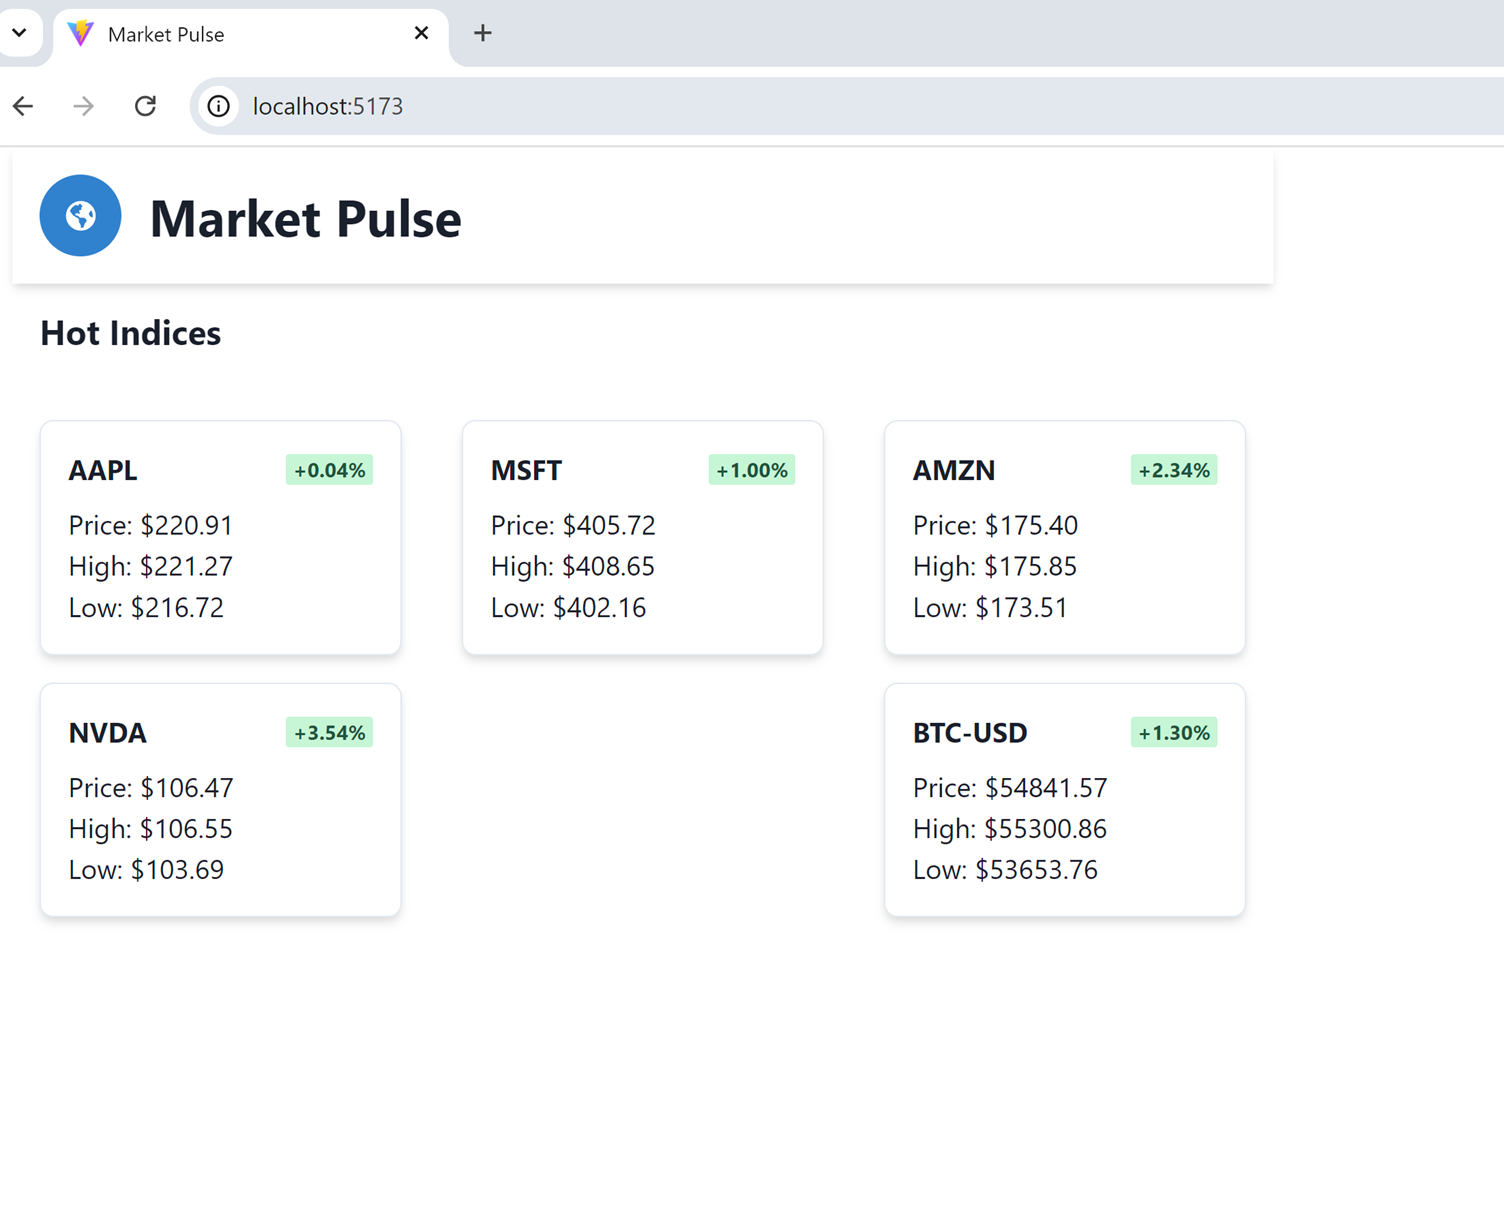
Open your browser and navigate to http://localhost:5173 to see the real-time stock prices for Apple, Microsoft, Amazon, NVIDIA, and Bitcoin.
Conclusion
By following these steps, you have successfully built a React client that connects to a GraphQL backend, fetches stock data, and displays real-time updates using subscriptions. This setup demonstrates the power of GraphQL in managing efficient data fetching and real-time updates, combined with the flexibility of React and Apollo Client for modern web development.
Start Both server and client projects from Visual Studio
Right-click the solution and select Set Startup Project. Change the startup project from Single startup project to Multiple startup projects. Select Start for each project’s action.
Make sure the backend project and move it above the frontend, so that it starts up first.
Now start the solution by press “F5” or click “Start” button at the top menu.
You can see both server and client projects started.
Summary
In this article, we explored how to build a robust, real-time stock price tracking application called Market Pulse using modern web development tools and frameworks. We started by implementing a powerful backend with .NET 8 and GraphQL using Hot Chocolate, providing an efficient API for querying and subscribing to real-time stock data. The backend leveraged the Finnhub API to fetch live market data and used GraphQL subscriptions to push updates to connected clients.
We then developed a React client using TypeScript and Apollo Client to consume the GraphQL API. By integrating Chakra UI, we built a modern, responsive user interface that displays real-time stock prices and market trends for companies like Apple, Microsoft, Amazon, NVIDIA, and Bitcoin. The client seamlessly handles real-time updates through GraphQL subscriptions, providing a dynamic user experience.
This project demonstrates the power of combining .NET 8, GraphQL, and React to create full-stack applications that are both efficient and responsive. Whether you are looking to learn more about GraphQL, enhance your frontend skills with React, or leverage .NET for modern web development, the concepts and implementations covered in this article provide a solid foundation to get started.
By following this guide, you now have the knowledge to build your own real-time applications that harness the power of modern web technologies to deliver a great user experience.

