Azure Diagnostics is extremely powerful when setup correctly and being fully utilised. That said, quite a bit of burden is still left with us developers to pull out the juicy bits and present that as information that can potentially be consumed and mean something to the other, often not quite so technical, stake holders. Maybe more importantly from a developer standpoint is being able to fault find a collection of services when something does go wrong or is about to go wrong.
A useful tool which I have used with Windows Azure and comes in very handy for diagnosing and monitoring is Stackify. It is online which immediately gets a thumbs up from me but the good part is that it supports all the Azure Diagnostics in near to real time.
You can see below that it is showing some useful stats from some Web and Worker roles.

There are a number of different views that can be selected such as the one shown below.

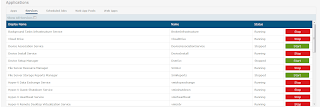
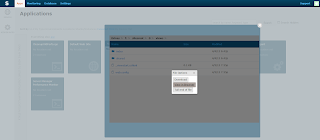
Going beyond the stats which are absolutely invaluable when trouble shooting problems, there are a whole host of other features and views which make this rather like a Swiss army dev ops tool as show below.
Process List

Schedule Jobs

Start and stop Services

Browse and download Files and Folders

Like me, you have probably written some similar features into your own set of utilities in the past.
There are other features as well which are worth checking out.
The Setup
Setup is very straight forward.
- Create an account with Stackify, login and download the zip archive for Azure (see fig 1 above)
- Extract the files to your Web or Worker Role project
- Set 'Always Copy to Output Directory' to ensure they get deployed from properties
- Set the Build action to 'None' from properties
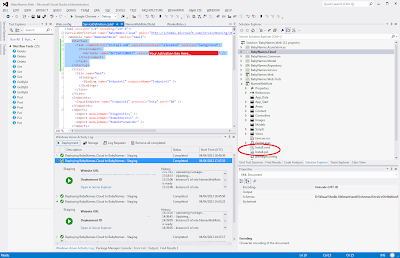
- Add a startup task to your ServiceDefinition.csdef as shown below:
<Startup>
 <Task commandLine="Install.cmd" executionContext="elevated" taskType="background">
  <Environment>   <Variable name="ACTIVATIONKEY" value="<Replace with your Activation Key>" />
  </Environment>
 </Task>
</Startup>
- Replace the value for the '
ACTIVATIONKEY' with your new activation key obtained from creating your new Stackify account.
This can be seen below from my project:

Now go ahead and perform a deployment as usual.
As soon as your services have been deployed and started, you will be able to see an item for each instance inside Stackify and drill down into the features. Now you can check the current status of a deployment and perform some pretty cool stuff just with your IPad. Not Bad...
One thing to note is that some of the other features focus on developer productivity! Your project manager will love it!!!
