Introduction
In this blog post, we will go through step by step how to actualize DotNetNuke on Windows Azure Website from Gallery. For those who are not familiar with DotNetNuke, we start by introducing what it is.
DotNetNuke is a web content management system based on Microsoft .NET. The Community Edition is open source, and source code and related information can be found on Codeplex. The product is used to build professional looking and easy-to-use commercial websites, social intranets, community portals, or partner extranets.
In addition to robust content management, the free, open source DotNetNuke Community Edition includes the following built-in features:
- A rich-text editor
- File management
- Cloud-ready with Microsoft Azure compatibility
- Mobile API and basic mobile device detection
- Core written in C#
- Single installation, multiple portals
- Social API (in DNN 6.2 and above)
- Modern client-side Web tools like CSS 3, HTML 5 and JQuery
- Bulk email
- Robust security
- Administration features like: security roles, protected content and site log
Windows Azure website from gallery makes available a wide range of popular web applications developed by Microsoft, third party companies, and open source software initiatives. Web applications created from the gallery do not require installation of any software other than the browser used to connect to the Windows Azure Management Portal.
So after a brief about DotNetnuke and Azure Websites, we are ready to go through step-by-step journey to set-up DotNetNuke on Azure.
NOTE: For following steps, you need a Windows Azure account that has the Windows Azure Web Sites feature enabled. If you don’t have one, you can create trial for free at the following link: Create a Windows Azure account and enable preview features.
- Login to the Windows Azure Management Portal.
- Click the New icon on the bottom left of the dashboard.

- Click the Compute Icon, then click Web Site icon, and click From Gallery.

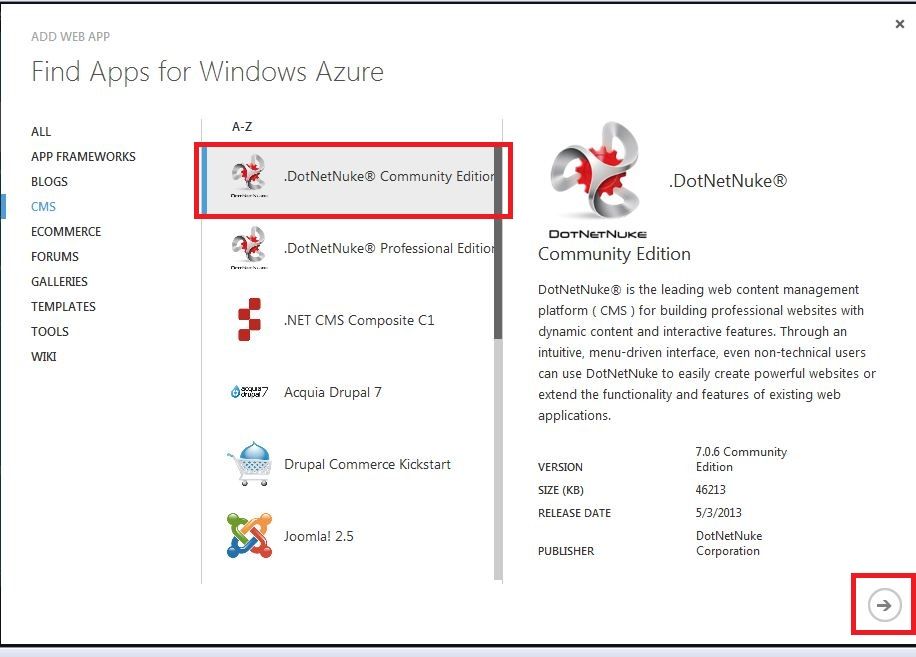
- Locate and click the DotNetNuke Community Edition icon in list, and then click Next.
- On the Configure Your App page, enter or select values for all fields:
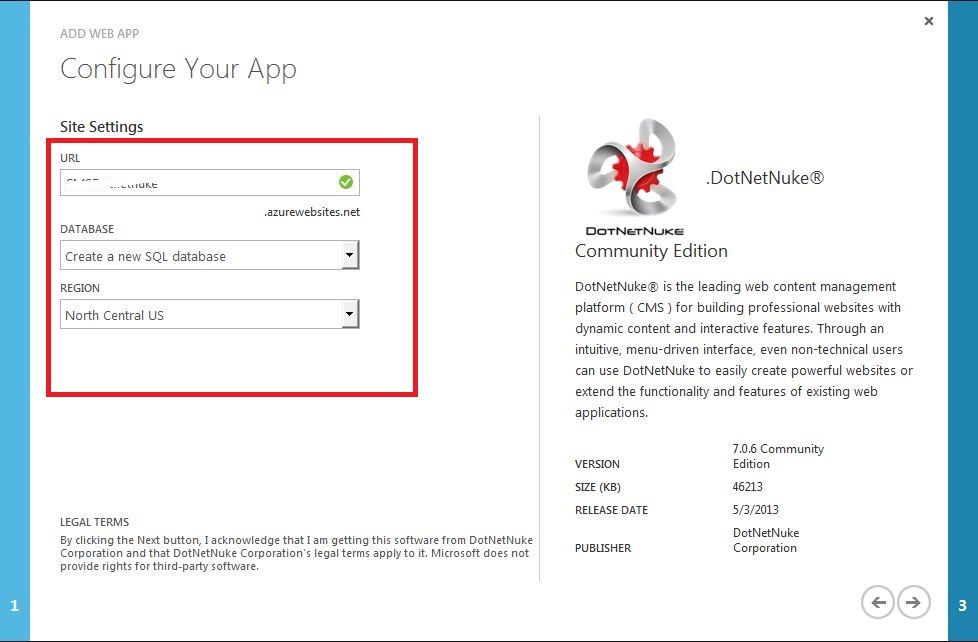
- Enter a URL name of your choice
- Leave Create a new SQL database selected in the Database field
- Select the region closest to you.
- Then click Next.
- On the ADD WEB APP page, you can specify a name for your new SQL database or use the default name. Select the region closest to you as the hosting location. Then enter Server Login Name and Server Login Password. Then click the check to complete the site creation.
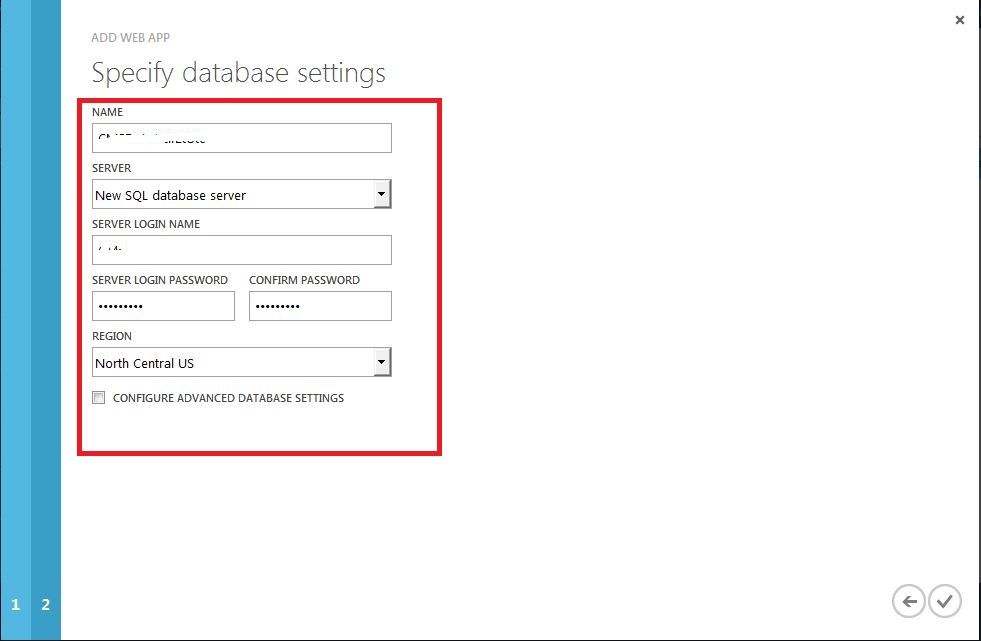
NOTE: Please note down the Server login name and password, as this will be later required in setting up DotnetNuke installation.
- Windows Azure will take a little time to deploy DotNetNuke Community Edition CMS to your site.
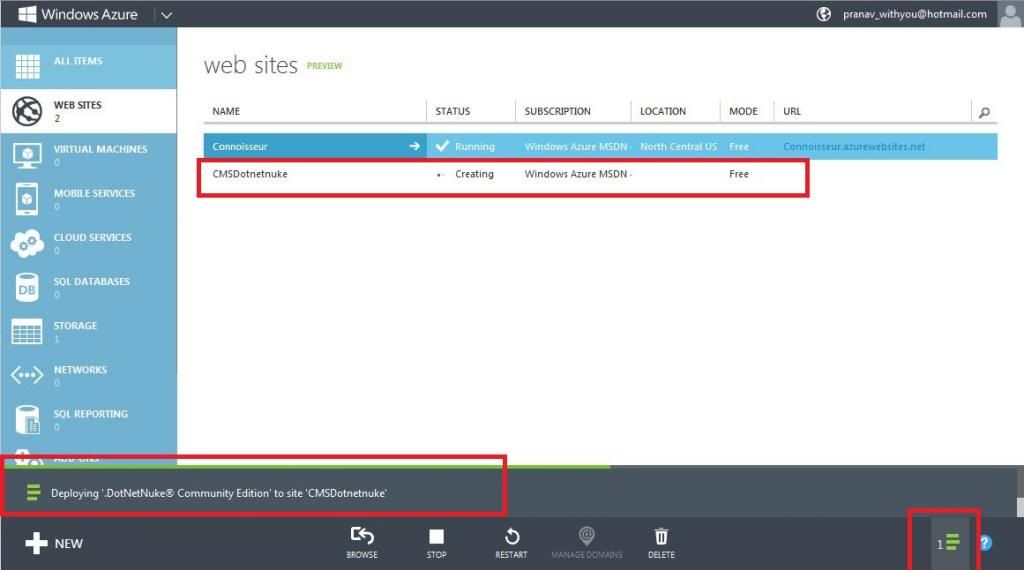
- After successful setup, a new website with given name can be seen in Running status.

- We are done at the part to be done at Windows Azure Management Portal, now open the deployed site by clicking website link.

- At the first time open of site will require some data from you.
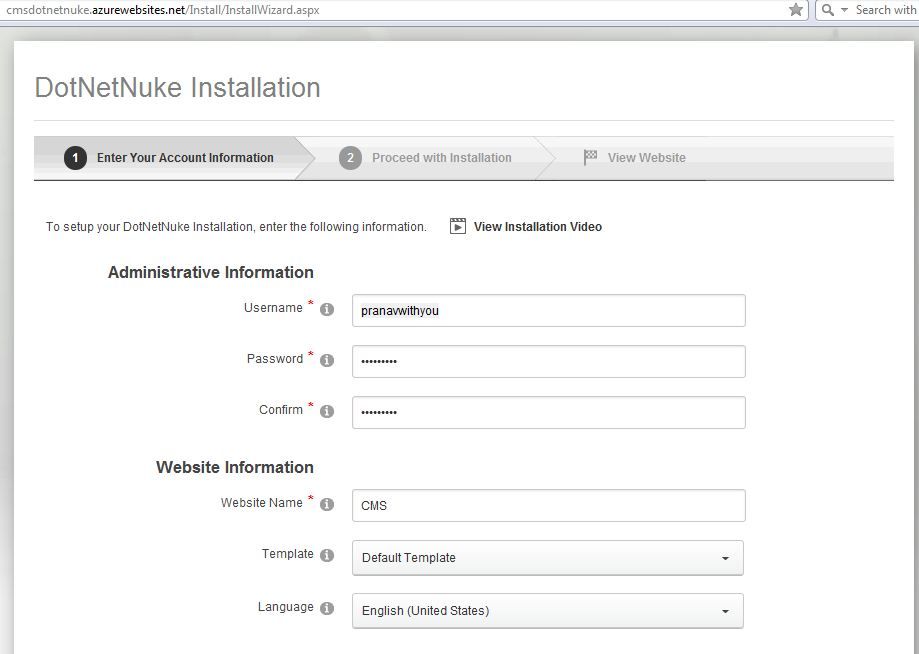
- Fill up Administrative Information
a) Fill up Username and enter Password.
Note: Note down this username and password as it will be your admin username and password.
- Enter Website Information
a) Fill up website name and change language, if necessary.
- Enter Database Information
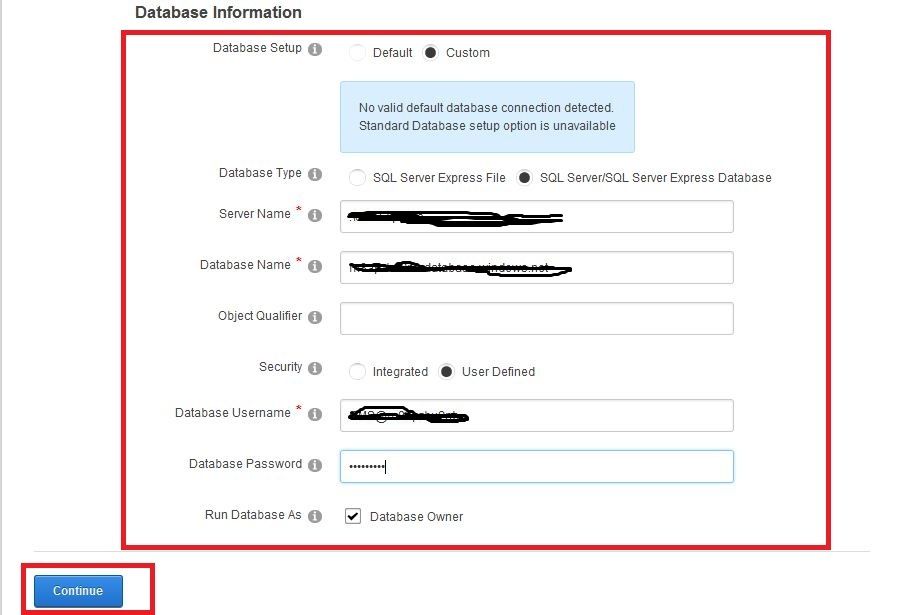
- Select Database Setup type Custom
- Select Database Type as SQL Server/SQL Server Express Database
- Enter Server Name and Database Name (You can check your server name at Windows Azure Management Portal)

- Select Security type User Defined.
- Enter Database Username (this is also can be found at Windows Azure Management Portal)
- Enter Database Password (that we saved in step 7).
- Finally click on continue.
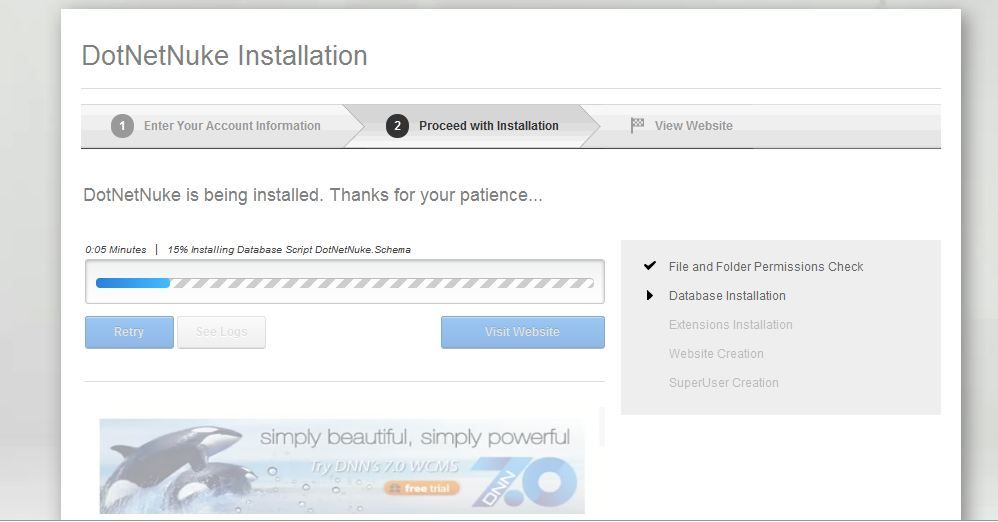
- Installation will take a while for verifying database connection.

- Page is then redirected to installation page, which will take a little time to install.
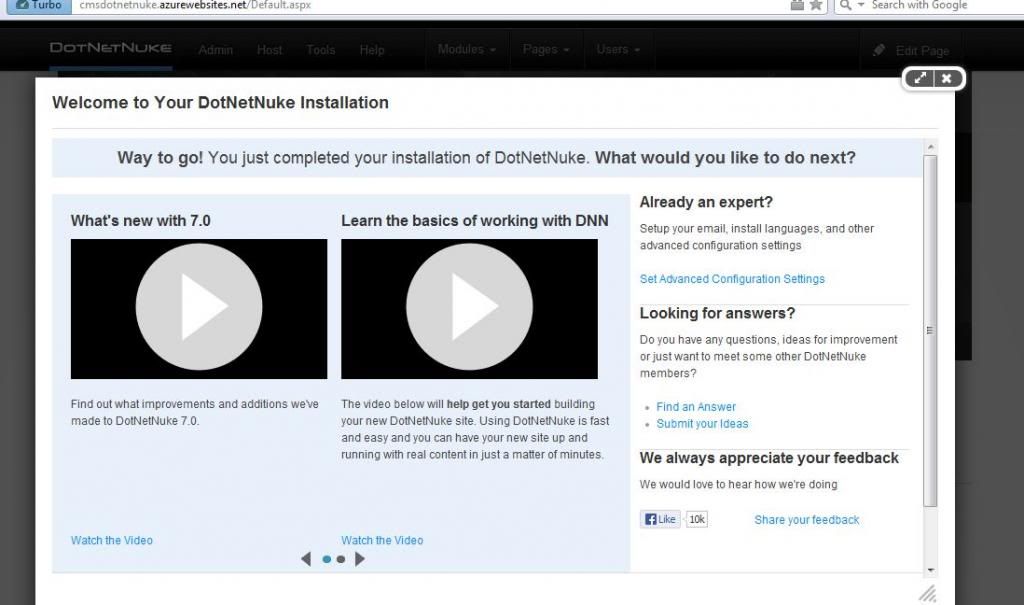
- After installation is complete, message is shown as Installation complete, click Visit Website.
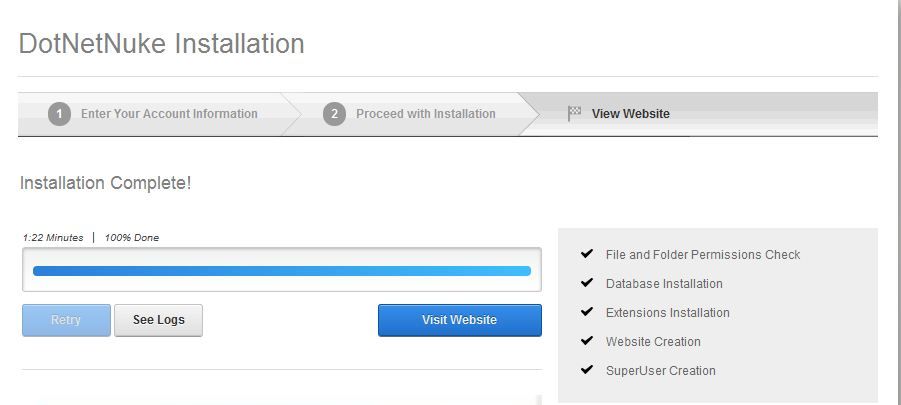
- DotNetNuke is installed on Windows Azure with SQL Azure database and is ready to use.
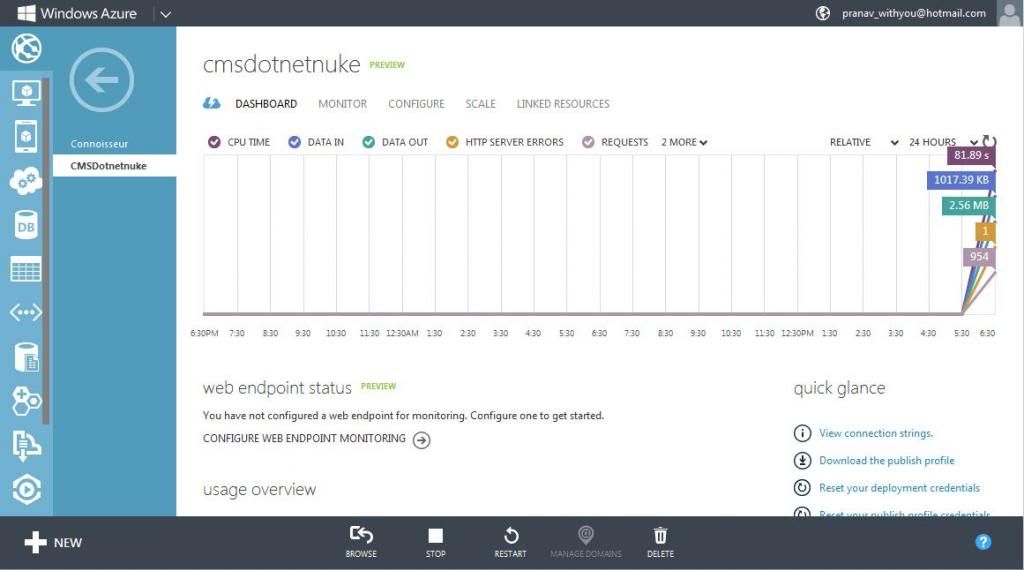
You can now enjoy the benefits of Azure Cloud Scalability and pay as you use model. You can monitor the traffic on website and database on Azure Dashboard.
CodeProject

