Introduction
As you know, after 18th of March 2013, Android Google Api V1 key requests are no more avaible. For those who want to create a map activity, need to get Android Google Api V2 key. So, in this article I will show the steps to get Android Google Api V2 key .
Background
For reader, knowing the Eclipse environment , Android sdk and Google Api's will be helpful.
Using the code
These are the steps needed to be followed:
- Create new android application ( Compile with Google Api )
- Import Google Play Services Lib
- Get your SHA1 fingerprint
- Get your mapKey by using your SHA1 key
- Modify the AndroidManifest.xml
and thats all, you are ready to go...
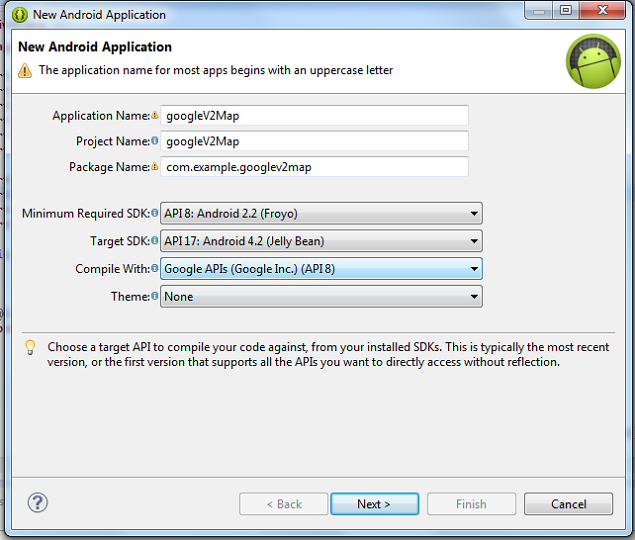
Create New Android Application
Import Google Play Services Lib
- Find your google play services lib which under the path
....\android-sdk\adt-bundle-windows-x86_64-20130522\adt-bundle-windows-x86_64-20130522\sdk\extras\google and move it to your workspace.
2. Import this liblary to your Eclipse
File\Import\Existing Android Code Into Workspace

3. Add google play service lib to your project by right clicking on your project properties\android and you will see little button on the buttom-right "add". Just add the google play service lib and click ok.
Get your SHA1 fingerprint
Go to:
Window\Preferences Android\Build
find your SHA1 fingerprint and copy that.
Go to Google Apis Console Window.
- Activate the option "Google Maps Android API V2"
- Click "Create New Android Key"
- Enter your SHA1 fingerprint followed by ' ; ' and your application package name.
Modify the AndroidManifest.xml
1- Add the following code right before the <application> tag.
    <permission
        android:name="com.example.osman.permission.MAPS_RECEIVE"
        android:protectionLevel="signature"/>
<uses-permission android:name="com.example.osman.permission.MAPS_RECEIVE"/>

<uses-permission android:name="android.permission.INTERNET"/>
<uses-permission android:name="android.permission.ACCESS_NETWORK_STATE"/>
<uses-permission android:name="android.permission.WRITE_EXTERNAL_STORAGE"/>
<uses-permission android:name="com.google.android.providers.gsf.permission.READ_GSERVICES"/>
<!-- The following two permissions are not required to use
     Google Maps Android API v2, but are recommended. -->
<uses-permission android:name="android.permission.ACCESS_COARSE_LOCATION"/>
<uses-permission android:name="android.permission.ACCESS_FINE_LOCATION"/>

<uses-feature
        android:glEsVersion="0x00020000"
        android:required="true"/>
2- Add this right before the </application> tag
  <meta-data
android:name="com.google.android.maps.v2.API_KEY"
android:value="YOUR_KEY"/>
3-Add this to your main_layout.xml
 <span style="color: black; font-family: Consolas, 'Courier New', Courier, mono; font-size: 9pt; white-space: pre;"> </span><RelativeLayout xmlns:android="http://schemas.android.com/apk/res/android"
    xmlns:tools="http://schemas.android.com/tools"
    android:layout_width="match_parent"
    android:layout_height="match_parent"
    android:paddingBottom="@dimen/activity_vertical_margin"
    android:paddingLeft="@dimen/activity_horizontal_margin"
    android:paddingRight="@dimen/activity_horizontal_margin"
    android:paddingTop="@dimen/activity_vertical_margin"
    tools:context=".MainActivity" >

<fragment
          android:id="@+id/map"
          android:layout_width="match_parent"
          android:layout_height="match_parent"
          class="com.google.android.gms.maps.SupportMapFragment"/>

</RelativeLayout>
And your MainActivity will be like this:
import android.os.Bundle;
import android.app.Activity;
import android.support.v4.app.FragmentActivity;
import android.view.Menu;

public class MainActivity extends FragmentActivity {

	@Override
	protected void onCreate(Bundle savedInstanceState) {
		super.onCreate(savedInstanceState);
		setContentView(R.layout.activity_main);
	}


}
- To use marker on your map, add these codes in to constructor of your MainActivity...,
      GoogleMap googleMap;
        googleMap = ((SupportMapFragment)(getSupportFragmentManager().findFragmentById(R.id.map))).getMap();
        LatLng latLng = new LatLng(-33.796923, 150.922433);
        googleMap.setMapType(GoogleMap.MAP_TYPE_NORMAL);
        googleMap.addMarker(new MarkerOptions()
                .position(latLng)
                .title("My Spot")
                .snippet("This is my spot!")
                .icon(BitmapDescriptorFactory.defaultMarker(BitmapDescriptorFactory.HUE_AZURE)));
        googleMap.getUiSettings().setCompassEnabled(true);
        googleMap.getUiSettings().setZoomControlsEnabled(true);
        googleMap.animateCamera(CameraUpdateFactory.newLatLngZoom(latLng, 10));

