This series of CodeProject articles is based on a series of posts I've first published on my blog.
In this post, we'll review the ribbon framework images terminology and see how to set images both statically and dynamically in your WinForms application.
More details can be found at Specifying Ribbon Image Resources on MSDN.
Large Images vs. Small Images
Many ribbon controls allow you to specify an image. For example: Button, ComboBox, and Spinner.
Most of these controls have two properties, one for a large image and one for small. The Ribbon framework will choose one of these sizes according to the available screen space and your definitions for group scaling.
Large image is usually of size 32x32 pixels and Small image is usually of size 16x16 pixels.
I say usually, because this can change. The actual image size should be dependent on your chosen resolution and DPI settings. Microsoft recommended sizes for images are as follows:
DPI
| Small Image
| Large Image
|
96 dpi
| 16x16 pixels
| 32x32 pixels
|
120 dpi
| 20x20 pixels
| 40x40 pixels
|
144 dpi
| 24x24 pixels
| 48x48 pixels
|
192 dpi
| 32x32 pixels
| 64x64 pixels
|
The images for a ribbon control are exposed via the LargeImage and SmallImage properties.
High Contrast Mode
High Contrast is a windows accessibility feature designed for people who have vision impairment. It can be turned on/off by pressing: Left ALT + Left SHIFT + PRINT SCREEN.
The mode’s main effect is changing the system colors, so that near colors have high contrast.
Now, in order to support high contrast mode in your application, the ribbon framework exposes two extra properties: LargeHighContrastImage and SmallHighContrastImage which allow you to set images specifically for this mode. Here is an example of how an application usually looks in high contrast mode:

Setting Images Statically
So we've mentioned that we have 4 image properties: LargeImage, SmallImage, LargeHighContrastImage and SmallHighContrastImage. The size of the images depends on the current system settings. So we need a way to supply the application different images for these scenarios. Here it is:
<Command Name="cmdCut" Id="1008" LabelTitle="Cut">
  <Command.LargeImages>
    <Image Source="res/CutLargeImage32.bmp" MinDPI="96" />
    <Image Source="res/CutLargeImage40.bmp" MinDPI="120" />
    <Image Source="res/CutLargeImage48.bmp" MinDPI="144" />
    <Image Source="res/CutLargeImage64.bmp" MinDPI="192" />
  </Command.LargeImages>
  <Command.SmallImages>
    <Image Source="res/CutSmallImage16.bmp" MinDPI="96" />
    <Image Source="res/CutSmallImage20.bmp" MinDPI="120" />
    <Image Source="res/CutSmallImage24.bmp" MinDPI="144" />
    <Image Source="res/CutSmallImage32.bmp" MinDPI="192" />
  </Command.SmallImages>
  <Command.LargeHighContrastImages>
    <Image Source="res/CutLargeImage32HC.bmp" MinDPI="96" />
    <Image Source="res/CutLargeImage40HC.bmp" MinDPI="120" />
    <Image Source="res/CutLargeImage48HC.bmp" MinDPI="144" />
    <Image Source="res/CutLargeImage64HC.bmp" MinDPI="192" />
  </Command.LargeHighContrastImages>
  <Command.SmallHighContrastImages>
    <Image Source="res/CutSmallImage16HC.bmp" MinDPI="96" />
    <Image Source="res/CutSmallImage20HC.bmp" MinDPI="120" />
    <Image Source="res/CutSmallImage24HC.bmp" MinDPI="144" />
    <Image Source="res/CutSmallImage32HC.bmp" MinDPI="192" />
  </Command.SmallHighContrastImages>
</Command>
If you don't specify all these images, the ribbon framework will use the available images and resize them according to his needs. Of course, providing the images yourself is the way to get the best results.
Setting Images Dynamically
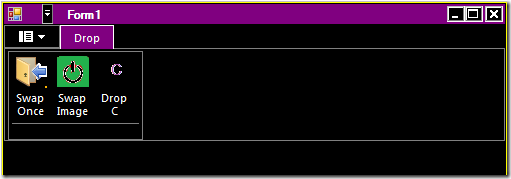
In this section, we'll see how to dynamically set the images for a button. The end result will look like this:

This time the image doesn't help, you need to run it yourself to see the code at work.
The “Swap Once” button demonstrates the simplest way to set the LargeImage property programmatically.
The “Swap Image” button demonstrates how to set the image according to the recommended size.
I've added a new function to the RibbonLib.Ribbon class, named ConvertToUIImage. Here is how you use it:
void _buttonDropA_OnExecute(PropertyKeyRef key,
PropVariantRef currentValue, IUISimplePropertySet commandExecutionProperties)
{
Bitmap bitmap = new System.Drawing.Bitmap(@"..\..\Res\Drop32.bmp");
bitmap.MakeTransparent();
_buttonDropA.LargeImage = _ribbon.ConvertToUIImage(bitmap);
}
If you want to set an image which has the correct size according to the current DPI settings, in order to avoid the ribbon framework from resizing your image, you should check the value of SystemInformation.IconSize.Width.
Large images size should be (SystemInformation.IconSize.Width x SystemInformation.IconSize.Width) and small images size should be (SystemInformation.IconSize.Width/2) x (SystemInformation.IconSize.Width/2).
Here is an example for setting an image according to windows settings:
void _buttonDropB_OnExecute(PropertyKeyRef key,
	PropVariantRef currentValue, IUISimplePropertySet commandExecutionProperties)
 {
     List<int> supportedImageSizes = new List<int>() { 32, 48, 64 };

     Bitmap bitmap;
     StringBuilder bitmapFileName = new StringBuilder();

     int selectedImageSize;
     if (supportedImageSizes.Contains(SystemInformation.IconSize.Width))
     {
         selectedImageSize = SystemInformation.IconSize.Width;
     }
     else
     {
         selectedImageSize = 32;
     }

     exitOn = !exitOn;
     string exitStatus = exitOn ? "on" : "off";

     bitmapFileName.AppendFormat(@"..\..\Res\Exit{0}{1}.bmp",
				exitStatus, selectedImageSize);

     bitmap = new System.Drawing.Bitmap(bitmapFileName.ToString());
     bitmap.MakeTransparent();

     _buttonDropB.LargeImage = _ribbon.ConvertToUIImage(bitmap);
 }
Behind the Scenes
What ConvertToUIImage method actually does is create an instance of a ribbon framework COM object named UIRibbonImageFromBitmapFactory, which implements IUIImageFromBitmap. This interface supplies a function for wrapping a given HBITMAP (handle for bitmap) as a IUIImage interface.
The ribbon image properties work with these instances of IUIImage. Note that the actual creation of UIRibbonImageFromBitmapFactory is done in the RibbonLib.Ribbon InitFramework method.
public IUIImage ConvertToUIImage(Bitmap bitmap)
{
    if (_imageFromBitmap == null)
    {
        return null;
    }

    IUIImage uiImage;
    _imageFromBitmap.CreateImage(bitmap.GetHbitmap(), Ownership.Transfer, out uiImage);

    return uiImage;
}
Bonus
Similar to my implementation of helper classes for Spinner and ComboBox ribbon controls, I've added helper classes for Tab, Group and Button controls. These helpers let you change properties of tabs, groups and buttons easily. The Button class also exposes an OnExecute event, which facilitates the way you respond to button clicks.
As always, the result of this post is yet another example of using ribbon features in WinForms applications. Find it at Windows Ribbon for WinForms.
That’s it for now,
Arik Poznanski.
