This article is about configuring FreeNAS (v. 8.2 BETA 3).
If you haven’t yet installed FreeNAS, have a look at Installing FreeNAS to USB stick first.
We will assume that FreeNAS was installed and running on a remote computer with IP address of 192.168.1.210. Your installation most probably will have a different address. It also happens that I have another installation of FreeNAS 7 and the computer is named freenas. Therefore the FreeNAS 8.2 computer is named freenas2.
If I type the IP address mentioned above in a web browser, I will see the web interface home screen for FreeNAS as shown below:
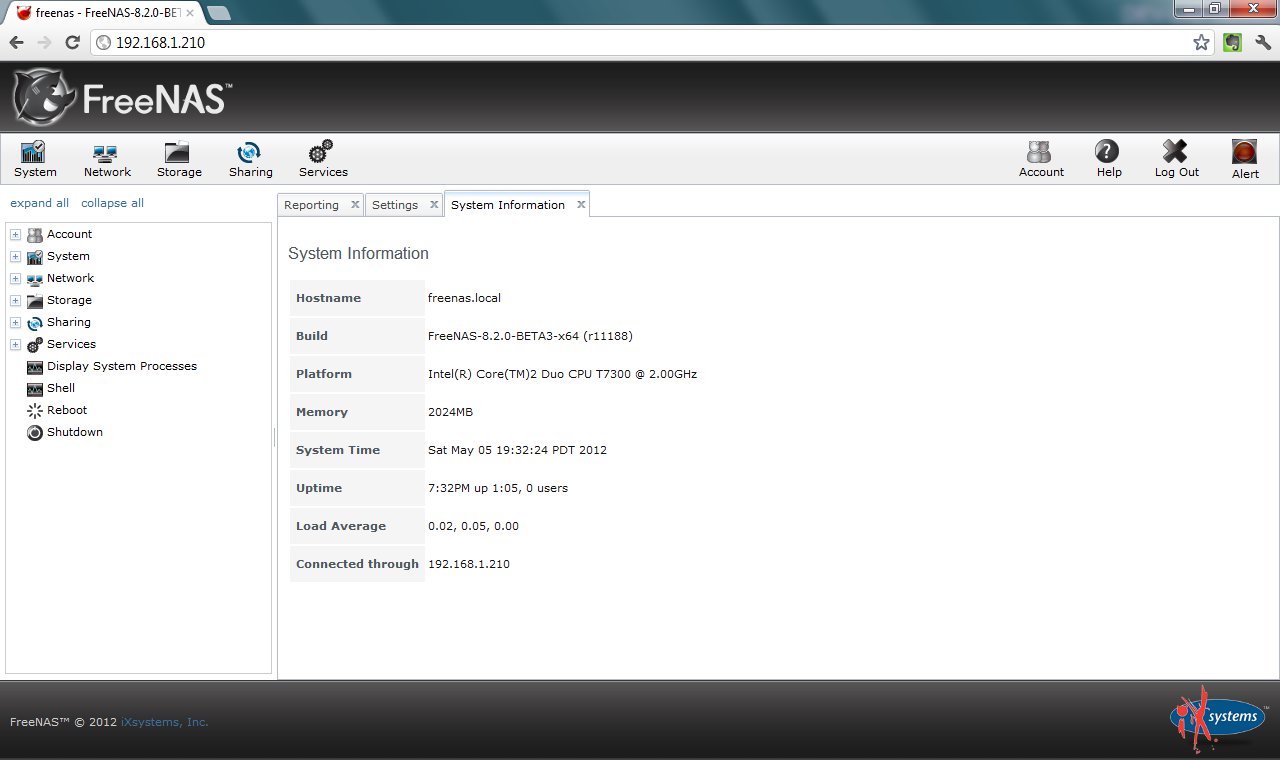
You will notice the blinking button that says “Alert” on the right side of the screen. It prompts you to change the admin password (by default, there is no password and anyone can access the FreeNAS GUI). Click it and it will take you to the form when you can change the password. You also can reach the form by using the tree-like navigation on the left part of the screen – expand Account -> Admin Account -> Change Password.
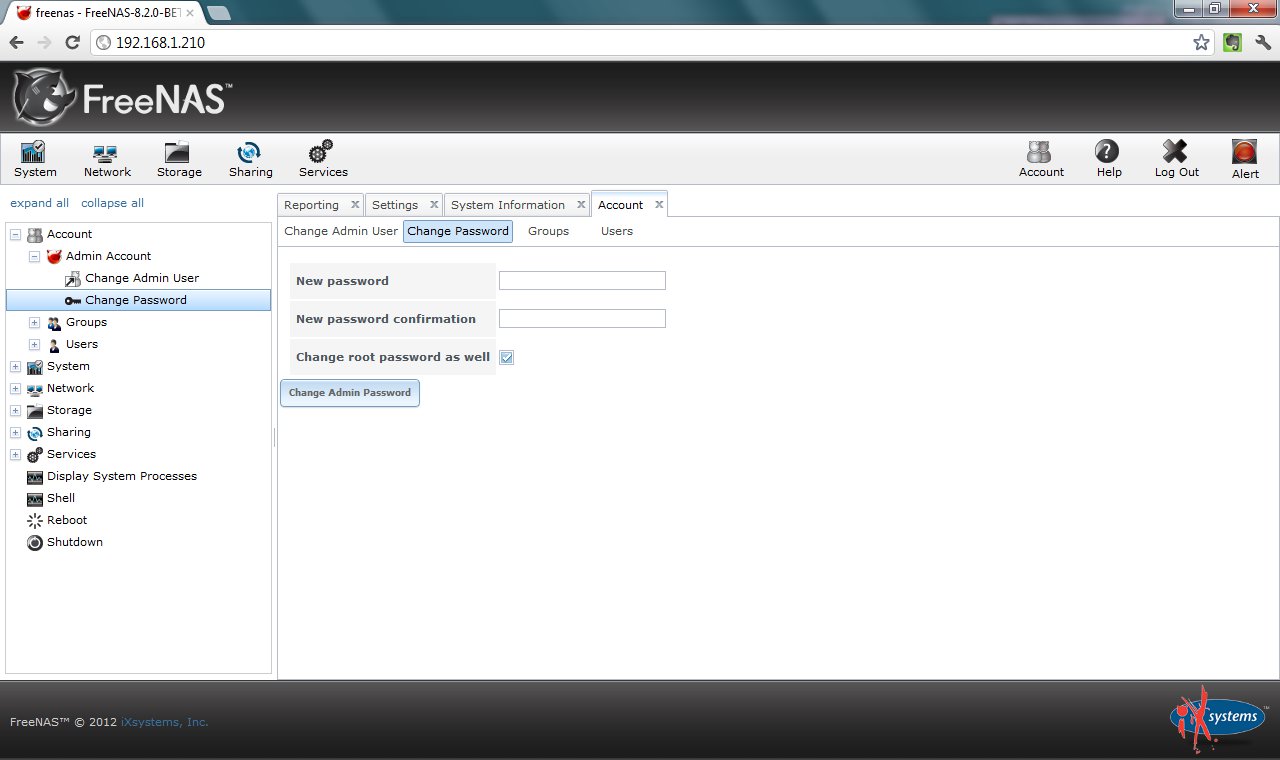
Next time, you will be asked for username (which is admin by default) and password (the one you set up above).
If you check the Change root password as well, it will set the root password with the password you typed above.
<!--adsense#Banner_468_60-->
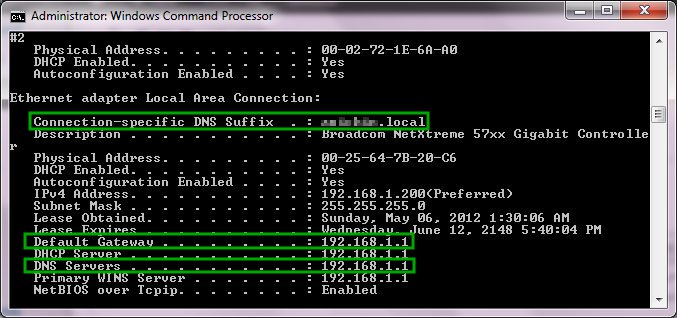
Next expand Network -> Global Configuration. Here fill in the Hostname, Domain, Default gateway, Nameserver 1 and press the Save button:
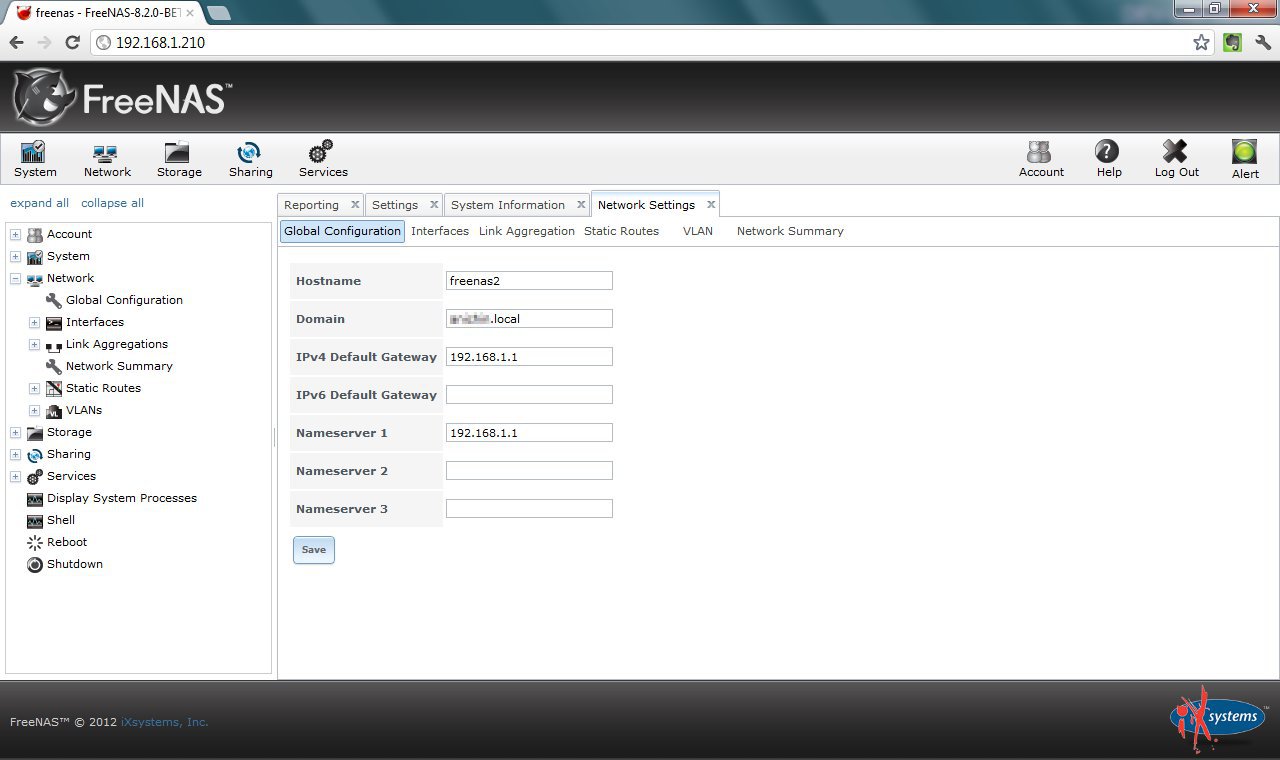
You can find most of this information if you open a command prompt (DOS prompt) and type ipconfig /all:
FreeNAS can send you status reports about the system. In order for this to work, you need to configure the Email settings. From the navigation on the left, expand System -> Settings and click the Email tab. The configuration shown below will work if you have a GMail account. You should be able to figure out what to put in the boxes if you want to use a non-GMail account. Save the settings and click Send Test Mail to confirm it works:
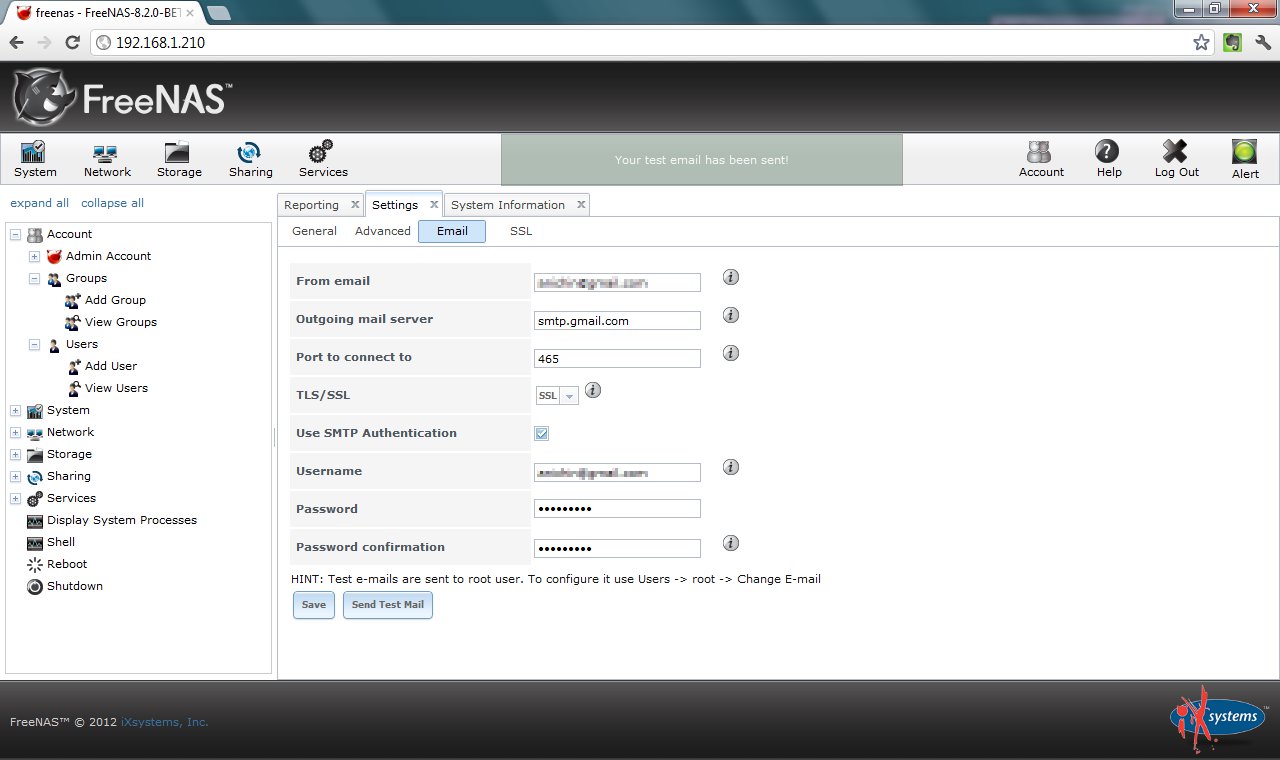
These are some of the settings that I would typically adjust on a newly installed FreeNAS. There are additional settings and I encourage you to explore them. If you need more information, you can always click the Help button on the toolbar.
Please make sure to check the next post FreeNAS – Windows (CIFS) Shares
<!--adsense#Banner_468_60-->
