Introduction
Most Techies have a perspective of
BizTalk as an Orchestration based solution. But designing the solution with
orchestration makes a round trip to Message box.
Whenever complex business logic
needs to be designed, the Orchestration is the best approach to follow.
But, if you need to implement
simple transformations with no business logics, The Best approach would be the
Message-only Solution, which avoids the round trip to Message box and increases
the through-put of the solution.
Let us quickly create a message
only solution without orchestration J
Steps
Pre Deployment
Steps
Deployment
Post Deployment
Checks
Configuring Receive
Port/Location
Configuring Send
Port
Configure map in
send port
Configuring Filters
in send Port
Post-Configuration
Tasks
Creating a BizTalk Input &
Output Schema
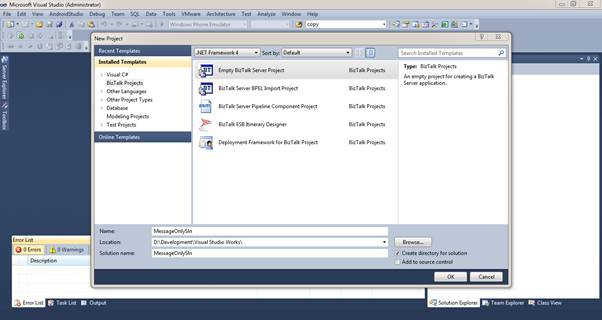
Start>>Visual
Studio 2010 >> BizTalk >> Empty BizTalk Server Project
Rename
the Name and Solution Name as MessageOnlySln
In
Solution Explorer, Right Click the project and Add>>New Item

Select
the schema from the Items and Rename the schema as ReceiveSchema.xsd
A
new schema will be formed with the root element as ‘root’, just rename the root
as ‘Input’
BizTalk
Identifies the Messages through the Message
Type. Message type is an integral part of ‘NameSpace#Root’
Now
create two child field elements as FirstName and LastName as string(default)
datatype
At last the ReceiveSchema should
be like this
Follow
the above steps 2,3,4,5 and create a SendSchema.xsd with one child field
element as ‘FullName’
Creating a Map
Map is a Message Transformational
object in BizTalk. The Conversion of schema ReceiveSchema and SendSchema
will be carried here. Maps are internally a XSLT Transformation.
Let us create a simple map
Create a new map and name it as ConcatenateMap.btm
Map
will be created with links as Open
Source Schema and Open Destination
Schema
Click
on those links and Select the Source(ReceiveSchema.xsd) and Destination Schema(SendSchema.xsd)
After
selecting the schemas, expand the root node to have a visibility of underlying
elements
Let
us do a simple concatenation of FirstName and LastName (Source Schema) to FullName(Destination
Schema)
Drag
and drop the String concatenate functoid
Functoids are ready-made
logical functions which is available for transforming the data in map
You can see the
warning shown in the functoid, because of no input/output is provided
For all the Functoids,
there will be an description, which you can find once you double click the same
Now
drag the Link from the FirstName and LastName elements from Source schema to
the left side of Concatenate functoid and link the result(right side)to the FullName
element of Output schema
Note
that functoid warning symbol has been disappeared
As said earlier
Map is internally an XSLT… Let’s see how the xslt is formed for this map.
Right click the
ConcatenateMap.btm and click validate map
If you click on the
output link of XSLT
You can see the
xslt as below:
With this we have
created the functionality. But we should do unit test before deploying, for now I am skipping that part J
Creating the instance of the
Input message
To create an instance, Right click the ReceiveSchema.xsd
and Generate instance
The schema’s
instance will be generated in the location. The Output window will show the
location as:
C:\Users\<PC-Name>\AppData\Local\Temp\_SchemaData\ReceiveSchema_output.xml
Open
the instance file
As
the Generate instance will be default field name will values, change it as
desired
Keep
this file ready before testing.
Deploy the Solution
We are done Lets Deploy the
SolutionJ
Pre Deployment Steps
All
the BizTalk Artifacts (Schemas,Maps,orchestration) or full projects has to be made the strongly
named before deploying
Goto
MessageOnlySln project in solution explorer and right click and click on
properties
And Navigate to
signing Tab in the left pane
Click on sign the assembly and choose a strong name key file as ‘new’
Give
the filename as ‘MessageOnlySlnKey’ and uncheck the ‘Protect my key file
with a password’
A
new Key will be created in the solution explorer as below
Now
go to the Deployment tab
Now
Create the application name as ‘MessageOnlyAppln’, this name will be used for
creating application in BizTalk Admin Console.If this is not specified this
solution will be deployed in the default application(BizTalk Application 1)
Save all the
unsaved artifacts…!
Deployment
Now
Right click on the Project in solution explorer and click on deploy
The
deploy started text will be displayed on Visual studio left bottom
Deploy
Succeeded after some time
New
Application called MessageOnlyAppln is formed in BizTalk Admin console
Note: In case of errors,
Please ensure that Biztalk necessary services
are up and running
In case of Access Denied errors, Restart visual
studio as administrator
Also make sure you have not missed out any steps
mentioned above
Configuring Application
Post Deployment Checks
Make
sure the schema and maps are available in the respective areas in the console
Configuring Receive Port/Location
Ports are the sources of Publish
subscribe model in BizTalk. All the Messages are published/Subscribed by the
ports in BizTalk
Configuring Receive Port/Location
Create
a new Receive port
In
General tab Rename the port as InboundRcvPort
Create
Receive Location
Click on the Receive
locations in the same window and click on new as shown below
Configure
Receive Location as below
Click
on Configure button and provide the location of Inbound folder
Click
ok on all the underlying windows
Make
sure Receive location is available as below
Configuring Send Port
The Message will be picked up by
the File based Receive Adapter>> It will be transmitted to Receive port
and Delivered to message box
Now we need to subscribe to this
delivered message through any of the Context properties(BTS.ReceivedFileName)
to apply the Outbound map. Here the map will be applied in the send port.
Create
a Send port as below
Click
on Static One-way send port and rename as ‘OutboundSendPort’ and make all configurations
as below
Click
on the Configure button and provide the Outbound folder location
Configure map in send port
Click
on the outbound maps in the same window on the left pane
Select
the map as shown below
Click
on apply
Configuring Filters in send Port
Filters are the
ones which subscribes to the messages from Message-Box
Go to filters tab on left pane in same window
and select the context property
‘BTS.ReceivedPortName’ from drop down
Provide the value to the property as ‘InboundRcvPort’
We can select any context properties(like
BTS.MessageType) based on your requirement
Apply all the settings and click on ok on all
windows
Post-Configuration Tasks
The Receive Location and Send port
will be in disabled state, Right click and enable the same
2. Make sure the host instance BizTalkServerApplication
is up and running
Testing the Solution
As we are done with all
configuration part, now it’s time to test the entire solution.
Copy
the instance file which you have generated in the previous task
Place
the file in the Inbound folder configured in receive location
The
file will be immediately picked up and output will be transformed and placed in
the output folder with unique MessageID as name
Output
file will be formed as
Ha!!! , We have
done this JSolution
is working as expected.
Trouble shoot on Failures
If
the file has not been formed in the send folder,
Double check the filter property and Value
configured
Make sure the Send Location is configured is
valid
For
more assistance check the Suspended Service instances to get the exact problem
With this we have learnt how to
make a simple Message only solution in BizTalk.
Hope this helps…!

