Introduction
We can integrate our database with SQL Azure by using the SQLAzureMW tool that is SQL Azure plugin for migrating the database from our local database to the Windows Azure cloud.
Windows Azure SQL Database does not support all of the features and data types found in SQL Server. Analysis Services, Replication, and Service Broker are not currently provided as services on the Windows Azure platform.
Windows Azure SQL Database performs the physical administration, any statements and options that attempt to directly manipulate physical resources will be blocked, such as Resource Governor, file group references, and some physical server DDL statements. It is also not possible to set server options and SQL trace flags or use the SQL Server Profiler or the Database Tuning Advisor utilities.
Initially, what we did was that we tried to generate the SQL scripts for our sample database, i.e., PhoenixDb from the task option available in the SQL Server Management Studio. So therein, we had the option to generate scripts for SQL Azure.
But the problem that we faced while running that SQL file in the SQL Azure was that these table had indexes which were not clustered. So there was a problem while inserting data into those set of tables.
Hence, the result was that we had the tables structure ready in the SQL Azure along with the procedures but still there was no data in the SQL Azure db.
So we resolved to a new way to generate the replica of the database on SQL Azure.
Following are the set of steps we followed.
Step 1: Go to SQLAzureMW.exe file and then the following window comes up:
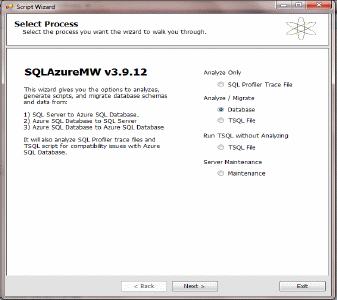
Select Analyse /Migrate option and click on Next.
Step 2: Now in this step, you need to connect to the database server where your database is currently residing, for example in our case, it would be in the sandbox server.
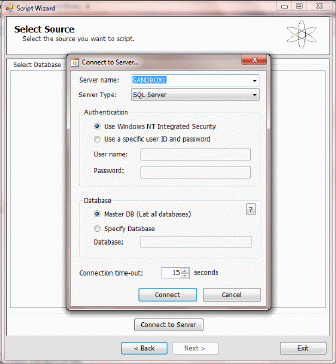
Step 3: Once the server is connected, we need to select the database that we need to copy to SQL Azure in our case, it is PhoenixSample and click on Next.
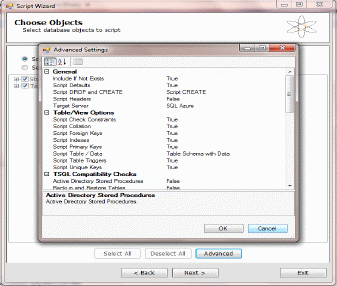
Step 4: After this, it will ask the user to select the option for what database objects need to be generated for the scripts. You can select all the tables and procedures or go with a few of them.
At the same time, you can click on the advanced tab at the bottom of the window to set the settings as per your needs. You can see the target Server as SQL Azure present over there.
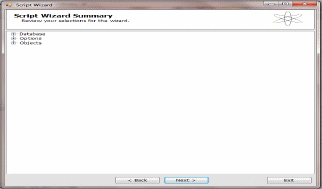
Step 5: Now the window will come up where you need to review all what you have selected as the target database objects to be scripted. Click on the next once you have reviewed your selected database objects.
Step 6: Now you will see that the script generation process has started. So you can see two tabs in the result summary window, one is the Result tab and other is the Script tab.
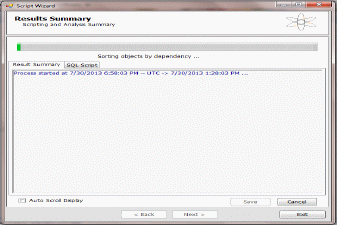
Once the script is generated, the following screen will show up:
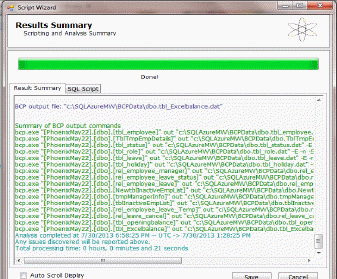
Step 7: Now once the scripts have been generated, you need to set up the Target SQL Azure Server where these generated scripts needs to run.
Herein, you need to mention the following things:
- Server Name (It should be in the following format ServerName.database.windows.net)
- The username (It should be in the following format Username@ServerName)
- The target database
You should have already created the database from the manage azure portal of the same name.
Step 8: Click on connect to proceed. You will land into a new page where it will ask you for confirmation whether you need to run the scripts on the target server or not. Once you click on Yes, the scripts will automatically execute on the SQL Azure server.
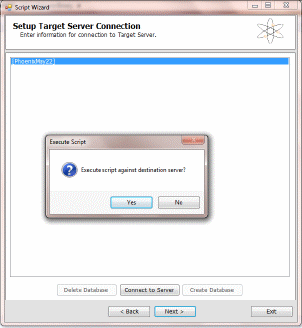
So once this is done, you need to verify whether all your data is there in the target SQL Azure Server.
Verifying whether the Complete Data is there on the Targeted SQL Azure Server
In order to do so, we need to make sure of two things:
- Total number of tables and Stored Procedure matches in both the places.
- The total number of records in the tables on both the servers should match up. Once this is done, our database is ready to move on.
We can run the following script on the SQL server to know the number of entries in each table in SQL Server Db.
CREATE TABLE #counts
(
    table_name varchar(255),
    row_count int
)

EXEC sp_MSForEachTable @command1='INSERT #counts (table_name, row_count) SELECT ''?'', COUNT(*) FROM ?'
SELECT table_name, row_count FROM #counts ORDER BY table_name, row_count DESC
Similarly, we can run the following script in the SQL Azure db to know the number of entries in each table:
select t.name ,s.row_count from sys.tables t
join sys.dm_db_partition_stats s
ON t.object_id = s.object_id
and t.type_desc = 'USER_TABLE'
and t.name not like '%dss%'
and s.index_id = 1
Once this is done, we can move ahead with the deployment scenarios.
I will illustrate the use of web and worker roles in my next article.
