It is pretty fun to work with Visual Basic database programming. You can incorporate database contents in your application with the help of easy to use Wizard in Microsoft Visual Studio. By using the wizard, all the programming is done by the Visual Studio editor.
Before we begin to explore it, there are few terms to understand for creating Visual Basic database connection:
DataSet: A DataSet simply refers to the contents of a database tableView: View is simply the result of a stored query on databaseBindingSource: A binding source provides easy access to data using the DataSource property. You can bind form controls to this object for further interaction with data sources (For example, a database)TableAdapter: Table Adapters connect to a database table. It is interface for communication between an application and database. You can execute queries and update data in your database with it.
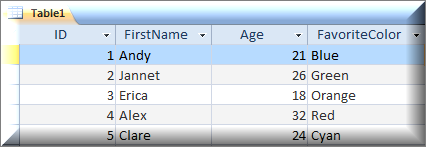
Let’s say we have an Access Database named Test_Database and we want to connect with it in a Visual Basic .NET application. The database contains a table Table1 containing three columns FirstName, Age and FavoriteColor fields.
Follow the steps below to get started:
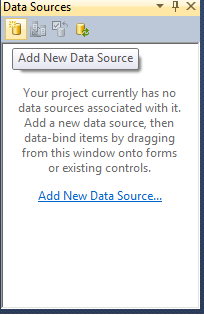
- Navigate to Data Sources tab. Click Add New Data Source.
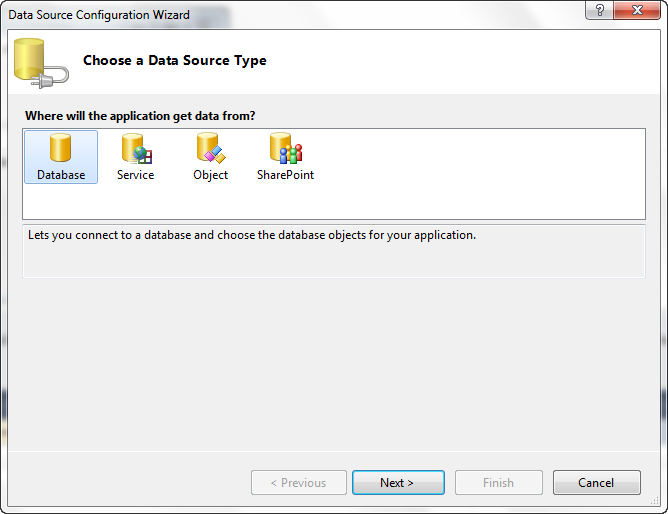
- Choose Database as a Data Source Type and Press Next.
- Choose
DataSet as a Database Model and Press Next. - Next step is to select a data connection to connect to the database. You should select New Connection. As we are going to connect to an Access Database, select Microsoft Access Database File as Data source. Continue with the Default data provider for this type of Data source.

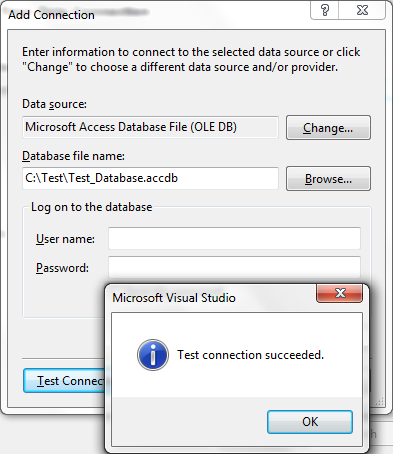
- A new dialog box will open asking for the connection parameters. Click Browse and select the
Test_Database file. As we have not set any password for the database, leave user name and password Blank. Test the database connection. A confirmation message will appear if everything went right. If you encounter an error, repeat the above steps from the start. After successful connection, Press OK to close the dialog box.
- You will notice that a new Data Connection is created and selected. Press Next to continue. Visual Studio may ask you to copy the database file to the current project. Select Yes to proceed.
- After successful connection, a list of database objects is retrieved and shown in the wizard. Select both the Tables and Views to be added to project. Press Finish.
Congratulations! A new DataSet is now available in your project. You have successfully established Visual Basic database connection.
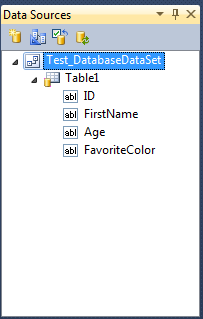
Now, you can access the table columns easily on your form. Just drag and drop FirstName and FavoriteColor onto the form. Press F5 to run the Test Application.
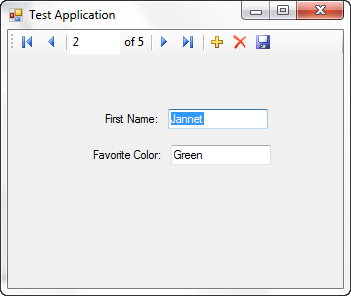
Binding Navigator
- Binding navigator provides with options for connecting and modifying the contents of database.
- You can access the database records from quick navigation buttons (Previous/Next).
- You can add or delete records from your database.
- You can save the changes to database using the Save button. This ensures that the changes in
DataSet are reflected to actual database stored in the Project output directory.
A video guide is presented for further illustration.
The post Working with Visual Basic database connection appeared first on Bubble Blog.
