I discussed the merits of selecting a suitable unit test framework for your development project in my previous post. I described the qualities that I found most valuable in the test framework that I use, CxxTest. The qualities are xUnit framework, portability, simplicity, and flexibility. There are other frameworks for C++ that contain many more features, however, rarely have I had to expand on what is provided in order to test something. Moreover, CxxTest is lightweight enough, that other test tools can be integrated with it, such as Google's GMock library.
Resources
I want to describe my test environment in detail since this will be the same environment that I will use to build and verify Network Alchemy.
Visual Studio Project Wizard: CxxTest
Integrated Tools
I saw benefits immediately when I first started experimenting with unit tests. I wrote a set of tests for a specialized string class I had recently written. That exercise alone helped me uncover 3 or 4 bugs that had existed in the class even though it had been in use for over two years. The thing that took a little longer to uncover was how cumbersome it became to create new unit test projects. Ideally you create a new unit test suite for each object.
I thought I that I needed to make this aspect simpler in order to have a chance of this being adopted by the other developers on my team. Therefore, I created a Visual Studio Wizard to quickly generate a new test project for me, as well as a class wizard to add a new test suite to the project. A project can contain multiple suites, however, I would only put multiple suites in the same project if they were closely related. It's best to minimize dependencies in your test suites, because of the tendency for this to help minimize the dependencies in your objects.
I also setup a Make system to be able to build my projects on Linux and other platforms. I have added these Visual Studio project wizards to my site for you to download and use if you are interested. More details are located below to describe tool requirements, installation and usage instructions. These files are located in the base directory of the zip file resources. You can use these Make files as a reference to integrate CxxTest into your own build environment.
- \Makefile: The top-level make file
- \Makefile.unittest: A make file specific to each unit test.
Requirements
This list describes what tools are required to use this integrated test environment that I have developed.
CxxTest
The CxxTest framework needs to be installed on your system:
Python
The Python scripting engine must be installed to generate the test runners:
Visual Studio
I have successfully used the CxxTest Project Wizard integrates with these versions of Visual Studio. I have verified the wizard works properly in Visual Studio 2013 Express. I believe it should also work in previous Express versions, possibly with minor modification:
- Visual Studio 2005
- Visual Studio 2008
- Visual Studio 2010
- Visual Studio 2012
- Visual Studio 2013
Installation
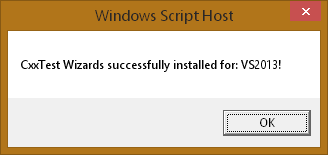
I have customized a JavaScript file that was originally included with the WTL installation wizard. This script is in main folder of the unit test zip file. Running this script will search for installations of Visual Studio on your system by looking up a key in the registry. If it detects an installation the appropriate wizard files will be copied into the C++ wizard directories of that install. A message box will appear when the script completes. This will list all of the versions of Visual Studio that were detected and for which the wizard was installed.

Customize to Your Environment
In the past I was able to create a very flexible project configuration that allowed the tool locations to be configured with a Visual Studio Property Sheet. This is either a .vsprops or a .props file depending on which version of Visual Studio you are using. Unfortunately, the API that I used in the wizard to associate this configuration property sheet with the project is not supported in JavaScript for Visual Studio 2010 and newer. Therefore, this became a manual step in my own environment. I have still distributed the property sheet files that I created with the wizard. However, I have chosen a solution that is less flexible but provides more convenience in test creation.
There are a variables that I have placed at the top of a few files that are responsible for configuring the location to the Python and CxxTest installations. These are the variables and files to modify before you run the installation script:
/files/AppWiz/Scripts/1033/default.js: Project Wizard Install script. Set both of these paths to indicate where python and CxxTest have been installed so the build tool can access them during compilation.
var pythonPath = "C:\Python34\python.exe";
var cxxTestPath = "C:\Development\CxxTest";
/SetupCxxTest_VS.js (Optional): Install script for registered versions of Visual Studio. Change this to set the name of the category the test wizard appears in Visual Studio under C++ Wizards.
var categoryDir = "CodeOfTheDamned";
/SetupCxxTest_VS - Express.js (Optional): Install script for Express versions of Visual Studio. Change this to set the name of the category the test wizard appears in Visual Studio under C++ Wizards.
var categoryDir = "CodeOfTheDamned";
Usage
There are two types of wizards that I have developed to simplify the creation of unit test suites for Visual Studio and CxxTest.
Unit Test Project Wizard
The project wizard is essential for the start of any project. Since CxxTest requires a two step process to generate, then run the unit tests, I have configured this type of project to handle this steps as one. Therefore, all the developer is left to do is develop their code in the unit test harness as they would if it were any simple driver program. Except the boilerplate code for a test harness is already setup.
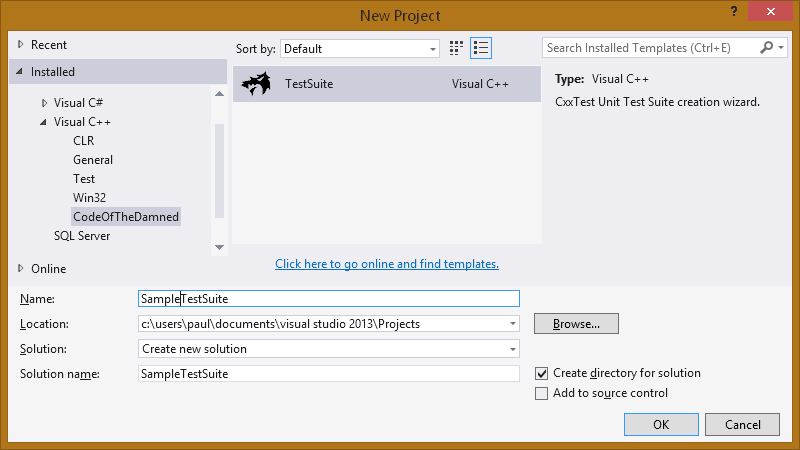
1. Create a new project. Use the CxxTest Wizard from the category you have configured.

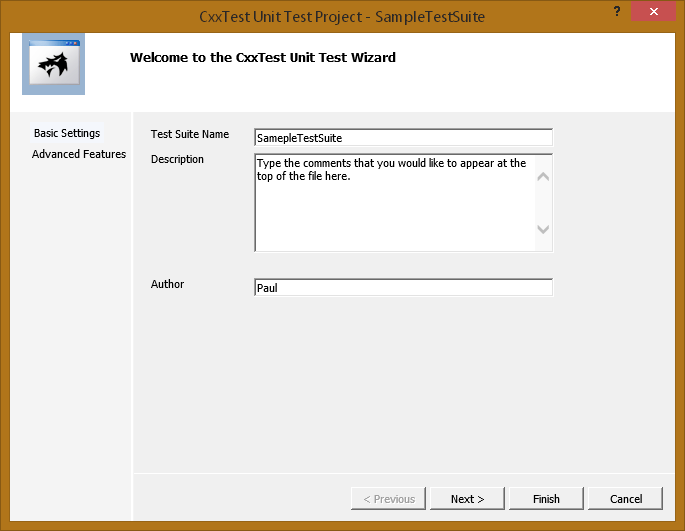
2. Give the test suite class a name and your basic comments.

Once the wizard has completed, you will have a shell project, similar to a default console project that Visual Studio creates. This project will be a unit test suite named by you, with file comments at the top. There are stub entries for the constructor, setup and teardown routines, and a single test case. Here is the structure of the project:
/TestSuite
- (Place all utility and shared test suite files in this directory)
- /Src
- (All test suite header definition files will be placed in here)
- TestSuite.h
- /Generated
- (Files in this directory are automatically generated)
- TestSuiteRunner.cpp
If all of the tools are configured properly, you should be able to successfully build the project. Output similar to this should be expected:
1> ------ Build started: Project: TestSuite1, Configuration: Debug Win32 ------
1>  A subdirectory or file ./Src/Generated/ already exists
1>  NewTestSuiteRunner.cpp
1>  TestSuite1.vcxproj -> c:\output\TestSuite1.exe
1>  Running 1 test.OK!
========== Build: 1 succeeded, 0 failed, 0 skipped ==========
Add Unit Test Suite
If you would like to add a second test suite to an existing test project you can use the class wizard to generate another test suite object file. You will see the same dialog as the project wizard, which asks you for an object name, comments and author. The difference is this object will be added to your selected project. You can access the class wizard from the following menu:
This time the type of project is called a Test Fixture.Summary
The relatively little amount of time I spent to better integrate my test environment with my development environment has been time well spent for me and my team. I have been using basically this same unit test wizard since 2009, and I have used it with all of the major releases of Visual Studio since 2005. Whatever tool you select for your development, make sure that it is easy to use. The point is to encourage the development and maintenance of unit tests for your software; not to introduce yet another tool or step in the process for the developers to fight.
