In my previous post, we looked at how to use local storage in Windows phone to save the data. In this post, we will look at another way of storing the data locally using IsolatedStorage. In most of the applications that we develop, we will need some way to save ‘Settings’. IsolatedStorage is quite useful in that scenario as we can easily save/retrieve settings from that.
Isolated Storage provides a way to store data locally in the file system. It is called ‘isolated’ as only your application has access to the data. There are two ways in which data can be stored in IsolatedStorage. We can store the data as Name/Value settings using IsolatedStorageSettings and you can also save normal files using IsolatedStorageFile. Data present in IsolatedStorage is persisted even when the application is stopped, tombstoned or closed or even if the phone is switched off. Data is going to be present unless it is removed manually or the application is uninstalled.
In this post, we will take a look at IsolatedStorageSettings and how we can use it to store/retrieve application settings.
Open Visual Studio –> New Project –> Windows Phone Blank App and name the application “IsolatedStorageApp”.
In the MainPage.xaml, we add the following code to the ‘ContentPanel’ grid:
<Grid x:Name="ContentPanel" Grid.Row="1" Margin="12,0,12,0">
    <StackPanel>
        <TextBlock Text="Greetings User" Name="txtGreeting" />
        <Button Content="Settings" Name="btnSettings" Tap="btnSettings_Tap" />
    </StackPanel>
</Grid>
We have added a Textblock which displays a greeting to the user. A button is added which will navigate the user to the Settings Page.
Add a new Windows Phone Page to the solution and name it ‘SettingsPage’. Add the following content to the ContentPanel grid in ‘SettingPage.xaml’:
<Grid x:Name="ContentPanel" Grid.Row="1" Margin="12,0,12,0">
            <StackPanel>
                <TextBlock Text="Name" />
                <TextBox Name="txtName" />
                <TextBlock Text="Background Color" />
                <RadioButton Content="Red" Name="rbRed" GroupName="Color" />
                <RadioButton Content="Green" Name="rbGreen" GroupName="Color"  />
                <RadioButton Content ="Blue" Name="rbBlue" GroupName="Color"  />
                <Button Content="Save Settings" Name="btnSave" Tap="btnSave_Tap"/>
                <Button Content="Remove Settings" Name="btnRemove" Tap="btnRemove_Tap" />
            </StackPanel>
        </Grid>
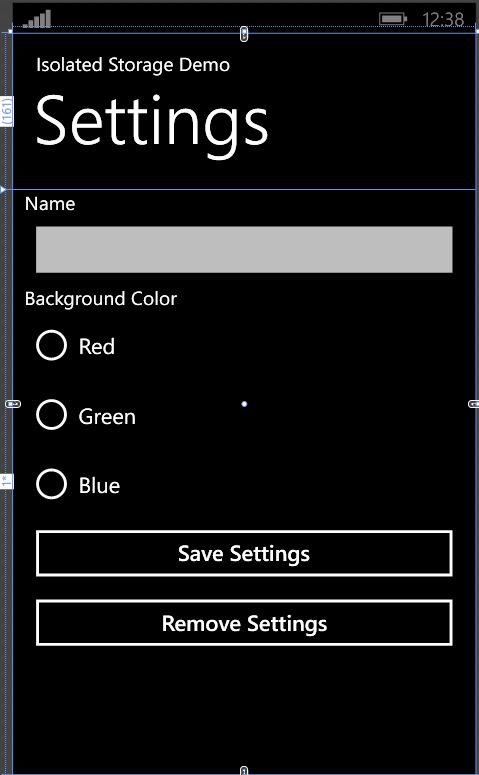
Our page will appear as shown below:

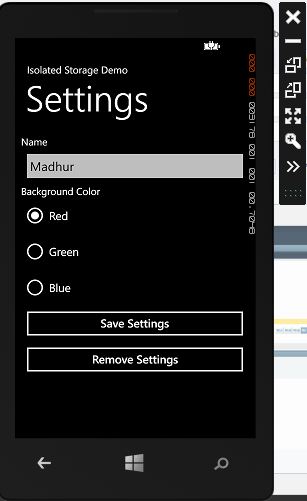
User can enter their Name in the textbox and can choose the background color which we are then going to store in the IsolatedStorage on the ‘Save Settings’ Button click. We will then use the value entered here in the MainPage.xaml to change the greeting and background color. Here is the code for the ‘Save Settings’ Tap event.
private void btnSave_Tap(object sender, System.Windows.Input.GestureEventArgs e)
{
    IsolatedStorageSettings settings = IsolatedStorageSettings.ApplicationSettings;
    if(txtName.Text != string.Empty)
    {
        settings["Name"] = txtName.Text.Trim();
    }

    if(rbBlue.IsChecked.HasValue && rbBlue.IsChecked.Value)
    {
        settings["Color"] =  "Blue";
    }
    if (rbRed.IsChecked.HasValue && rbRed.IsChecked.Value)
    {
        settings["Color"] = "Red";
    }
    if (rbGreen.IsChecked.HasValue && rbGreen.IsChecked.Value)
    {
        settings["Color"] = "Green";
    }
}
We are creating an instance of IsolatedStorageSettings from the ApplicationSettings property. We are then creating keys named ‘Name’ & ‘Color’ to store the value of textbox and radio button. Any data that can be serialized can be stored in IsolatedStorage. We can also use “settings.Add(“Color”,”Red”)” for adding the keys. But if a key is already present, then the Add method throws an exception.
To remove the settings from the IsolatedStorage, we use the below code on “Remove Settings” tap event:
private void btnRemove_Tap(object sender, System.Windows.Input.GestureEventArgs e)
{
    IsolatedStorageSettings settings = IsolatedStorageSettings.ApplicationSettings;
    settings.Remove("Color");
    settings.Remove("Name");
    txtName.Text = string.Empty;
    rbBlue.IsChecked = false;
    rbGreen.IsChecked = false;
    rbRed.IsChecked = false;
}
We use the “Remove” method passing in the key that we want to remove and it will be removed permanently from the IsolatedStorage.
Let's now take a look at how to retrieve the values from IsolatedStorage. In the MainPage.xaml.cs file, add the following method:
private void ApplySettings()
       {
           IsolatedStorageSettings settings = IsolatedStorageSettings.ApplicationSettings;
           if (settings.Contains("Name"))
           {
               txtGreeting.Text = "Hello " + settings["Name"].ToString();
           }
           else
           {
               txtGreeting.Text = "Hello User";
           }

           if (settings.Contains("Color"))
           {
               if (settings["Color"].ToString().Equals("Red"))
               {
                   ContentPanel.Background = new SolidColorBrush(Colors.Red);
               }
               else if (settings["Color"].ToString().Equals("Blue"))
               {
                   ContentPanel.Background = new SolidColorBrush(Colors.Blue);
               }
               else
               {
                   ContentPanel.Background = new SolidColorBrush(Colors.Green);
               }
           }
           else
           {
               ContentPanel.Background = new SolidColorBrush(Colors.Black);
           }
       }
On trying to retrieve a value from IsolatedStorage settings, an exception will be thrown if the key is not present so I am using the “Contains” method to check if the key is present or not. While retrieving the values, we also need to cast the values to their correct type as it is saved as type “Object” in the dictionary. If the keys are present, we are using them to customize the greeting text and changing the background color of the grid to the one which user has selected in setting page.
We will call the “ApplySettings()” method from the MainPage constructor and also on “OnNavigatedTo” method.
public MainPage()
{
InitializeComponent();
ApplySettings();
}
protected override void OnNavigatedTo(NavigationEventArgs e)
{
base.OnNavigatedTo(e);
ApplySettings();
}
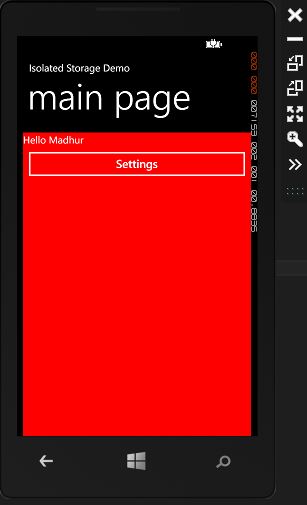
Let's run the app in the emulator. Initially, we will get the default greeting and the default background color. We can click on the “Settings” button to go the Setting page where we can modify the settings and save them to IsolatedStorage. On coming back to the main page, we will see the customized greeting as well as background color. It will be persisted even if the application is closed or the phone is turned off. On click of Remove button, the data gets removed from the IsolatedStorage.


This is helpful which saving Application Settings. You can download the full solution from the link at the top of this post.
