Introduction
There are tons of neat, awesome devices and services available in the world. When you want to do interesting things with them, it usually takes a lot of development work to add UI, connectivity, and so forth. What if you could write the bare minimum necessary to make your device or service work, and then immediately start using it with in interesting ways (even the cloud)? If that peaks your interest, read on...
Background
SetInMotion is a Windows .NET application and cloud service that serves as the 'glue' to connect things together in real-time. There are two API's available, one for Plugins (that work with the Windows application), and one for Cloud. This article discusses how to use the Plugin API.
The SetInMotion software is free to use in standalone (non-cloud) mode, and available at http://sim.x9tech.com. End-user examples and tutorials are highlighted on the SetInMotion Blog.
Channel Philosophy
What makes SetInMotion powerful is the "Channel" system. Every device within SetInMotion is required to report its state through its Channel properties. Let's take a look at how this might look in a more complex device with mostly outputs (an XBox Controller), and a simple device with a single input (a light bulb).
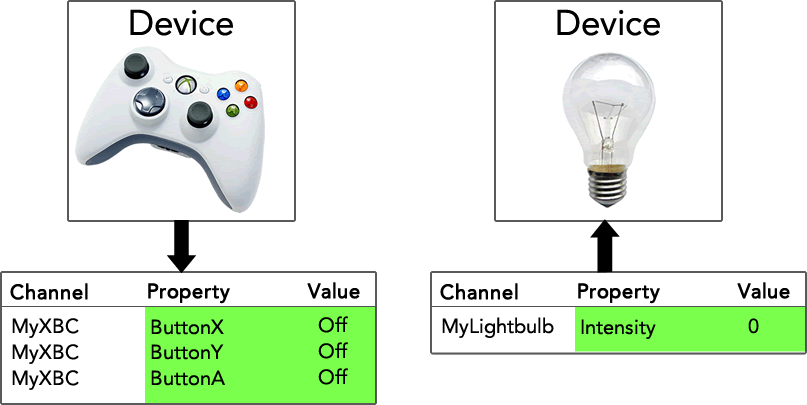
The XBox Controller and the Light Bulb are both devices. They both report their state via their Channel Properties. Channel property values can be:
- An On/Off value, appropriate for buttons, relays, LED's, or anything that simply has an on/off or true/false state.
- A percentage value (like 51.2), appropriate for dimmers, positions for servos, speeds, and so forth.
- A text string (let's say you made a 'Scoreboard' device and one of the channel properties represents the Team Name).
When a device is added to the system, the user is required to define the channel name. The device then notifies SetInMotion of its properties and values (highlighted in green), and lets SetInMotion know when those values change. Likewise, SetInMotion notifies the device when something else changes its properties (like setting the light bulb's Intensity property). A device's channel property can be considered an input, an output, or both!
Because every device's inputs and outputs conform to the channel format, SetInMotion users are able to create Channel Actions that make things happen when channel properties change to do interesting things. In the example above, the user could choose to set the light bulb's Intensity property to 100 when the XBox Controller's ButtonA equals On, thus turning on the light bulb when the A button is pressed on the XBox Controller.
The power of Channels increases exponentially when SetInMotion is connected to the cloud, where other internet-connected applications can see and control these channels in real-time.
Create a Class Library, and add the SetInMotion API NuGet Package
SetInMotion plugins are class libraries. From Visual Studio, create a new Class Library project targeted at .NET 4.0 or .NET 4.5.
Then, add the NuGet package called SetInMotionApi to your project.
(The NuGet package is located here, for reference.)
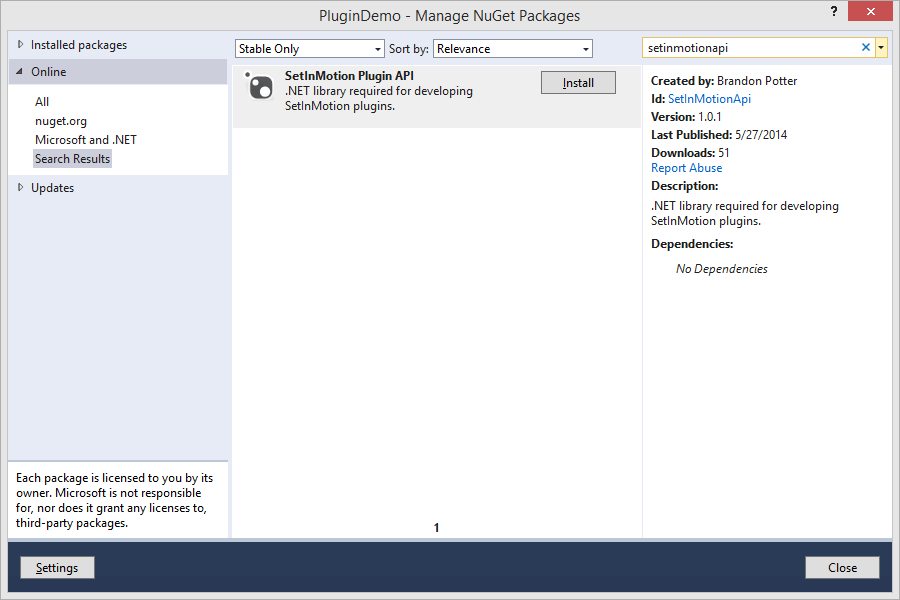
When this package is installed, you'll see a reference to SIM.IO.API in your class library's references, as well as the SetInMotion API namespaces in your object browser.
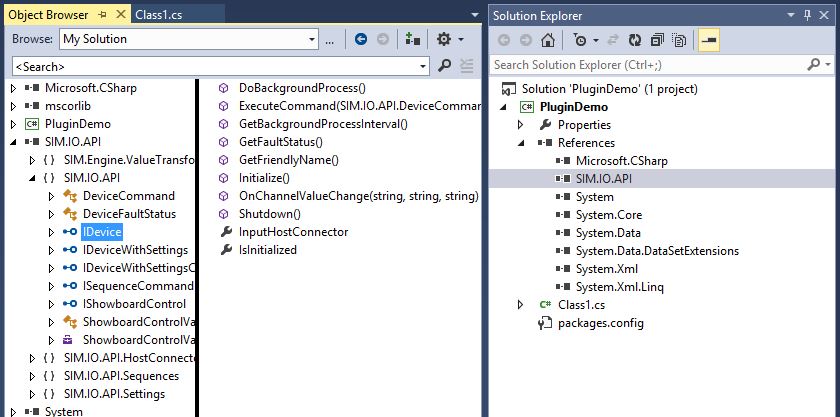
You'll notice that there are various interfaces available.
Implement the IDevice interface
Any device in SetInMotion is exposed via a public class that implements the IDevice interface.
We'll create a device that brings the current DateTime.Now.Second into a SetInMotion channel. (This is about as simple as it gets.)
You can copy the following code to get started. Comments have been added in each required method.
using SIM.IO.API;
using System;
using System.Collections.Generic;
using System.Linq;
using System.Text;
using System.Threading.Tasks;
namespace PluginDemo
{
public class MyPlugin : IDevice
{
public SIM.IO.API.HostConnectors.IHostConnector InputHostConnector { get; set; }
public void DoBackgroundProcess()
{
InputHostConnector.SetChannelValue("CurrentTimeSeconds", DateTime.Now.Second.ToString());
}
public TimeSpan? GetBackgroundProcessInterval()
{
return TimeSpan.FromSeconds(1);
}
public DeviceFaultStatus GetFaultStatus()
{
return new DeviceFaultStatus(false);
}
public string GetFriendlyName()
{
return "Current Seconds Clock";
}
private bool _initialized = false; public bool IsInitialized
{
get
{
return _initialized;
}
}
public void Initialize()
{
_initialized = true;
}
public void Shutdown()
{
_initialized = false;
}
public void OnChannelValueChange(string channelId, string property, string value)
{
return;
}
public void ExecuteCommand(DeviceCommand command)
{
return;
}
}
}
Important Device Concepts
There are 3 especially important things to keep in mind when designing and implementing any Device plugin:
InputHostConnector - Notify SetInMotion when things change.
SetInMotion assigns this object to your device prior to the initialization process. Any time something about your device changes, it should let SetInMotion know by calling:
InputHostConnector.SetChannelValue("MyProperty", "MyNewValue");
You don't have to worry about checking to make sure the value has changed since the last time you called - SetInMotion will deal with that for you.
SetInMotion is also designed to work fast. Try to design your device so that it detects changes quickly. That way, when a user presses a button or causes an interaction with your device plugin, they see near-immediate results.
Initialization, Shutdown, and Faults
Pay careful attention to get these areas right. When a user adds your device to SetInMotion, the following workflow takes place:
- SetInMotion will attempt to assign an InputHostConnector to your device.
- SetInMotion will check at regular intervals to find out if your device is initialized, via your IsInitialized property.
- SetInMotion will attempt to initialize your device with the Initialize() method if your IsInitialized property returns false.
- When the user shuts down or removes your device, SetInMotion will call the Shutdown() method.
A faulting status method is also checked regularly - GetFaultStatus(). This is the device's opportunity to tell SetInMotion (and the user) that something is wrong. It should make every effort to report anything wrong with the device's operation.
Devices should be able to auto-recover from user disconnections and reconnections.
Background Processes
When interacting with hardware, most likely you will need to poll or do things in the background at a regular interval. Normally, in a standalone application, you spawn and manage a thread. Don't do this! Extra threads that crash can bring down the entire SetInMotion application, creating frustrated users.
SetInMotion's Background Process is designed to make that easier, and automatically handles thread scheduling and error handling.
Simply tell SetInMotion how often your background processes needs to run via the GetBackgroundProcessesInterval() method (whether it's milliseconds or minutes), and do your work in the DoBackgroundProcess() method.
Testing Your Plugin
It's a pain to write test apps to test your plugin. So, we do it for you. Go get the Developer Sandbox from http://sim.x9tech.com/developer/sandbox and launch it after compiling your class library.
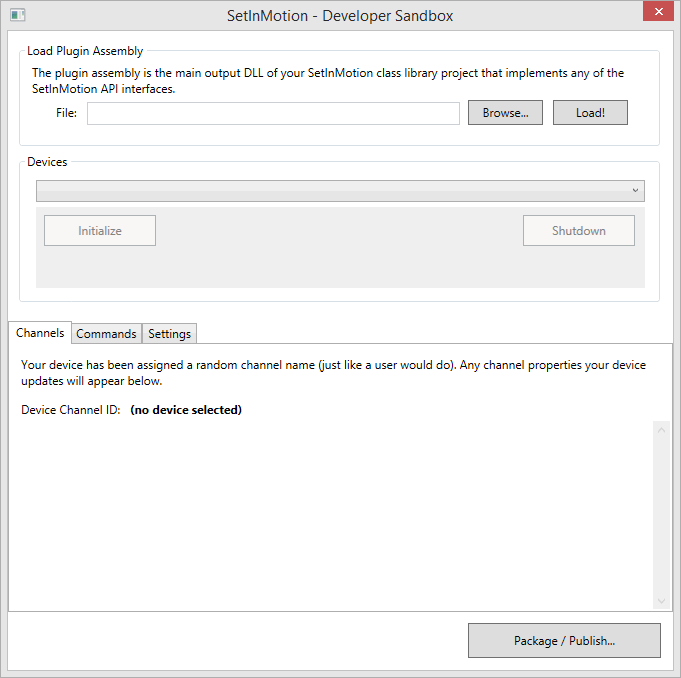
Click Browse... and select your Class Library's DLL.
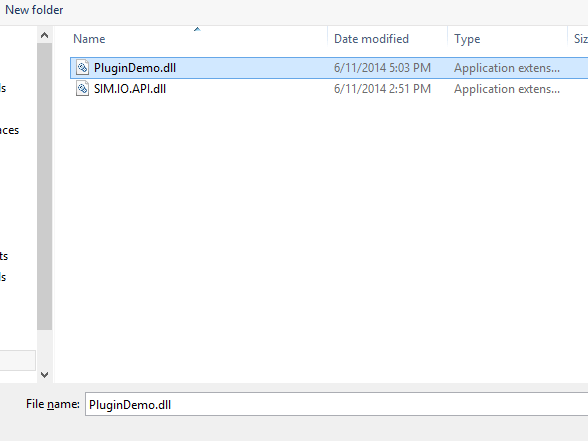
You should now see that your device is available in the drop-down list:

From here, you can test initialization and shutdown of your device, as well as view your device's reported channels in real-time.
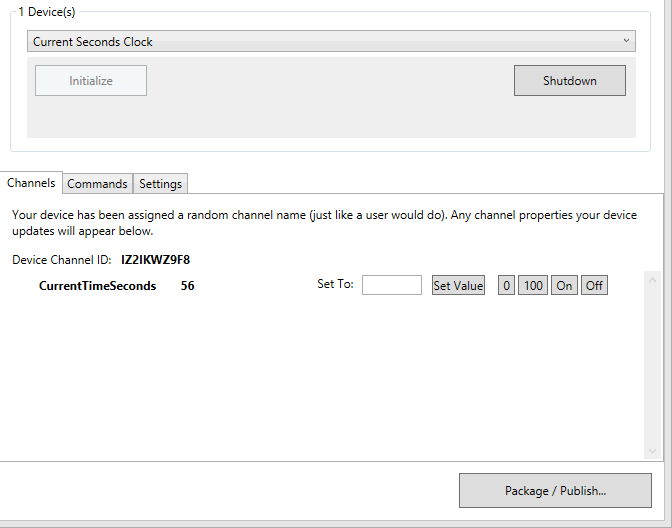
When your device is initialized, the Developer Sandbox will assign a random channel ID, to simulate the end-user providing a channel name.
If the channel is an input, the Developer Sandbox allows you to simulate setting the channel to a value of your choosing, or some of the more common values (0, 100, On, or Off).
Debugging Tip
If you want to step through how your device is processing while using the Developer Sandbox, in Visual Studio, click Debug > Attach to Process...

Attach to SIM.DeveloperSandbox.exe, and you will be able to set breakpoints in your plugin's code.
Publishing Your Plugin
Once you've tested the device, it's time to package and publish it! You can publish your plugin to your local machine, or the SetInMotion Cloud for others to use.
From the Developer Sandbox, click Package / Publish... and fill in the fields:
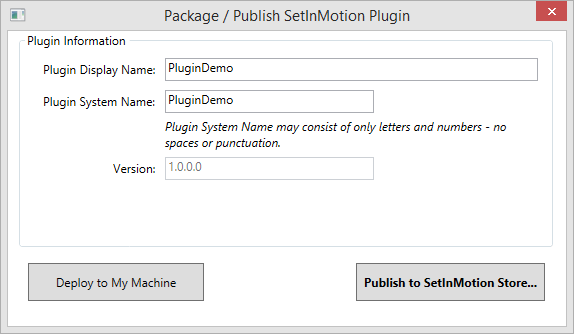
The Package/Publish dialog will automatically pull suggested names from your assembly's manifest.
Plugin Display Name - The name that will be displayed to SetInMotion users when installing and using the plugin.
Plugin System Name - This is how SetInMotion and the SetInMotion Store refers to your plugin. This must be unique for your plugin - you cannot upload a plugin with a system name that someone else's account has already published.
Version - This information is pulled from your plugin assembly's manifest. The initial version number doesn't matter, but as you re-publish your plugin, the version number in your class library's manifest (AssemblyInfo.cs) must be greater than the previously published version.
Deploy to My Machine
This option will bypass the SetInMotion Store and package/deploy the plugin to your local machine, great for testing with the actual SetInMotion software.
SetInMotion plugin packages are stored in %ProgramData%\SetInMotion\Plugins and are extracted at runtime. While you can deploy at anytime, you will need to restart SetInMotion for your new plugin to be detected.
Publish to SetInMotion Store
Publishing to the SetInMotion Store allows other users to see, install, update, and use your plugin. Plugin publishing requires a SetInMotion account.
That's it!
Congratulations! You should have a working SetInMotion Device Plugin at this point. If your device requires settings support, you can also implement the IDeviceWithSettings interface, but we'll save that for another walkthrough.
History
6/11/2014 - Initial article
