Introduction
It is not difficult to bind custom objects to AutoCompleteBox control of Silverlight. There are two methods available to do so. Among the two first method has limited functionality, like we cannot show images or other complex controls using it.
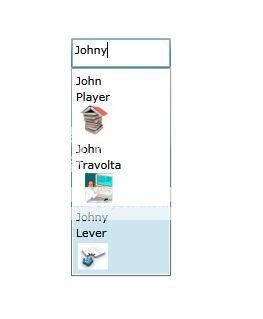
While Second method is great, we can use any control as suggestion.
Background
The inspiration behind writing this article is basically I do not found proper solution of binding custom object to AutoCompleteBox control. I searched many forums as well but hopelessly unable to find the solution.
Some Description
There are mainly two methods to bind custom object to AutoCompleteBox control in Silverlight.
- Using ItemSource Property (Simplest one, working fine with single value collection)


- Using DataContext Property (It is mainly used for Custom Objects)

You can also bind images or other complex and/or custom controls with this method.

Code - First Method
Let's have an employee class.
public class Employee
{
    public int ID { get; set; }
    public string FirstName { get; set; }
    public string LastName { get; set; }
    public string ImagePath { get; set; }
    public Employee(int id1, string fname1, string lname1, string imgpath)
    {
        ID = id1;
        FirstName = fname1;
        LastName = lname1;
        ImagePath = imgpath;
    }
    public override string ToString()
    {
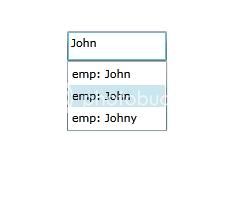
        return "emp: "+FirstName;
    }
}
Do following code in xaml file.
<input:autocompletebox x:name="test" width="100" height="30" valuememberpath="FirstName" xmlns:x="#unknown" xmlns:input="#unknown">
</input:autocompletebox>
And for back-end there are two options. Either you can bind simple list like following.
List<string> lst=new List<string>()
lst.Add("John");
lst.Add("James");
lst.Add("Johny");
lst.Add("Arnold");
test.ItemsSource = lst;
Or you can bind Generic list of Employee.
List<employee> emp = new List<employee>();
emp.Add(new Employee(1, "John", "Player", "books1.jpg"));
emp.Add(new Employee(2, "Vann", "Dam", "LawBooks.jpg"));
emp.Add(new Employee(3, "John", "Travolta", "programmer1.jpg"));
emp.Add(new Employee(6, "Johny", "Lever", "calendar_share.jpg"));
test.ItemsSource = emp;
Code - Second Method
In second method we need to change the control bindings way in xaml file.
<input:autocompletebox x:name="Test1"
    filtermode="ContainsOrdinal" valuememberpath="FirstName"
    width="100" height="30" itemssource="{Binding}"
    xmlns:x="#unknown" xmlns:input="#unknown">
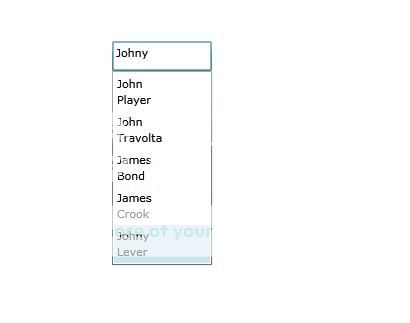
        <input:autocompletebox.itemtemplate>
            <datatemplate>
                <stackpanel>
                    <textblock text="{Binding
                        Path=FirstName}" />
                    <textblock
                        text="{Binding Path=LastName}" />
                    <image source="{Binding Path=ImagePath}"
                        height="30" width="30" />
                </stackpanel>
            </datatemplate>
        </input:autocompletebox.itemtemplate>
   </input:autocompletebox>
And for binding list of employee object we need to use DataContext property of the control rather than ItemSource property.
Test1.DataContext = emp;
I think it would be clearer now the difference between both methods and the capability of both methods.
Hope this will be helpful to everyone.
