Table of Contents
This tutorial will not cover an NDK installation/configuration on your machine. Instead, it will explain how to set up the very basic integration between Java and NDK using simple “Hello World” example.
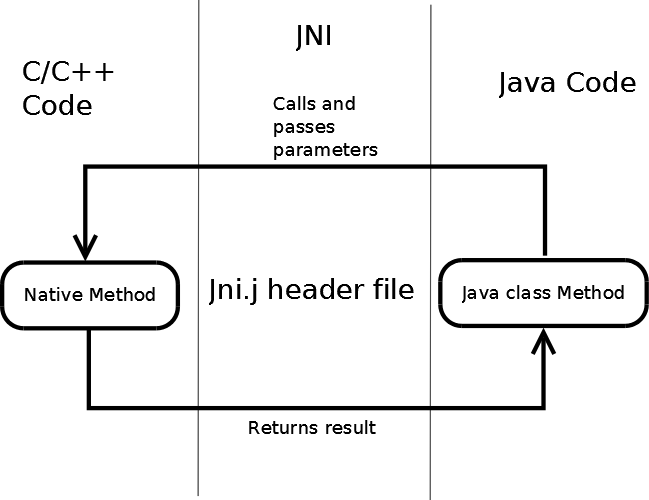
The NDK (Native Development Kit) allows you to write code with C/C++ languages and then call it from your Java application using JNI (Java Native Interface).
Using native code in Java is reasonable especially when you are dealing with bits/bytes operations, like bitmaps compression/decompression.
NDK will not be interpreted like Java through the JVM, instead it will use the operating system API (in Android case, Linux) for those operations, and thus its performance will be much faster.
One of the big advantages of the NDK is that you can call custom allocation of memory using malloc() method. However, in the native code, there is no GC (Garbage collection), hence you need to free memory by yourself.
Potentially, you can increase your application performance, but sometimes it can be just overkill, so use it appropriately.

- Declare native method in Java class.
- Create a header file according to native implementation.
- Implement the header file on the native side in C/C++ class.
- Create an Android.mk file.
- Compile native code to .so package/s.
- Call the Java native declaration method.
First thing that we need to do is to create a native method declaration in our Android application class.
public class NDK_Methods
{
     public static native String SayHello();
}
Javah is a Java utility that produces C headers files from Java class, in order to provide an interface through which Java and C code can interact.
After we created our native SayHello() method declaration, we need to create a header file which will be implemented in C class on the native side.
Steps:
- Go to the root directory of your project.
- Open a CMD.
- Type in"
javah -classpath bin/classes/ -d jni/ndk.NDK_Methods
- -classpath bin/classes/: location of the classes directory in which the compiled Java classes of your Android application are located.
- -d jni/ndk.NDK_Methods: is a fully qualified name of the class from which the header class will be generated.
The generated header file will be created under the jni directory in our project.

In our example, we will get the following header file:
#include <jni.h>
#ifndef _Included_ndk_NDK_Methods
#define _Included_ndk_NDK_Methods
#ifdef __cplusplus
extern "C" {
#endif
JNIEXPORT jstring JNICALL Java_ndk_NDK_1Methods_SayHelo(JNIEnv *, jclass);
#ifdef __cplusplus
}
#endif
#endif
Our Java method declaration:
public static native String SayHello();
was generated to:
JNIEXPORT jstring JNICALL Java_ndk_NDK_1Methods_SayHelo (JNIEnv *, jclass);
Notice that the generated name is Java followed by package name, class and the method separated by underscores.
Since we did not pass any parameters to the function, we accept only the default parameters:
JNIEnv – is a pointer through which we are communicating with Java from the native implementation.jclass – a class that called the function.
Now we have a header file and we need to define an implementation for our method.
We need to create a new file with c or cpp extention in the jni directory and copy to it the SayHello() method declaration:
#include <ndk_NDK_Methods.h>
JNIEXPORT jstring JNICALL Java_ndk_NDK_1Methods_SayHello(JNIEnv *env, jobject thiz )
{
return (*env)->NewStringUTF(env, "Hello from JNI!");
}
Notice that we are returning jstring which is different from C string in our method. We need to return a Java object, so we are doing it through the JniEnv pointer by calling a NewStringUTF() method.
In order to compile our file to .so package, we need to define an Android.mk file in our jni directory.
Android.mk file describes to the build system about your sources.
Android.mk contains those fields:
LOCAL_PATH := $(call my-dir) - Android.mk must begin with this definition, this defines the location of the sources. The macro ‘my-dir’ is the directory of the Android.mk file.include$(CLEAR_VARS) – clears all variables that might be set from a previous module build.LOCAL_MODULE :=native_lib – sets the name that is used as the identifier for a module, which is later used in Java.LOCAL_SRC_FILES := native_lib – file that will be compiled in your module, no need to specify headers, the system will take care of it.include $(BUILD_SHARED_LIBRARY) – ensures that shared library becomes a part of this make.
Not necessary for the compilation, but in our case we specified:
APP_ABI := all – sets the compilation for all the supported CPUs
If we will not specify this, the compilation will be made only for the default CPU. You can also specify your CPU destination compilation explicitly.

An ndk-build is an NDK tool which is responsible for compiling your native code to executable files.
After we created the Android.mk file, we can create the .so package using ndk-build tool.
Steps:
- Go to your root directory of the android application.
- Lunch the ndk-build utility with its full path, in my case: C:/android_ndk/ndk-build.
C:/android_ndk – The directory where you have downloaded your NDK.
ndk-build – The utility.
This will create a .so package/s in libs directory in our project.
What’s left for us to do is to make a call from Java to JNI method in our application:
String ndkMessage = NDK_Methods.SayHelo();
This will call the static method in NDK_Methods class, that will call the Java_ndk_NDK_1Methods_SayHelo() method which is declared in the header file and implemented in our C class.
