Introduction
Many of us know about ZF2 (Zend Framework 2), it is an open source, object oriented Framework designed for developing web applications and services using PHP 5.3+.
So, in this post, we will go through the installation process for ZF2 Framework with a skeleton application so that it will be easier for the developer to continue developing the application directly :).
We will go through just simple 4 steps and then we will be done with the installation.
Step 1
We can install ZF2 skeleton application in 2 different ways:
Case 1
Go here and click the zip button to download. Unzip this file into the directory where you keep all your vhosts (in this case, I used D:/projects/) and rename the folder to ZendSkeletonApplication.
Case 2
Install GIT Bash if you have not installed yet. Installing GIT is easy to do. Go to http://git-scm.com ->Downloads -> Select OS -> Save File -> Run -> Accept all and install it.
Open GIT bash and open the folder where you keep all your vhosts or where you want to create the Project (in this case, I used D:/projects/) and run this command:
git clone git://github.com/zendframework/ZendSkeletonApplication.git
After this, one folder will be created on your specified path named as ZendSkeletonApplication.
Step 2
Open GIT Bash and go to ZendSkeletonApplication folder using:
cd D:/projects/ZendSkeletonApplication
Then run the following command:
E:/xampp/php/php.exe composer.phar self-update
Then, after executing the above command, run the below command:
E:/xampp/php/php.exe composer.phar install
Note: Here in my case, I have my xampp folder inside E:/ drive.
Step 3
Add the following in httpd-vhosts.conf (E:\xampp\apache\conf\extra\httpd-vhosts.conf) file. After adding the below lines, restart your xampp.
<VirtualHost *:80>
    ServerName http://zend.localhost.com
    ServerAlias zend.localhost.com
    DocumentRoot "D:\projects\ZendSkeletonApplication\public"
    SetEnv APPLICATION_ENV "development"
    <Directory "D:\projects\ZendSkeletonApplication\public">
        DirectoryIndex index.php
        AllowOverride All
        Order allow,deny
        Allow from all
    </Directory>
</VirtualHost>
Step 4
Finally, add the following in your host file (C:\Windows\System32\drivers\etc\host).
zend.localhost.com
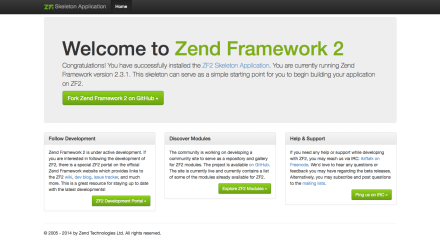
Great !!! Now, everything is set and ready to use. Browse http://zend.localhost.com and you will get the default skeleton application page :eek:.

If you are finding the page like above, while browsing http://zend.localhost.com, then that is cool, we are done now (clap).
Thanks :) and I will be happy to hear from you.
CodeProject


