So as I said in my last post, I'm taking my first series of posts by looking at Azure Platform as a service focusing on the different offerings Microsoft has from Azure to enhance your applications.
The first offering we are going to look at is Azure Websites. For many of the technical leads I've all spoken to, if you want to stand up a site in Azure, you start at a VM, stand up an instance from the gallery, configure IIS, and deploy the site. Then you manage up time, set up load balancing, if necessary and work with it in pretty much the same manner you would with an OnPremise Virtual Machine.
Which sounds pretty normal, but in all seriousness, this is a lot of work. Especially when you start talking about configuring servers to be load balanced. This is especially a large amount of work given that many sites can be smaller, as I discussed before in a previous post. Making this is a big barrier to entry for small businesses. Then you have to deal with patching, backups, updates, etc. For a small business, the idea of paying someone for these servers is going to cost significantly more than they can afford. They are reasonable, but if all you are looking for is a web application, they definitely aren't what you would call cheap.
Azure Websites allows for a developer to focus on the only part of the VM they actually care about...the site. The basic elevator pitch is that by using Azure Websites, you now gain the ability to build out the site and abstract away the VM its hosted on. This allows for creating a situation where Microsoft will manage your uptime, and patching the server all while moving your site to a new VM when this occurs.
So how do we actually go about using this. You start by logging into the Azure Management portal, which can be found at https://manage.windowsazure.com/.
Now for the purposes of this post, I'm going to assume you've already registered with Microsoft Azure, you have a Microsoft Live ID, and have gone through those steps. This post is focused on the platform as a service offerings, so we're starting there.
After you log into the Azure portal, you will be presented with a screen like the following:
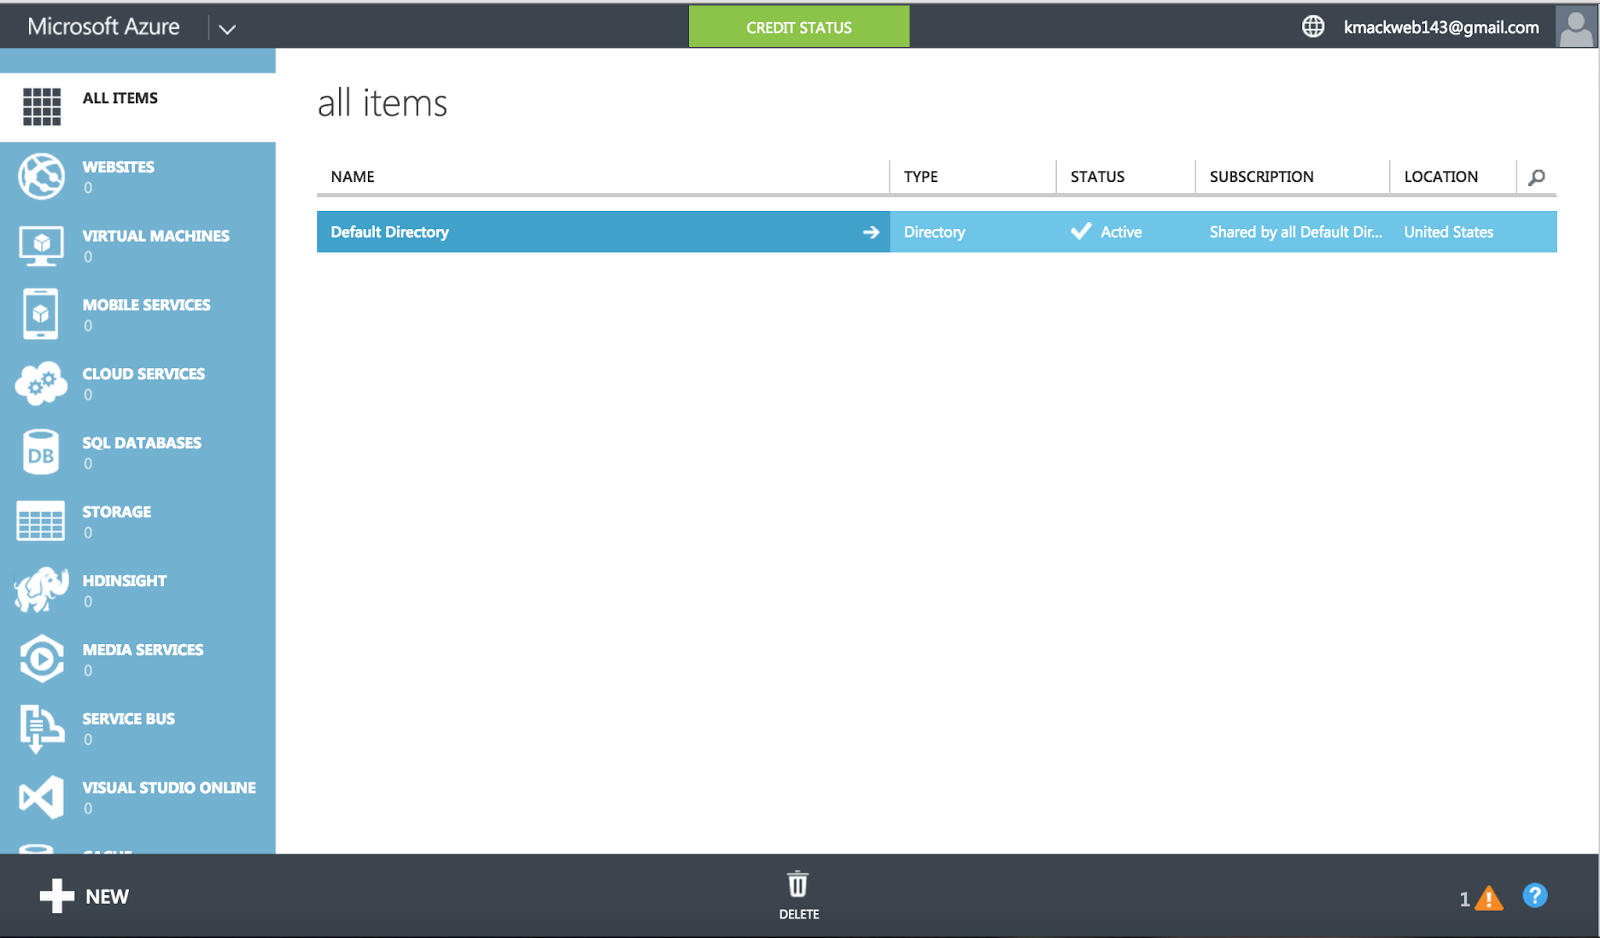
This is the Azure Portal, and the Azure portal allows you to configure, monitor and work with all the various services and offerings available with Azure. As you can see down the left hand side, there are quite a few, and throughout this series, we will be talking about several of the bigger offerings. But for right now, let's focus on websites.
To create a new website, we click on the "+ NEW" button in the lower left hand corner of the screen. And you'll be presented with this menu shown below:
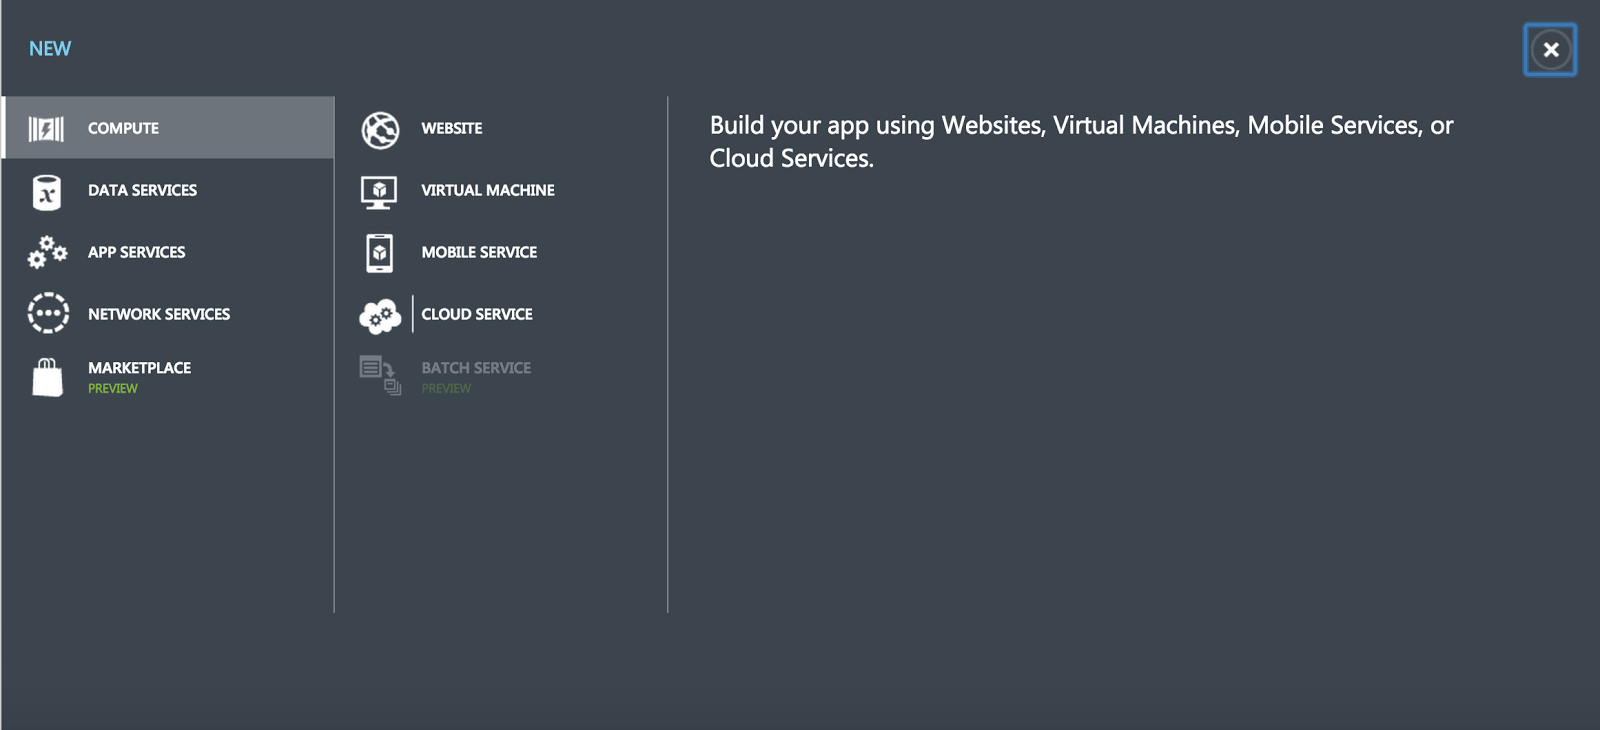
Whenever you want to create a new service in Azure, this is the menu structure you use. From here, we're going to select the menu option "Website".
From there, we are going to select the the "Quick Create" option. If you are trying to create a web application that you built using Visual Studio, this is most likely the option you are going to want to use.
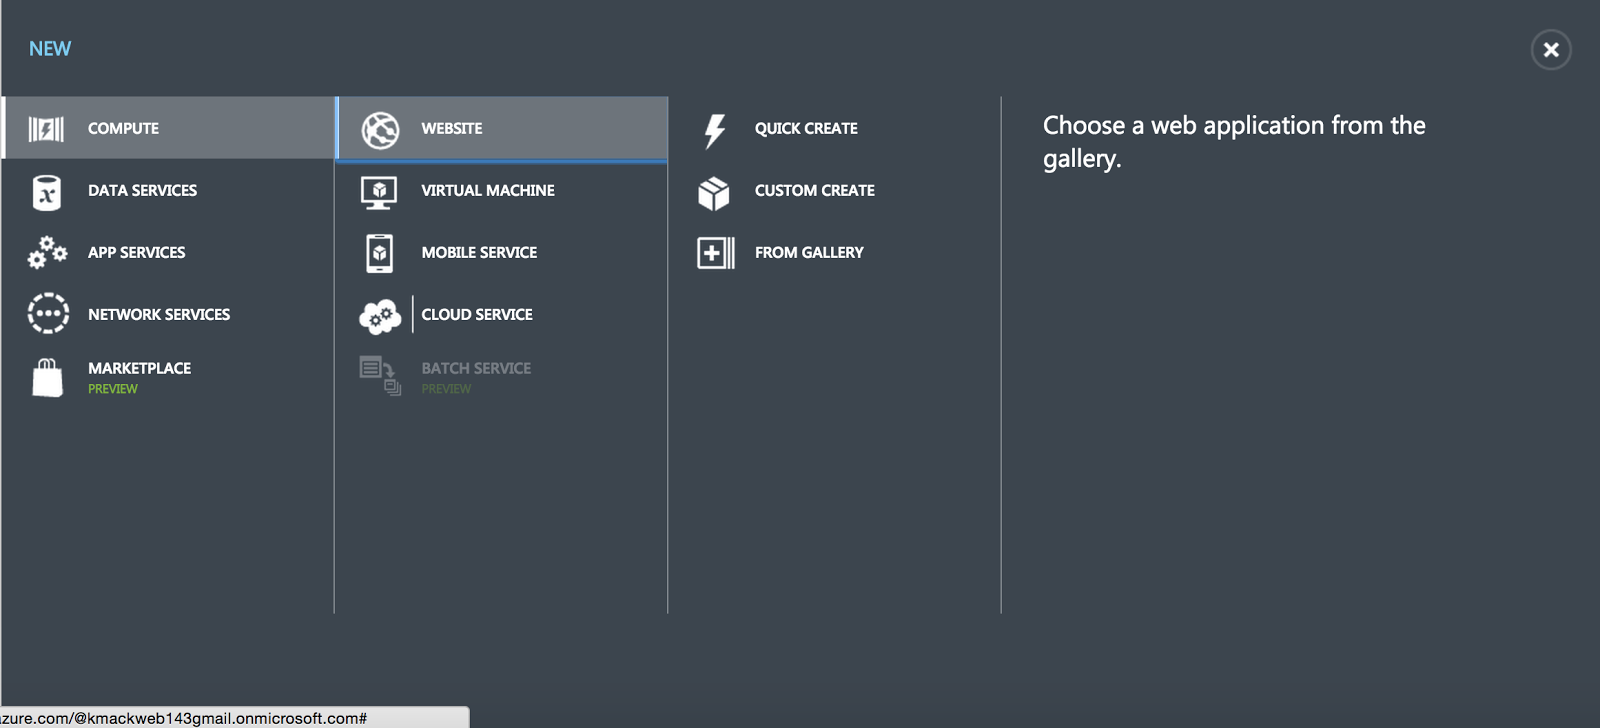
One thing to note is that Azure does have lots of offerings for different frameworks and platforms. For example, if you want to create up a "BlogEngine.net", you can select that from the gallery and then just configure it making things a lot simpler.
But for a "Quick Create", you would then specify a unique domain name, hosting plan, and region.
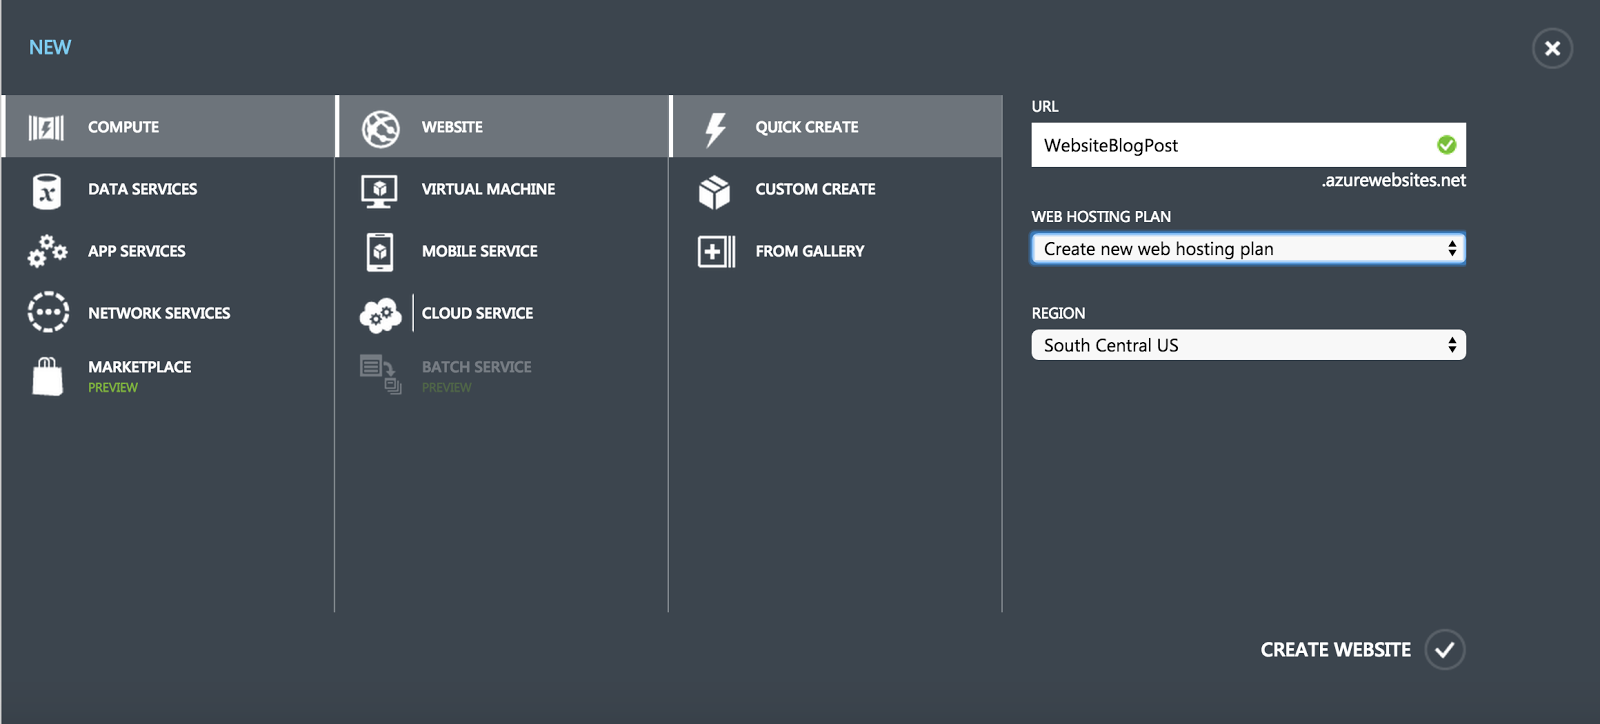
The import part here is the "Region", Microsoft has data centers all over the world. And when you select the region, you are identifying the data center you want to use. This is important because if you create a database, you'll want to make sure it's in the same region. This will limit some latency, cause you don't want a website in Western Europe, and a Database in South Central US. And constant traffic between each.
Then you click "Create Website", you will get a progress bar that appears and when the process is done, you will see the following message:

And now, under the "Websites" item on the left hand side, you will see your new website:
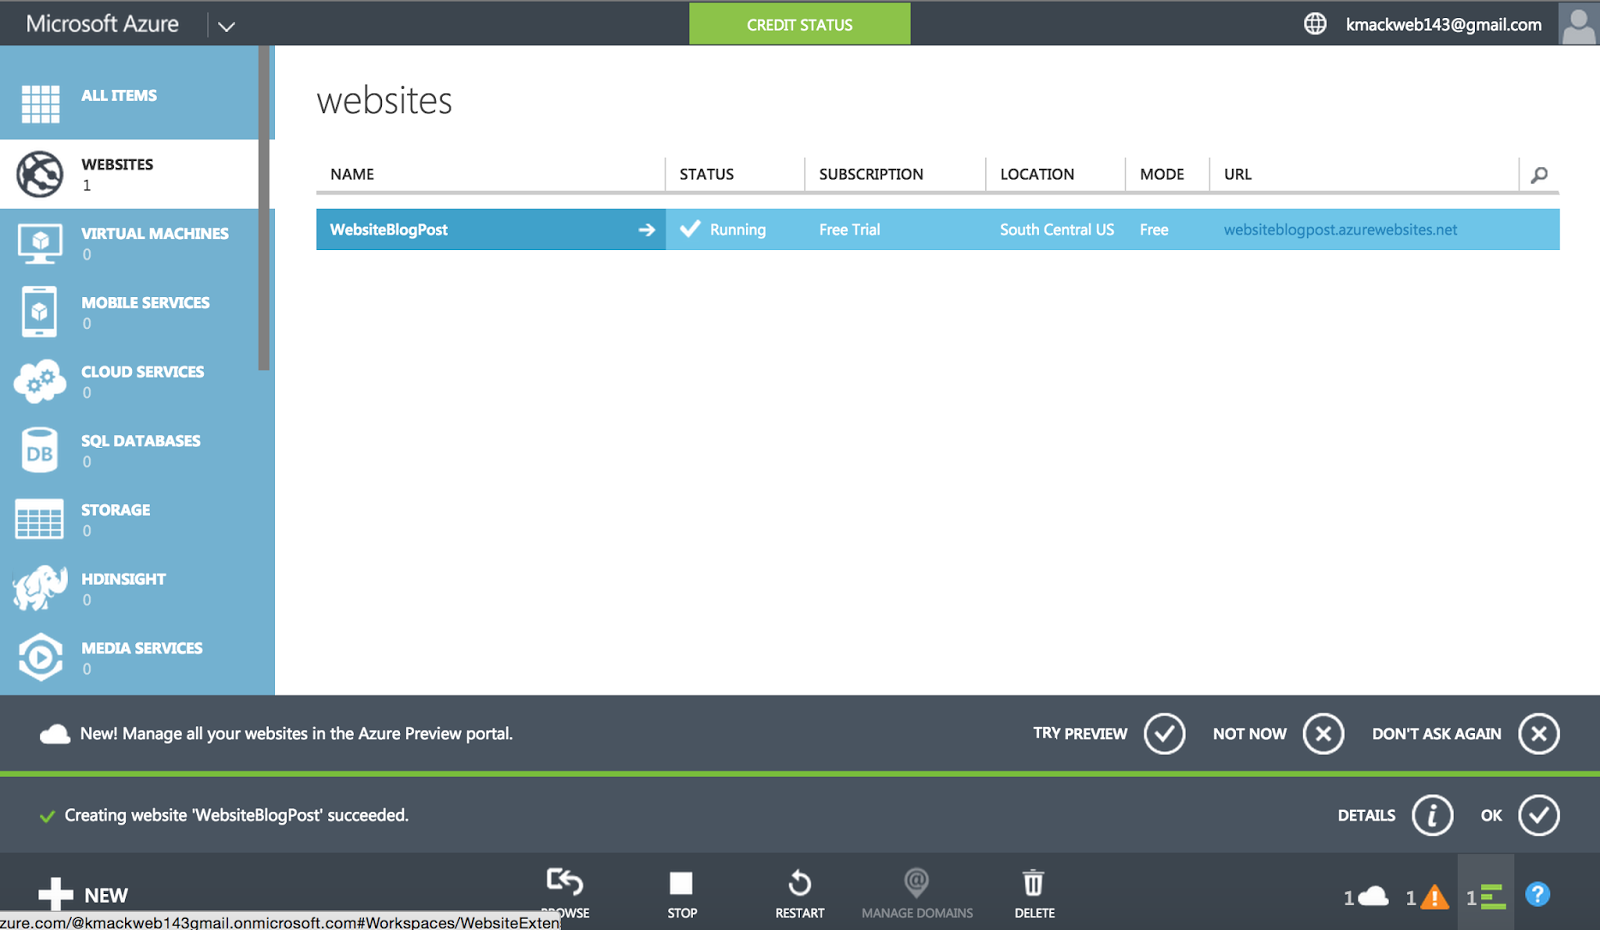
That's really all there is to it, you just created a website. If you click on the website, you'll see all the options that are available to control.
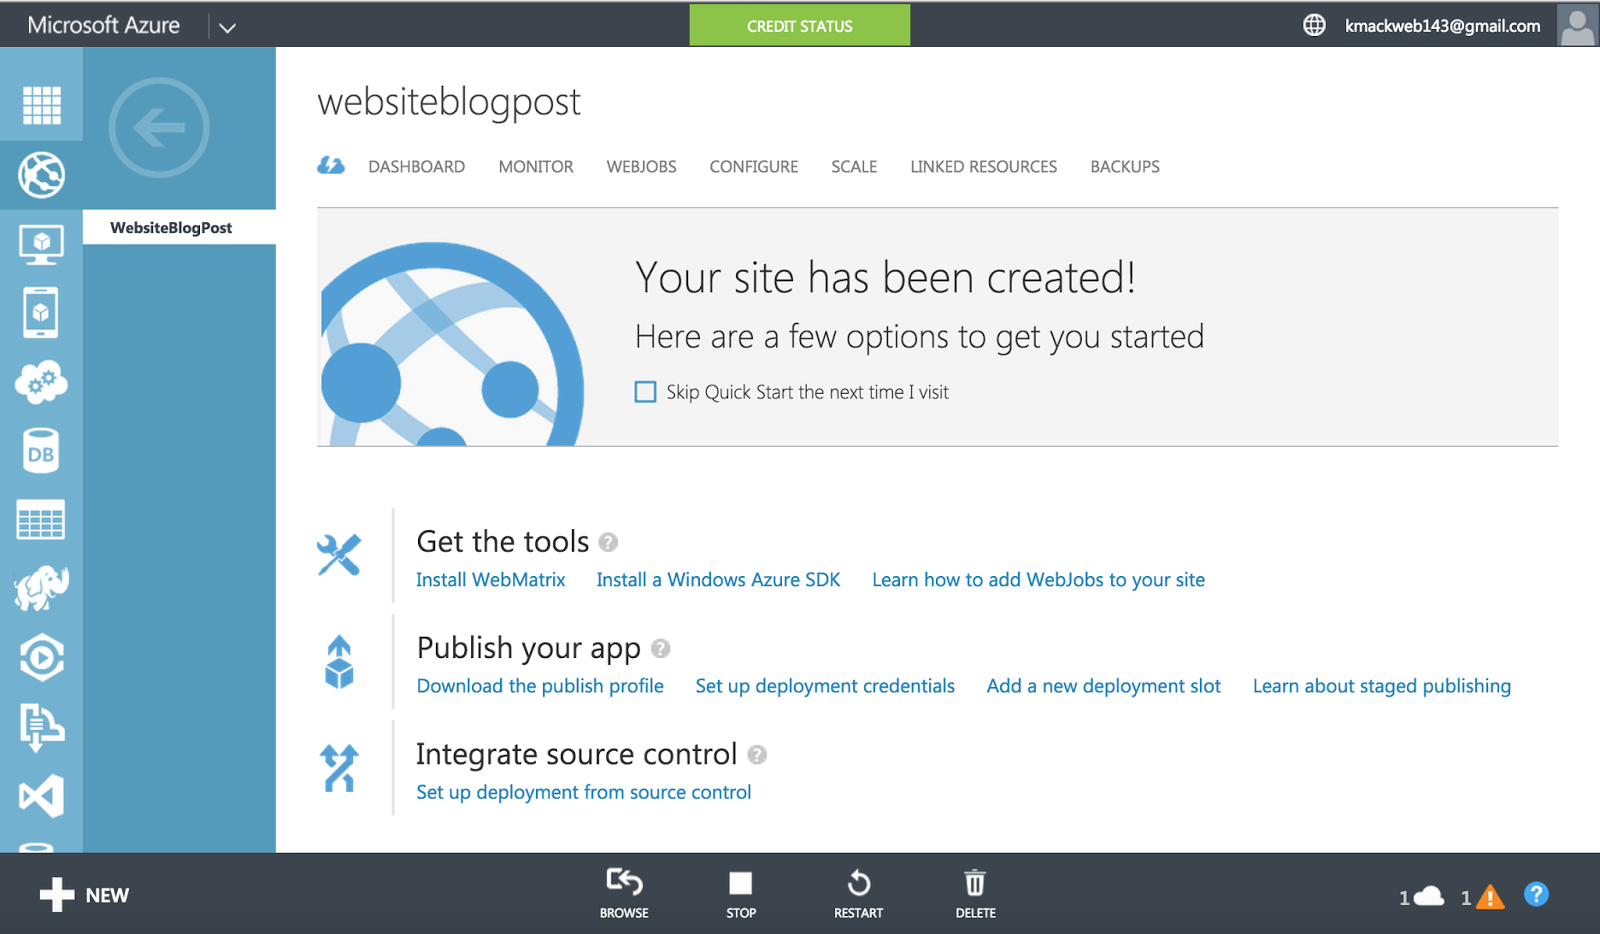
So now, how do you get your web application into the website, on the main screen here is a link "Download publish Profile".
This file will allow you to import all of the settings for the site to deploy it.
Go to your publish menu in Visual Studio, and you'll see an import option:
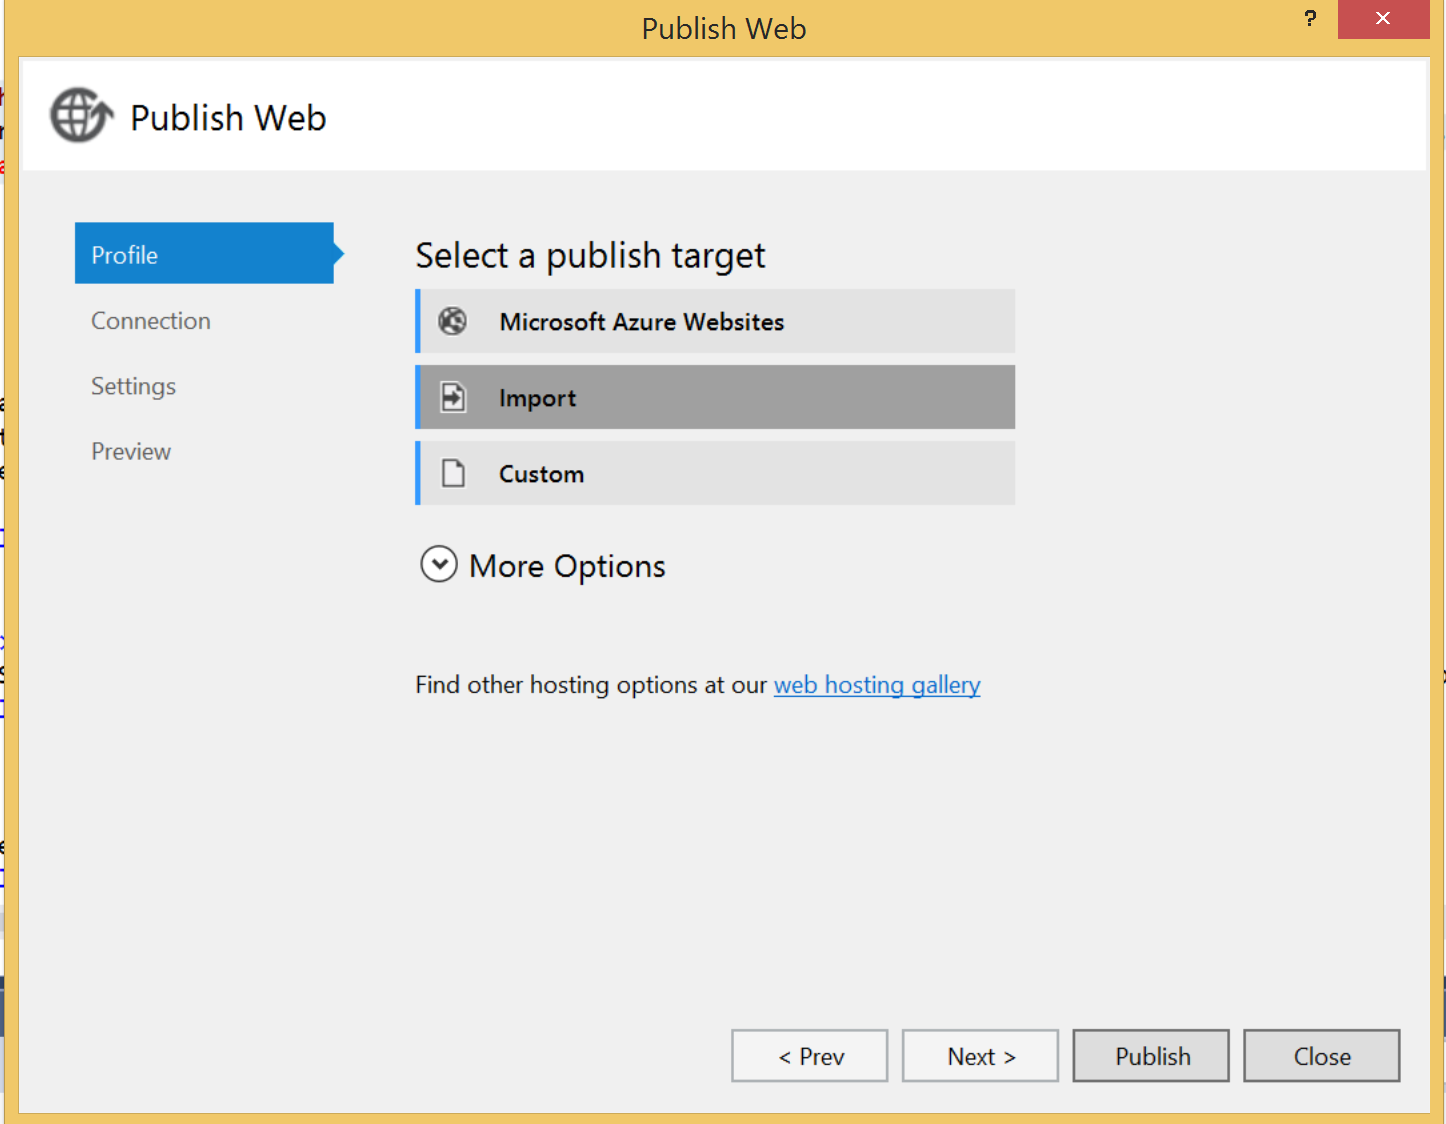
And select the profile you just downloaded:
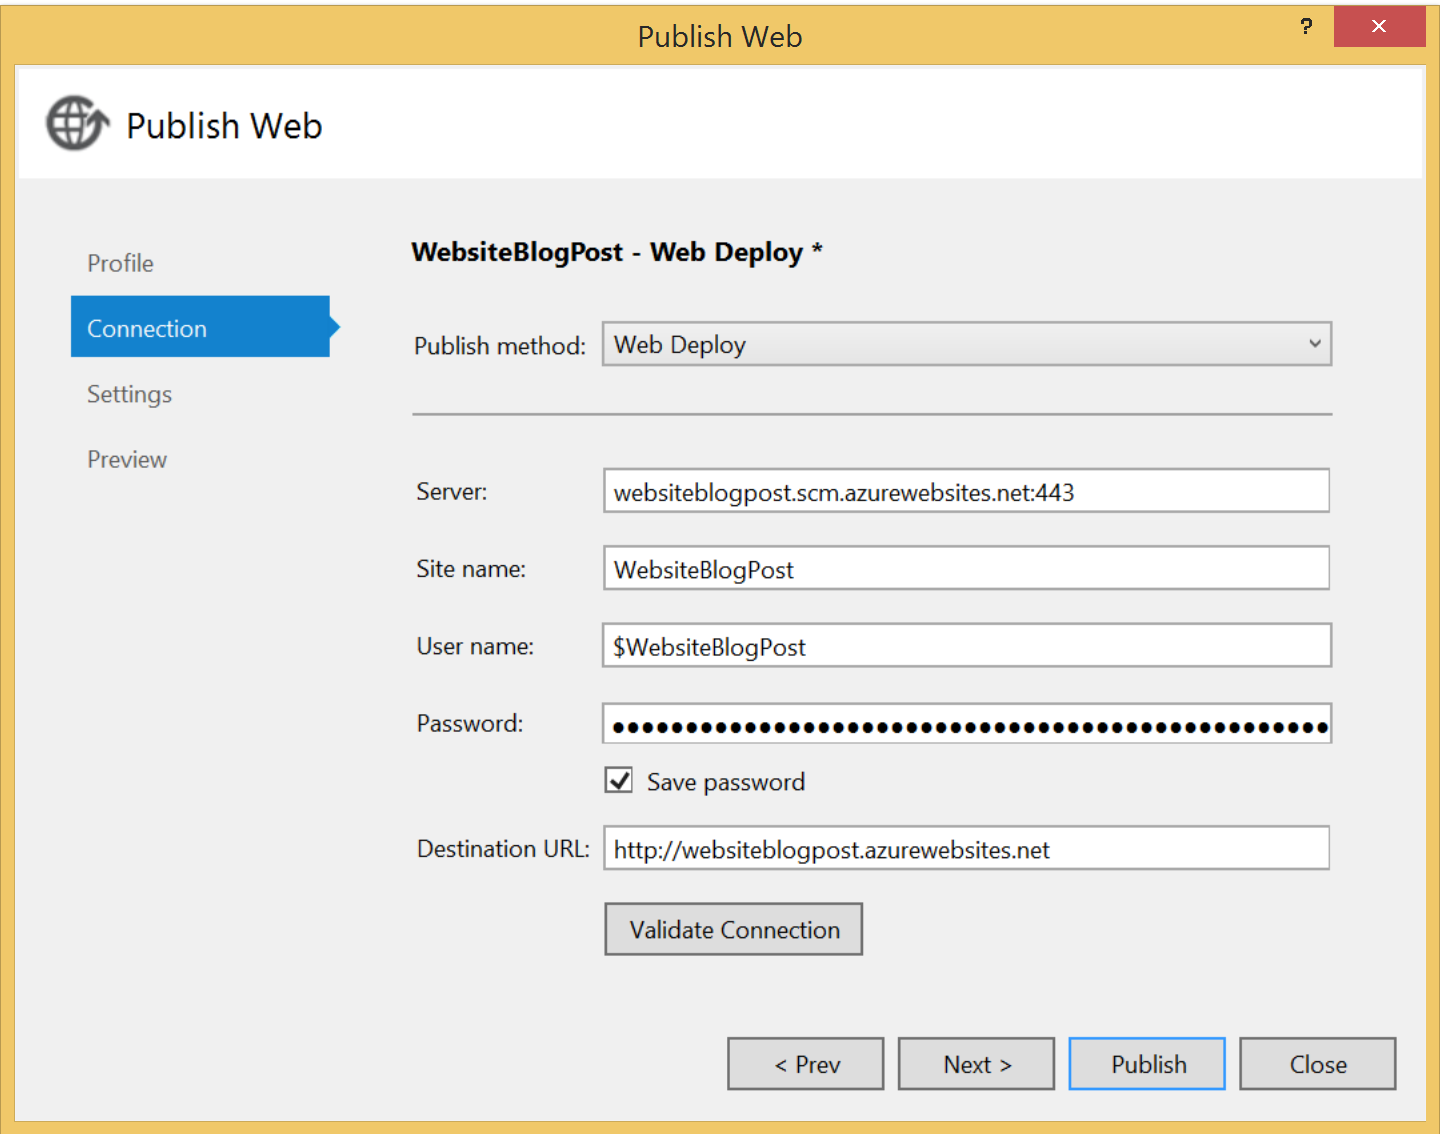
And that's it. The site is now published. It's that easy.
So additionally, you can connect your Visual Studio to your Azure account, which will make it that if you create an ASP.NET web application, it immediately creates a site in Azure. But this approach is pretty helpful if you are using a customer's Azure account, and don't want to link it to your account.
In my next post, we will go through the menus for websites in the Azure Portal.
