This is a series of articles which covers SharePoint 2013 Outgoing email configuration.
- Configure Outgoing e-mail settings in SharePoint Central Administration
- Configure outgoing e-mail settings with existing email sever in SharePoint Server 2013
- Configure outgoing e-mail settings with Gmail/Google SMTP server with SharePoint Server 2013
- Configure outgoing e-mail settings with Office 365 SMTP server with SharePoint Server 2013
Configure Outgoing E-mail Settings with Existing Email Server in SharePoint Server 2013
If you have existing SMTP server, you can simply configure with the SharePoint Central Admin.
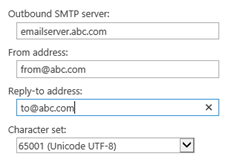
- Open the SharePoint 2013 Central Administration and go to System Settings and Click Configure outgoing e-mail settings.


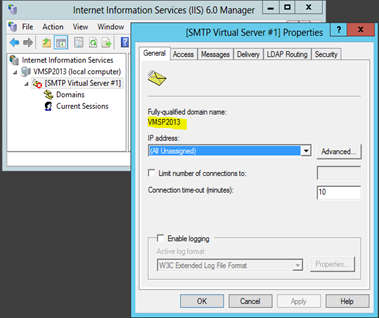
Outbound SMTP server should be set to fully qualified domain name of the SMTP virtual server (You can find configuring SMTP virtual server in the later part in the article); if you had IIS SMTP virtual server setup. SMTP virtual servers are simply forwarding emails to SMTP server in order to perform email exchange. (Refer: Understanding the SMTP Virtual Server)

