Get access to the new Intel® IoT Developer Kit, a complete hardware and software solution that allows developers to create exciting new solutions with the Intel® Galileo and Intel® Edison boards. Visit the Intel® Developer Zone for IoT.
Requirements
You must have:
This section contains steps to create a new project in the Intel XDK IoT Edition, with the appropriate code to update your Sphero.
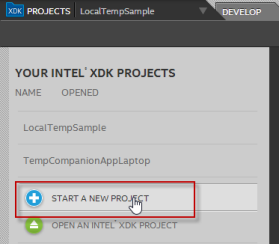
- In the Intel XDK IoT Edition, click the Projects tab. Click Start a New Project.
- Under Internet of Things Embedded Application, click Templates.

- In the Project Name field, type a name for your project and click Create.
- Your new project opens, with the main.js file displayed. Delete the contents of main.js and paste the following code into the file:
var twitter = require('mtwitter');
var colors = require('colors');
var moment = require('moment');
var spheron = require('spheron');
var sphero = spheron.sphero();
var spheroPort = '/dev/rfcomm0';
var COLORS = spheron.toolbelt.COLORS;

var newMessage = false;
var lastTweet = '21:35:5';

var twit = new twitter({
    consumer_key : 'xxxxxxxxxxxxxxxxxxxxx',
    consumer_secret : 'xxxxxxxxxxxxxxxxxxxxx',
    access_token_key : 'xxxxxxxxxxxxxxxxxxxxx',
    access_token_secret : 'xxxxxxxxxxxxxxxxxxxxx'
});

console.log('Starting'.cyan);

setInterval(function() {
    twit.get('search/tweets', {q: '#intelmaker'}, function(err, item) {
        console.log(item.statuses[0].created_at.substring(11, 18).cyan)
        console.log(lastTweet);
        console.log("From isNew(): ", newMessage);
        if(item.statuses[0].created_at.substring(11, 18) === lastTweet) {
            console.log("we here");
            newMessage = false;
        }
        else{
            newMessage = true
            updateSphero(true);
            lastTweet = item.statuses[0].created_at.substring(11, 18);
        }
    });
 }, 1000);

 function updateSphero(flag)
 {
    console.log('updating sphero');
    sphero.on('open', function() {
        sphero.setRGB(COLORS.RED, false);
        setTimeout(function(){sphero.setRGB(COLORS.BLUE, false);}, 2000);
    });

    sphero.open(spheroPort);
 }
- From the left, select package.json. In the dependencies section, be sure to add an entry for each of the modules required by the code:
"dependencies": {

        "mtwitter":"latest",
        "colors":"latest",
        "moment":"latest",
        "spheron":"latest"
}
This section contains steps to create a new Twitter app and retrieve the appropriate keys to allow your code to interact with Twitter.
- Navigate to the Twitter Apps site at https://apps.twitter.com/ and sign in using your Twitter account.
- Click Create New App. The Create an application page opens.
- On the Create an application page, do the following:
- Type your name in the Name field.
- Type a description of your app in the Description field.
- Type a placeholder URL in the Website field.
- Read the terms and conditions of use, then select the Yes, I agree check box. Click Create your Twitter application.
- Click the Keys and Access Tokens tab.
- In the Application Settings section, copy and paste the consumer key from the Consumer Key (API Key) field and the consumer secret from the Consumer Secret (API Secret) field into a separate text editing program, such as Notepad.
- In the Your Access Token section, click Create my access token.
- Copy and paste the access token key from the Access Token fieldand the access token secret from the Access Token Secret field into your text editing program.
- In the Intel XDK IoT Edition, navigate to the line that begins with
consumer_key. Replace the placeholder text in the code with the consumer key, consumer secret, access token, and access token secret.
This section contains steps to connect your board to Sphero using Bluetooth*.
- Connect to your board in a serial communication window.
- To activate Bluetooth and scan for Bluetooth-enabled devices, enter the following commands:
rfkill unblock bluetooth<br />
	bluetoothctl
- The MAC address of your Sphero should be displayed at the bottom of the Sphero's box, in the format
XX-XX-XX-XX-XX-XX. If you cannot locate the Sphero's MAC address, do the following:
- Enter the command:
scan on - Locate your Sphero in the list and copy the MAC address.
- Enter the command:
scan off
- Pair your board with the Sphero by entering the following commands:
pair SpheroMacAddress<br />
	exit<br />
	rfcomm bind 0 SpheroMacAddress 1
The MAC address should be in the format XX:XX:XX:XX:XX:XX. This will create a Sphero connection.
This section contains steps to build, upload, and run your code. After completing the steps, the color of your Sphero will change in response to tweets.
- In the Intel XDK IoT Edition, click the Install/Build icon . If you are prompted to choose whether to upload or build your project, click Build.
- Once your project finishes building, a build complete message is displayed. Click the Upload icon to upload the project to your board.
- Click the Run icon to run your project. Your Sphero checks Twitter once a second and turns blue when someone tweets using the hashtag #intelmaker.
Next Steps
Getting Started Home
Troubleshooting
Help through forums
Resources
Intel® Developer Zone for IoT
Start inventing today with the Intel® IoT Developer Program which offers knowledge, tools, kits and a community of experts to quickly and easily turn your innovative ideas into IoT Solutions.
Dream it, Build it with the Intel® IoT Developer Kit for Intel® Edison and Intel® Galileo platforms. These kits are versatile, performance-optimized and fully integrated end-to-end IoT solutions supporting a variety of programming environments, tools, security, cloud connectivity and hardware.
For more resources and to learn how the new Intel® IoT Developer Kit v1.0 can help streamline your IoT projects:

