Introduction
Visual Studio .NET provides a rich set of design-time support for a components.
One of the elements which allows components to take advantage of
the designer architecture is Properties Window with the functionality like Value conversion,
Subproperties, Enumeration and Dropdown / Popup editors.
This article explains how to build Popup editor and link it to an appropriate property in
Properties Window. For that purpose, I have made LEDControl custom
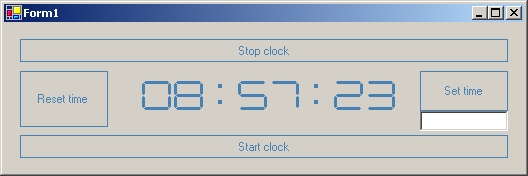
control and composite LEDClock
control to simulate a clock.
LEDControl custom control
LEDControl control has a public property Number which is used
by OnPaint method to draw appropriate number or
colon (:), and a public method Increase to change
the property Number by one. Here is one segment of code, which draws part of the "LED" digit:
Private Sub DrawNumber(ByVal g As Graphics, ByVal num As Integer)
Dim p As New Pen(Me.ForeColor)
Select Case num
Case 0
g.DrawLine(p, 5, 2, Me.Width - 5, 2)
g.DrawLine(p, 4, 3, Me.Width - 4, 3)
g.DrawLine(p, 5, 4, Me.Width - 5, 4)
g.DrawLine(p, 5, Me.Height - 4, Me.Width - 5, Me.Height - 4)
g.DrawLine(p, 4, Me.Height - 3, Me.Width - 4, Me.Height - 3)
g.DrawLine(p, 5, Me.Height- 2, Me.Width - 5, Me.Height - 2)
................
LEDClock user control
LEDClock contains eight LEDControl controls in a row.
Except all properties, methods and events inherited from UserControl class,
there are a few public methods Stop, Start and Reset
and one property Time. You can use them to manipulate with the clock.
The control uses the thread to increase the time every second.
It was necessary to override OnResize method to resize
all LEDControl controls when their parent LEDClock is resized.
The same stands for OnForeColorChanged method
(all digits have to change a color in parent's ForeColor):
Protected Overrides Sub OnForeColorChanged(ByVal e As System.EventArgs)
   Dim c As Control
   For Each c In Me.Controls
       c.ForeColor = Me.ForeColor
   Next
End Sub
Time property and design-time LEDEditor
When you select Time property in Property window, an ellipsis button will appear:

If you click this button, an appropriate UI editor will be shown:
After that, you can set Time property entering numbers in TextBoxes.
Inside the form you can provide all necessary validation for the controls used for input.
How can you achieve that? There are a few steps you have to follow.
The first one is to design an appropriate editor dialog, by adding a form to the project.
Imports System.Drawing.Design
Imports System.Windows.Forms.Design

Public Class LEDEditor
   Inherits System.Windows.Forms.Form
.............
LEDEditor class has a property called Value,
which is initialised in the constructor with current value of Time property.
Next thing you need is a class derived from UITypeEditor
that will be called to determine how the type should be edited.
Public Class LEDTypeEditor
    Inherits UITypeEditor

    Public Overloads Overrides Function EditValue(ByVal context As _
           System.ComponentModel.ITypeDescriptorContext, _
           ByVal provider As System.IServiceProvider, ByVal value As Object) As Object

        Dim edSvc As IWindowsFormsEditorService
        Try
            edSvc = CType(provider.GetService(GetType(IWindowsFormsEditorService)), _
                          IWindowsFormsEditorService)
            Dim edForm As LEDEditor
            edForm = New LEDEditor(CStr(value))
            edSvc.ShowDialog(edForm)
            If edForm.DialogResult = DialogResult.OK Then
                edForm.Value = edForm.txtH1.Text & edForm.txtH2.Text & ":" & _
                               edForm.txtM1.Text & edForm.txtM2.Text & ":" & _
                               edForm.txtS1.Text & edForm.txtS2.Text
            End If
            Return edForm.Value
        Catch e As Exception
            MsgBox(e.ToString)
        End Try
    End Function

    Public Overloads Overrides Function GetEditStyle(ByVal context As _
           System.ComponentModel.ITypeDescriptorContext) As _
           System.Drawing.Design.UITypeEditorEditStyle
        Return UITypeEditorEditStyle.Modal
    End Function

End Class
Two methods need to be overridden: GetEditStyle and EditValue.
GetEditStyle is called by the Properties window to determine
how the value should be edited. UITypeEditorEditStyle can have three values:
1. None - which means that no UI element will be used to edit the value,
2. DropDown - which means that a drop-down list will be shown,
3. Modal - which means that a modal dialog will be shown.
After the GetEditStyle is called,
the Properies window will show ellipsis button (or a down-arrow button for a drop-down list).
When this button is clicked, the EditValue method
will be called to create the dialog.
The final step is to indicate that a property will be edited with this particular editor using EditorAttribute:
< Editor(GetType(LEDTypeEditor), GetType(UITypeEditor)) > _
    Public Property Time() As String
...............
You can set Time property in Properties Window directly, which is String type,
but you have to provide an appropriate validation for that input as well.
Private Function IsValid(ByVal s As String) As Boolean
        If s.Length <> 8 Then Return False
        If s.Substring(2, 1) <> ":" Or s.Substring(5, 1) <> ":" Then Return False
        Dim ss As String
        ss = s.Substring(0, 2)
        If IsNumeric(ss) = False Then Return False
        If CInt(ss) > 23 Then Return False
        ss = s.Substring(3, 2)
        If IsNumeric(ss) = False Then Return False
        If CInt(ss) > 59 Then Return False
        ss = s.Substring(6, 2)
        If IsNumeric(ss) = False Then Return False
        If CInt(ss) > 59 Then Return False
        Return True
    End Function
Conclusion
This was an attempt to use design-time
support for .NET controls. I have only scratched the surface and there are so many elements and facilities
in VS.NET that help us to build better .NET controls and components.
Any comment will be welcome not only from Visual Basic programmers,
but C# and others as well. We are all .NET programmers, aren't we?
Good luck and wish you lots of bright ideas in your work.
This member has not yet provided a Biography. Assume it's interesting and varied, and probably something to do with programming.


 General
  News
News  Suggestion
  Question
  Bug
Bug  Answer
  Joke
Joke  Praise
  Rant
Rant  Admin
Admin 


 ;);P
;);P 

 ?
?
