Introduction
In this article I show the use of a JavaScript[1] object to produce galleries of pictures with a (limited) choice on transition effects. The script is lean and easy to use. You can download source and documentation here and try yourself.
Using the script
The source must be included in the page, if there is a js directory this can be:
<script type='text/javascript' src='js/gallery.js'></script>
When the script is loaded it creats the object gallery which exposes a function for creating a gallery based on an array of arguments containing information such as dimension, time of visibility, effect and obviously the names of the images. Except for the image names, all information is optional.
<script type='text/javascript'>
var args = {"width":300,"Height":300,"duration":5000,"transition":2000,"effect":"fade","id":"divGallery",
			"images":[["img/TramVenaria.jpg","Tramway at Venaria castle"],["img/Olimpo.jpg","Mount Olympus"],"img/ConteVerde.jpg",
				["img/RabbitLake.jpg","Rabbit lake"],["img/Bukavu.png","Bukavu and lake Kiwu"],"img/Burkina.png"]}
slideGallery.gallery(args);
</script>
The key and the name of effects are indifferent to the case.
Images and image dimension
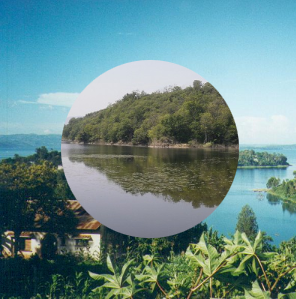
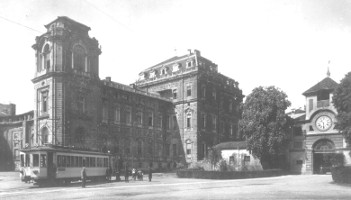
The argument images is a list of images in the server. If we want to add a title to the image of the argument, instead to be an image name, it is an array of two elements formed by the name and title: ...,["img/Bukavu.png","Bukavu and lake Kiwu"],"img/Burkina.png",...; the arguments width and height control the dimension of the gallery; the ideal is to have images of the exact dimension, therefore, the program fits the images to the values required, cropping or stretching or expanding if necessary without altering the relative sizes. The algorithm used is below:
var normImg = function (wOrigin,hOrigin,wSlide,hSlide) {
if ((wOrigin == wSlide) && (hOrigin >= hSlide) || (hOrigin == hSlide) && (wOrigin >= wSlide)) {
return [wSlide,hSlide];
} else {
if (wSlide/wOrigin > hSlide/hOrigin) {return [wOrigin, hSlide * wOrigin/wSlide];}
else {return [wSlide * hOrigin/hSlide, hOrigin];}
}
}
 | At left the original image, at right the cropped image. |  |
Duration and effects on images transition
The argument duration tells the time of visualisation (unless the duration is indicated manual or 0); it includes the transition time (in milliseconds) of the image with the effect. On the basis of 25 frames per second the function that makes the effect is activated every 40 milliseconds. Below a function for fade transition:
...
var timesNumber = 0;
var frameSecond = 25;
...
timesNumber = parms.transition*frameSecond/1000;
...
hTimer = setInterval(fader,1000/frameSecond)
...
var fader = function() {
countTimes--;
ctx.globalAlpha = 1-countTimes/timesNumber;
ctx.drawImage(img,0,0,dimImg[0],dimImg[1],0,0,parms.width,parms.height);
if (countTimes == 0) {clearInterval(hTimer)}
}
The effects are:
no no effect, the transition time is ignored;fade the new image appears on the previous image;page is the effect of a book page turning;tl-wipe a top left replacement:tr-wipe a top right replacement:c-wipe the new image grows into circular area;l-wipe the new image enters from left;r-wipe the new image enters from right.
On some canvas (rendering context) functions
In addition to the drawImage function with its capacity to compress or expand images, I had to use some other functions, in particular, the clip function, for the the effect obtained by inserting the new image on a growing circle.
The clip function identifies a portion of the canvas through a closed shape within which subsequent graphical instructions take effect, leaving unchanged the abroad.
var cWiper = function() {
ctx.save();
countTimes--;
ctx.beginPath();
ctx.arc(parms.width*0.5, parms.width*0.5,((timesNumber - countTimes)/timesNumber)*parms.width*Math.SQRT2*0.5, 0,2 * Math.PI, false);
ctx.closePath();
ctx.clip();
ctx.drawImage(img,0,0,dimImg[0],dimImg[1],0,0,parms.width,parms.height);
if (countTimes == 0) clearInterval(hTimer);
ctx.restore();
}
For the effects of pushing out the old image by the new one I had to save the old image in a imageData object by the getImageData function, and from this, at each iteration extract the portion of the image to be inserted into canvas. The imageData object maps every pixel in four bytes: red, green, blue and transparency and is used for manipulate the graphic. For example, this fragments take the image, forces the transparency to 50% end restore the image (is in slisdeGallery.stop function).
...
var imageData = ctx.getImageData(0,0,canv.width, canv.height);
var data = imageData.data;
for (var i = 3; i < data.length; i += 4) data[i]  = 127;
ctx.putImageData(imageData, 0, 0);
...
The insertion of a portion of image is by putImageData function that, in its complete form, it allows to put only a part of imageData object, the so called dirty rectangle, in fact the entire image is virtually copied back but not what is outside the dirty rectangle; above the function which enters the new image.
function dWiper(direction) {
if (timesNumber == countTimes) dWiper["canvasImg"] = ctx.getImageData(0,0,parms.width,parms.height);
sw = dimImg[0];
sh = dimImg[1];
dw = parms.width;
dh = parms.height;
countTimes--;
var modif = (timesNumber - countTimes) / timesNumber;
if (direction == "L" ) {
ctx.drawImage(img,sw-sw*modif,0,sw*modif,sh,0,0,dw*modif,dh);
if (countTimes == 0) return clearInterval(hTimer);
ctx.putImageData(dWiper["canvasImg"],dw*modif,0,0,0,dw-dw*modif,dh);
}
if (direction == "R") {
ctx.drawImage(img,0,0,sw*modif,sh,dw-dw*modif,0,dw*modif,dh);
if (countTimes == 0) return clearInterval(hTimer);
ctx.putImageData(dWiper["canvasImg"],0-dw*modif,0,dw*modif, 0, dw-dw*modif,dh);
}
}
A manual gallery
The passage from one image to the successive (or precedent one) can be manual, by imposing the argument duration to manual or 0. In this case, the canvas is inserted in a table which contains also two navigation arrows. Below a sample of CSS for personalize (the ID of the table is composed by the Id argument, in this case divGallery, plus _table).
#divGallery_table {border:1px inset}
#divGallery_table tr:nth-child(1) {font-size: 20pt;color:black}
#divGallery_table tr:nth-child(2) {background-color:silver}
#divGallery_table td {padding:0px 5px;}
#divGallery_table td:hover {color:silver}
Note
- ^You can found an introduction to the JavaScript language (and other things) in my site.
