Introduction
For those that use Amazon EC2 Cloud Services and want to establish a VPN connection to a VPC, this tip discusses how to achieve a Software VPN connection in case you do not have dedicated hardware.
Background
Typically, Amazon does not support Software VPN solutions to connect to their network, they only support hardware devices, e.g., CISCO. You can, however, achieve a VPN connection with software and it can be useful if developing off a notebook which you take to multiple sites.
N.B.: This tip does not instruct on how to setup the VPN Amazon side, it's quite simple and is covered in many other tutorials.
Instructions
Step 1 - Download and install the Shrew Soft VPN Access Manager from here: https://www.shrew.net/download/vpn
Step 2 - Add a new Connection
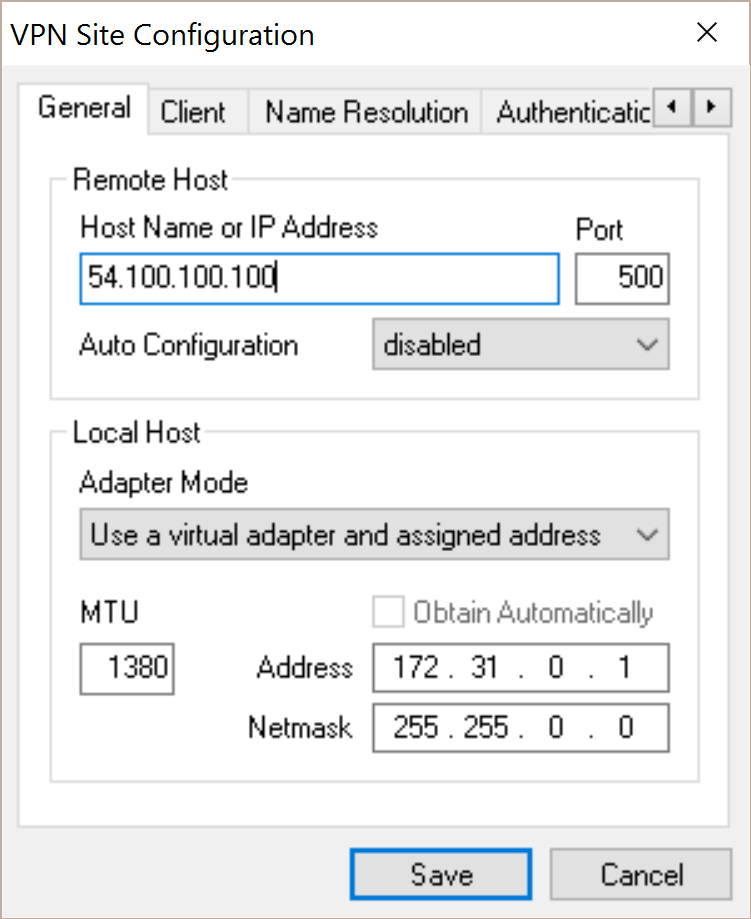
Step 3 - Configure General Information

Note that the Host Name / IP Address should be set to the IP Address of the Amazon VPN Connection Tunnel (Click on the connection, and then tunnel details to view the two tunnel configurations to get this IP).
Address 172.x.x.x is the local IP Address that will be used when the connection is established.
Step 4 - Configure Client Settings

Step 5 - Configure Name Resolution Settings

I set the Google DNS server as the server for this connection.
Step 6 - Authentication

In order for the connection to authenticate, ensure both the Local Identity and Remote Identities are configured with the appropriate IP addresses for the two ends of the tunnel.
Don't forget to set the PSK from Amazon:

Step 7 - Phase 1 VPN Configuration

Step 8 - Phase 2 VPN Configuration

Step 9 - Policy Configuration

Points of Interest
Initially, I made a mistake when setting up this connection where I had my local subnet conflicting with the Amazon VPC subnet. Rookie mistake, so please ensure these ranges are different. In my case, 172.x.x.x vs 10.x.x.x
