Introduction
Windows store standards requires a set of assets in order to present an app, those assets, including icons and tiles, will be the face of your app across all Windows devices. Visual Studio provides a list of categories, dimensions and scales to ease the process.
On every UWP Project, there is a Package.appxmanifest file. Open it and go to the Visual Assets Tab. You will see some visual properties that will define your app, like short name, background color, or the show name category. For more information, see guidelines for tile and icon assets.
For the app tile sizes, you choose a set of assets should be provided (It's strongly recommended to provide as many tile sizes as possible) following certain scales to match Windows DPI scales for different devices and screen settings.
Using Adobe Illustrator
The use of Illustrator (or any other vectorial design software) is strongly recommended in any app design process, as it will run in many screen resolutions and dpi scales you will be asked for different sizes of your logo.
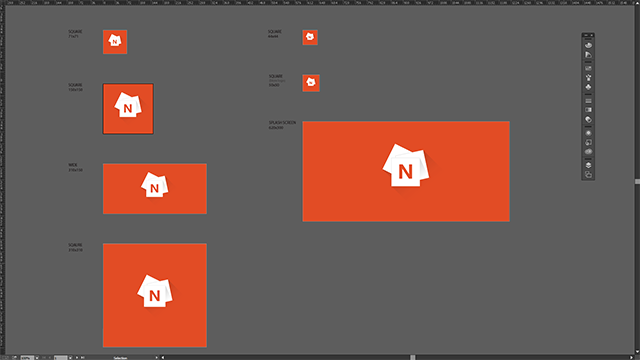
Once your logo is ready, the best approach is to create different artboards matching assets sizes and put your logo following these guidelines. Next picture shows artboards containing assets for all sizes for the Write a Note app:

Now comes the hideous part, you should save every artboard to 5 different scales (100%, 125%, 150%, 200%, 400%). Go to File->Save for Web (ALT+SHIFT+CTRL+S) and set your scale in the Percent box inside the Image Size section. Five different scales for every artboard should be 35 times exporting your artboards.
Using Scripts
There is an easy way for the export process, you can use scripts. Adobe Illustrator can run scripts written in JavaScript language, this way you can program tasks to be executed and ease long processes like this one.
The next script enumerates along the artboards in a single document and exports to .png files in all scales and with the right name format. The exported file names will use the artboard names so don’t forget to name every artboard with the right format. Names format are easy to assume, for example the name for the square 150x150 logo is Square150x150Logo. For more information about this, see Create tiles.
In order to use the script, all you have to do is create a new text file and name it with the .jsx extension (for example: SaveAssetsForUWP.jsx) and paste the follow code inside:
var folder = Folder.selectDialog();
var document = app.activeDocument;
if (document && folder) {
saveAllArtboardsToScale(100);
saveAllArtboardsToScale(125);
saveAllArtboardsToScale(150);
saveAllArtboardsToScale(200);
saveAllArtboardsToScale(400);
}
function saveAllArtboardsToScale(scale) {
var i, artboard, file, options;
for (i = document.artboards.length - 1; i >= 0; i--) {
document.artboards.setActiveArtboardIndex(i);
artboard = document.artboards[i];
var fileName = artboard.name + ".scale-" + scale;
file = new File(folder.fsName + "/" + fileName + ".png");
options = new ExportOptionsPNG24();
options.verticalScale = scale;
options.horizontalScale = scale;
options.artBoardClipping = true;
options.antiAliasing = true;
options.transparency = true;
document.exportFile(file, ExportType.PNG24, options);
}
}
Also for Windows 8.1
In order to export assets for Windows 8.1 or Windows Phone 8.1 Apps, you can modify the code in the script file for the scales needed. The function saveAllArtboardsToScale(scale) exports all artboards to the desired scale, so just adjust the code to your needs and enjoy your needs.
Here are the scales needed for the Windows Store Apps platforms:
- Windows 10 (UWP): 100%, 125%, 150%, 200%, 400%
- Windows 8.1: 80%, 100%, 140%, 180%
- Windows Phone 8.1: 100%, 140%, 240%.
More Information
For more information about Windows Apps design, you can take a look at Design UWP apps.
